Making A Line-following Toy Into A Programmable Robot

[Eric Gregori] picked up this little yellow robot as a kit build. It has a single PCB inside that has a pair of IR emitters and detectors pointed downward at the front of the robot. It is able to follow a dark line on a light surface based on how the infrared beam reflects back to the detector. But it’s a one-trick pony that [Eric] wanted to make into a programmable robot.

The kit came with a schematic, which makes the process of patching into its logic quite easy. There are two motors, each with a driver circuit made up of a pair of transistors and one flyback diode. This means the motors can only move in one direction, but they also only take one logic connection to control. Instead of populating the transistor that usually connects the IR receiver to the motor driver, [Eric] soldered jumper wires from each to an MSP430 chip (the G2231 that came with his Launchpad).

As you can see in the clip after the break, the first version of the code he wrote makes the robot follow a line as it would if it had not been altered. But there’s still plenty of programming space and several free I/O pins for future improvements.

Continue reading “Making A Line-following Toy Into A Programmable Robot”

Dustbin Computer Lets You Clean And Prototype With A Neato XV-11

So you bought yourself a Neato XV-11 and your floors have never been cleaner. The only problem is that you want to hack around with the hardware without losing your floor-sweeping minion. [Hash] found a solution to the issue by building a computer inside of the dustbin module.

You can see at the center of the image above a touchscreen. Normally this is just blank plastic, as it’s the removable container where your floor sweepings go, but [Hash] was inspired by the modular design. Since that bin is intended to be removable, it’s a perfect way to make add-on hardware removable. All he needed to do was find a way to connect to the Neato’s own electronics. The solution was a non-standard USB cable.

Using the guts from an Insignia Infocast 3.5 (he picked several of them up on clearance at Christmas) he  milled an opening for the touch screen, added a cooling fan, and wired up a toggle switch (not pictured above) which powers everything from the 14-17V coming in from that USB cable. The Infocast is a Chumby with a different branding so there’s plenty of Linux-based power and it’s WiFi enabled. Watch [Hash’s] walk through video after the break to see all that went into this clever concept.

We haven’t seen too many hacks that make use of the Neato XV-11. [Hash] is the same guy who hacked the Lidar on the unit, but there must be others turning out impressive projects. Don’t hesitate to send in a tip if you know of one.

Continue reading “Dustbin Computer Lets You Clean And Prototype With A Neato XV-11”

My First Robot: A Simple Demo To Get Kids Excited About Robotics

revoltlab_balloon_popping_robot

[Will] from Revolt Lab needed a project to get the summer campers he supervises interested in electronics, but when your audience is 5 years old, your subject matter had better be simple, yet interesting enough to hold their attention at length. He settled on using a Lego NXT robot to keep their little minds engaged, because who doesn’t like robots?

He picked up a basic Lego NXT kit and paged through the manual. The first “example” robot looked pretty cool so he decided to give it a shot, though he still hadn’t figured out exactly what he would have the robot do. Inspiration struck, and he decided that he could take advantage of the NXT’s color sensor as well as its proximity sensor to construct a balloon hunting robot.

He constructed a “balloon corral” to keep the balloons in place and the kids out of his thumbtack-wielding robot’s reach. He let his creation loose, and as you can see in the video below, the robot hunts down the blue balloon and pops it, much to the children’s delight.

If you’re in the position to introduce a group of young kids to electronics, this balloon popping robot paired with some conductive Play Dough would make for a fun and educational afternoon workshop.

Continue reading “My First Robot: A Simple Demo To Get Kids Excited About Robotics”

Chumby Controlled Mechanum Wheel Robot

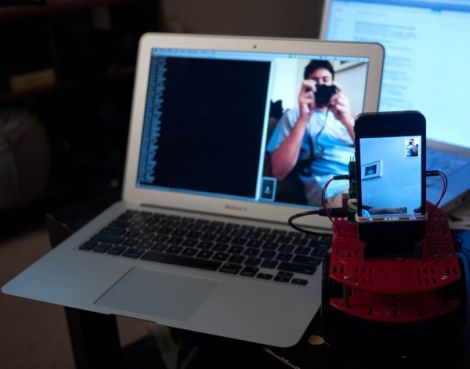
[Madox] gutted an Insignia Infocast to use with this robot. Insignia is Best Buy’s house brand and they partnered with Chumby to make their Infocast line. If you can find a used or clearance model it’s a great way to get yourself and embedded Linux board for a project like this one.

The body and wheels are 3D printed, with design files available at [Madox’s] Thingiverse page. The mechanum wheels work amazingly well, using seven bearings each for smooth operation. The body itself includes a holder for two groups of batteries. One of those battery packs powers the Chumby board while the other is used to power the four servo motors responsible for locomotion. To simplify the electronics [Madox] chose to use a USB servo drive which only set him back about $20.

We’re not sure what the USB dongle on top of the robot is used for. We’d guess it’s a WiFi adapter, since the machine sets up its own access point to act as a controller. But we thought Chumby boards had WiFi built-in. At any rate, check out the video after the break where you can see an Android phone driving the little bugger. There’s a flaw in the code that prevents side-to-side movement, it gets fixed after a video break at about 2:15 and everything is peachy after that.

Continue reading “Chumby Controlled Mechanum Wheel Robot”

[Easton’s] Animatronic Hand Gets 3D Printed Upgrade

[Easton] as been working with [Jeremy Blum] to come up with the newest version of his animatronic hand. You may remember seeing [Easton’s] first animatronic hand, with which he won his regional science fair and made a trip to nations. Since then he’s been working on improvements, and with access to [Jeremy’s] Makerbot he harnessed the power of open source design to make his own printed hand, extending a different Thingiverse project.

He’s still using the original sensor glove as a controller. It sends commands to the Arduino controlling the arm via an Xbee module. From there, five servos inside a fiberglass forearm move each finger and the thumb. The video clip after the break gives [Easton] a chance to show off all of the new design features, and finishes with a demonstration of the hand grasping different objects. We had a chance to chat with him briefly. He’s got big goals for himself, aiming to design a prosthetic arm for under $1000. That’s not a career goal… he’d like to get it done this year.

Continue reading “[Easton’s] Animatronic Hand Gets 3D Printed Upgrade”

shadeydaves_lawnbot

How Not To Build A Robotic Lawnmower

[shadeydave] wanted to build his own Lawnbot, but he had no idea where to start. He purchased some DIY plans online which looked like they would get the job done, but then he strayed from the path in a big way and spent gobs of money in the process.

In his Instructable writeup, he details each misstep he made, explaining why his choices were bad as well as how much each mistake cost him. It sounds like pretty much everything that could go wrong did go wrong, from spending money on unnecessary microcontrollers to choosing the wrong wheels. Our favorite part is where he mentions that he couldn’t figure out how to create a “kill switch” for the Lawnbot in the event that his transmitter loses contact with the speedy whirling death machine.

[shadeydave] is well aware of how poorly his build went, and primarily wrote it up as a cautionary tale to others out there who might decide to take on a similar project. He says that the Lawnbot works for the most part, but with his newfound wisdom he will be revising the bot, having learned from his mistakes.

We actually like to see this kind of writeup as they can be quite beneficial to someone trying to put together a similar project. So if you have some major flubs under your belt, don’t be shy about digging them out and letting us know. As Thomas Edison said, “I have not failed. I have just found 10,000 ways that won’t work.”

Continue reading to see a quick video tour of [shadeydave’s] mostly working Lawnbot.

Continue reading “How Not To Build A Robotic Lawnmower”

Kinect-controlled Delta Robot Has A Magnetic Personality

kinect_controlled_delta_robot

[Malte] is a loyal Hackaday reader and neurobiology PhD candidate with a keen interest in hobby robotics – definitely our kind of guy! He wrote in to share a project he has been working on in his spare time, a Kinect-controlled delta robot (Google translation).

Deltares, as it is called, is pretty straightforward as far as delta robots are concerned. It uses three servos to actuate the arms, which are controlled by an AVR micro running BASCOM. The AVR gets its coordinate data from his computer via a serial connection after it has been captured by the Kinect. [Malte] opted to use Microsoft’s official SDK for the project, processing the Kinect skeletal data using a small C# application he wrote.

The end result is pretty neat as you can see in the pair of videos below. In the first video, [Malte] uses Deltares as a plotter, drawing a crude face on a piece of paper with a marker. In the second, he commands Deltares with his right hand, using his left to activate the magnetic solenoid to pick up the steel spheres.

It looks pretty cool to us, and we’d love to see what sorts of things he puts together if he ever ends up making robotics his career rather than a hobby.

Continue reading “Kinect-controlled Delta Robot Has A Magnetic Personality”