Supercon 2024: May The Best Badge Add-Ons Win

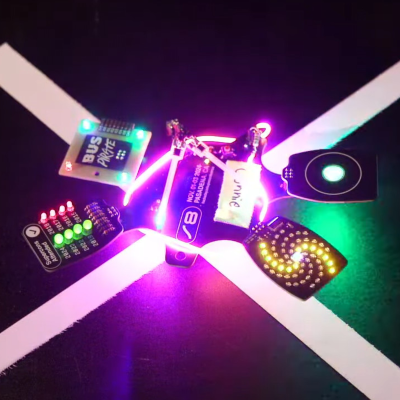
One of our favorite parts of Hackaday Supercon is seeing all the incredible badge add-ons folks put together. These expansions are made all the more impressive by the fact that they had to design their hardware without any physical access to the badge, and with only a few weeks’ notice. Even under ideal conditions, that’s not a lot of time to get PCBs made, 3D print parts, or write code. If only there was some standard for badge expansions that could speed this process up…

The SAO Wall at Supercon 2023

But there is! The Simple Add-On (SAO) standard has been supported by the Supercon badges since 2019, and the 2×3 pin connector has also popped up on badges from various other hacker events such as HOPE and DEF CON. There’s only one problem — to date, the majority of SAOs have been simply decorative, consisting of little more than LEDs connected to the power pins.

This year, we’re looking to redefine what an SAO can be with the Supercon Add-On Contest. Don’t worry, we’re not changing anything about the existing standard — the pinout and connector remains the same. We simply want to challenge hackers and makers to think bigger and bolder.

Thanks to the I2C interface in the SAO header, add-ons can not only communicate with the badge, but with each other as well. We want you to put that capability to use by creating functional SAOs: sensors, displays, buttons, switches, rotary encoders, radios, we want to see it all! Just make sure you submit your six-pin masterpiece to us by the October 15th deadline.

Continue reading “Supercon 2024: May The Best Badge Add-Ons Win”

What’s New In 3D Scanning? All-In-One Scanning Is Nice

3D scanning is important because the ability to digitize awkward or troublesome shapes from the real world can really hit the spot. One can reconstruct objects by drawing them up in CAD, but when there isn’t a right angle or a flat plane in sight, calipers and an eyeball just doesn’t cut it.

Scanning an object can create a digital copy, aid in reverse engineering, or help ensure a custom fit to something. The catch is making sure that scanning fits one’s needs, and isn’t more work than it’s worth.

I’ve previously written about what to expect from 3D scanning and how to work with it. Some things have changed and others have not, but 3D scanning’s possibilities remain only as good as the quality and ease of the scans themselves. Let’s see what’s new in this area.

All-in-One Handheld Scanning

MIRACO all-in-one 3D scanner by Revopoint uses a quad-camera IR structured light sensor to create 1:1 scale scans.

3D scanner manufacturer Revopoint offered to provide me with a test unit of a relatively new scanner, which I accepted since it offered a good way to see what has changed in this area.

The MIRACO is a self-contained handheld 3D scanner that, unlike most other hobby and prosumer options, has no need to be tethered to a computer. The computer is essentially embedded with the scanner as a single unit with a touchscreen. Scans can be previewed and processed right on the device.

Being completely un-tethered is useful in more ways than one. Most tethered scanners require bringing the object to the scanner, but a completely self-contained unit like the MIRACO makes it easier to bring the scanner to the subject. Scanning becomes more convenient and flexible, and because it processes scans on-board, one can review and adjust or re-scan right on the spot. This is more than just convenience. Taking good 3D scans is a skill, and rapid feedback makes practice and experimentation more accessible.

Continue reading “What’s New In 3D Scanning? All-In-One Scanning Is Nice”

Supercon 2024: Show Off Your Unique Display Tech

If there’s a constant in the world of electronics, it’s change. Advancements and breakthroughs mean that what was once state-of-the-art all too soon finds itself collecting dust. But there are exceptions. Perhaps because they’re so much more visible to us than other types of components, many styles of displays have managed to carve out their own niche and stick around. Even for the display types that we no longer see used in consumer hardware, their unique aesthetic qualities often live on in media, art, and design.

This year, to coincide with Hackaday Supercon, the folks at Supplyframe’s DesignLab want to pay tribute to display technology past and present with a special exhibit — and they need your help to make it possible. If you have a display you’d like to show off, fill out this form and tell them what you’ve got. Just be sure to do it by September 16th.

For the larger specimens, it would be ideal if you’re somewhat local to Southern California, but otherwise, they’re looking for submissions from all over the world. The exhibit will open on the first day of Supercon and run throughout November.

Don’t worry. They’re only looking to raid your parts bin temporarily. Any hardware sent in to be part of the exhibit will be considered on loan, and they’ll make sure it gets back to where it belongs by January 31st, 2025. The goal is to show the displays on and operational, so in most cases, that’s going to mean sending over a complete device. But if it’s possible to isolate the display itself and still demonstrate what it would look like in operation, sending along just the bare display is an option. Continue reading “Supercon 2024: Show Off Your Unique Display Tech”

Hacker Tactic: Pimp Your Probes

Is your multimeter one of your trusty friends when building up boards, repairing broken gadgets, and reverse-engineering proprietary ones? Is it accompanied by a logic analyzer or an oscilloscope at times?

Having a proper probing setup is crucial for many a task, and the standard multimeter probes just won’t do. As a PCB is slipping under your grip as you’re trying to hold the standard multimeter probes on two points at once, inevitably you will ponder whether you could be doing things differently. Here’s an assortment of probing advice I have accumulated.

Beyond The Norm

There’s the standard advice – keep your board attached firmly to a desk, we’ve seen gadgets like the Stickvise help us in this regard, and a regular lightweight benchtop vise does wonders. Same goes for using fancy needle probes that use gravity to press against testpoints – they might be expensive, but they are seriously cool, within limits, and you can even 3D-print them!

Continue reading “Hacker Tactic: Pimp Your Probes”

Laser Cutters: Where’s The Point?

It is funny how when you first start doing something, you have so many misconceptions that you have to discard. When you look back on it, it always seems like you should have known better. That was the case when I first got a low-end laser cutter. When you want to cut or engrave something, it has to be in just the right spot. It is like hanging a picture. You can get really close, but if it is off just a little bit, people will notice.

The big commercial units I’ve been around all had cameras that were in a fixed position and were calibrated. So the software didn’t show you a representation of the bed. It showed you the bed. The real bed plus whatever was on it. Getting things lined up was simply a matter of dragging everything around until it looked right on the screen.

Today, some cheap laser cutters have cameras, and you can probably add one to those that don’t. But you still don’t need it. My Ourtur Laser Master 3 has nothing fancy, and while I didn’t always tackle it the best way, my current method works well enough. In addition, I recently got a chance to try an XTool S1. It isn’t that cheap, but it doesn’t have a camera. Interestingly, though, there are two different ways of laying things out that also work. However, you can still do it the old-fashioned way, too. Continue reading “Laser Cutters: Where’s The Point?”

Portable Router Build: Picking Your CPU

I want to introduce you to a project of mine – a portable router build, and with its help, show you how you can build a purpose-built device. You might have seen portable routers for sale, but if you’ve been in the hacking spheres long enough, you might notice there are “coverage gaps”, so to speak. The Pi-hole project is a household staple that keeps being product-ized by shady Kickstarter campaigns, a “mobile hotspot” button is a staple in every self-respecting mobile and desktop OS, and “a reset device for the ISP router” is a whole genre of a hacker project. Sort the projects by “All Time” popularity on Hackaday.io, and near the very top, you will see an OpenVPN &Tor router project – it’s there for a reason, and it got into 2014 Hackaday Prize semifinals for a reason, too.

I own a bunch of devices benefitting from both an Internet connection and also point-to-point connections between them. My internet connection comes sometimes from an LTE uplink, sometimes from an Ethernet cable, and sometimes from an open WiFi network with a portal you need to click through before you can even ping anything. If I want to link my pocket devices into my home network for backups and home automation, I can put a VPN client on my laptop, but a VPN client on my phone kills its battery, and the reasonable way would be to VPN the Internet uplink – somehow, that is a feature I’m not supposed to have, and let’s not even talk about DNSSEC! Whenever I tried to use one of those portable LTE+WiFi[+Ethernet] routers and actively use it for a month or two, I’d encounter serious hardware or firmware bugs – which makes sense, they are a niche product that won’t get as much testing as phones.

Continue reading “Portable Router Build: Picking Your CPU”

Audio On Pi: Here Are Your Options

There are a ton of fun Raspberry Pi and Linux projects that require audio output – music players, talking robots, game consoles and arcades, intelligent assistants, mesh network walkie-talkies, and much more! There’s no shortage of Pi-based iPods out there, and my humble opinion is that we still could use more of them.

To help you in figuring out your projects, let’s talk about all the ways you can use to get audio out of a Pi or a similar SBC. Not all of them are immediately obvious and you ought to know the ropes before you implement one of them and get unpleasantly surprised by a problem you didn’t foresee. I can count at least five ways, and they don’t even include a GPIO-connected buzzer!

Let’s rank the different audio output methods, zoning in on things like their power consumption, and sort them by ease of implementation, and we’ll talk a bit about audio input options while we’re at it.

Continue reading “Audio On Pi: Here Are Your Options”