A Full Motion Video Codec For The Atari ST

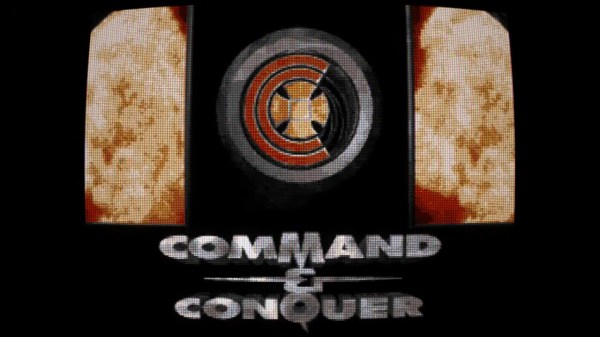
Who says an old dog can’t do new tricks? The Atari ST has got to qualify as an “old dog” 41 years after launch, and if playing Full Motion Video (FMV) cutscenes– from DOS games of a decade later– doesn’t count as a new trick, we’re not sure what does. In this case, [Jonas Eschenburg] is the trainer and his fascinating write-up lets you know exactly how he did it.

Unlike the contemporary and pricier Amiga, Atari’s 68000-based home computer didn’t have any fancy graphics chips; everything has to go through the Motorolla CPU at a blistering 8MHz. Just porting classic DOS games like [Jonas Eschenburg] is doing with Command and Conquer— a title 10 years newer than the ST– is an amazing tour de force. Bringing the cutscenes along for the ride is just bonus, but what a bonus it is.

Granted, [Jonas] has to work within the Atari’s limitations, so it doesn’t quite look the same. The biggest limitation is of course the 16 colour planar graphics on the Atari, compared with 256 colours of chunky goodness that VGA offered. [Jonas] admits that getting good palettes to minimize artifacting is a challenge. Interestingly he’s not showing quite so many blocking artifacts we would expect from the technique he is using: to take advantage of how the ST’s memory is laid out, he’s using a codebook-based codec that splits the image into easily-addressable blocks. Both the palette and the codebook must update continuously as the film plays but that’s still easier on the antique hardware than streaming raw pixel data, which you cannot do. The whole article is absolutely worth a read, and the demo videos generously sprinkled through it are worth a look, too. We’ve included a demo of C&C‘s intro below. If you’re itching to play, the port is on Itch.io.

Speaking of DOS games, did you know the Atari ST can run doom? Multiple versions, even.

Continue reading “A Full Motion Video Codec For The Atari ST”
Making The Codec Communicator From Metal Gear Solid

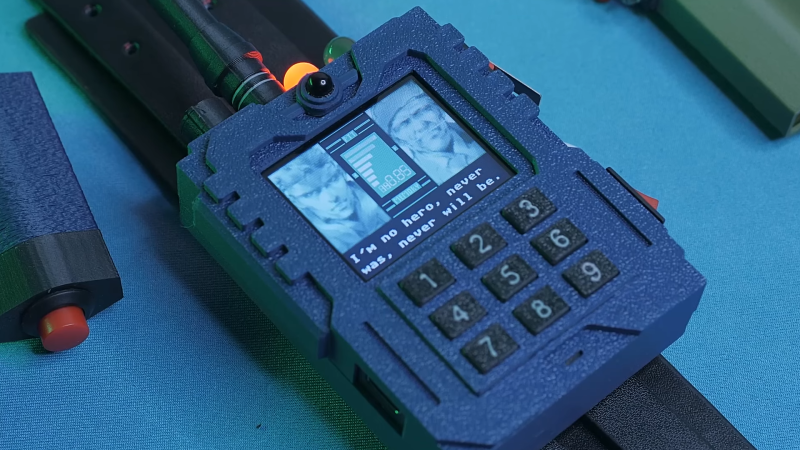
[3DSage] likes building replicas of hardware from movies and video games, often with a functional twist. His latest build aimed to bring the Codec from Metal Gear Solid to life.

If you haven’t played the Metal Gear games, the Codec has been modelled somewhat like an advanced walkie talkie at times, but has often been kept off-screen. Thus, [3DSage] had a great deal of creative latitude to create a realistic-feeling Codec device that provided voice communications and some simple imagery display.

The resulting build relies on an RP2040 microcontroller to run the show. It’s paired with an MPU6050 3-axis gyroscope and accelerometer for motion control of the device’s functionality, and features a small LCD screen to mimic the display in the games. A kids walkie-talkie kit was leveraged for audio communication, but kitted out with a better microphone than standard. Power is via a rechargeable 9V battery, which is really a lithium-ion and USB charging board packed into the familiar 9V form factor.

Where the build really shines, though, is the aesthetic. [3DSage] managed to capture the military-like look and feel as well as authentically recreate the graphics from the games on the screen. The simulated noise on the display is particularly charming. Beyond that, the 3D-printed enclosures leverage texture and multi-color printing really well to nail the fit and finish.

Ultimately, the Codec isn’t much more than a glorified walkie talkie. Even still, [3DSage] was able to create an impressive prop that actually does most of what the device can do in game. If you’ve ever coveted a PipBoy or tricorder, this is one project you’ll be able to appreciate.

Continue reading “Making The Codec Communicator From Metal Gear Solid”

Audio On Pi: Here Are Your Options

There are a ton of fun Raspberry Pi and Linux projects that require audio output – music players, talking robots, game consoles and arcades, intelligent assistants, mesh network walkie-talkies, and much more! There’s no shortage of Pi-based iPods out there, and my humble opinion is that we still could use more of them.

To help you in figuring out your projects, let’s talk about all the ways you can use to get audio out of a Pi or a similar SBC. Not all of them are immediately obvious and you ought to know the ropes before you implement one of them and get unpleasantly surprised by a problem you didn’t foresee. I can count at least five ways, and they don’t even include a GPIO-connected buzzer!

Let’s rank the different audio output methods, zoning in on things like their power consumption, and sort them by ease of implementation, and we’ll talk a bit about audio input options while we’re at it.

Continue reading “Audio On Pi: Here Are Your Options”

Hands On With Boondock Echo

Perhaps no words fill me with more dread than, “I hear there’s something going around.” In my experience, you hear this when some nasty bug has worked its way into the community and people start getting whatever it is. I’m always on my guard when I hear about something like this, especially when it’s something really unpleasant like norovirus. Forewarned is forearmed, after all.

Since I work from home and rarely get out, one of the principal ways I keep apprised of what’s going on with public health in my community is by listening to my scanner radio. I have the local fire rescue frequencies programmed in, and if “there’s something going around,” I usually find out about it there first; after a half-dozen or so calls for people complaining of nausea and vomiting, you get the idea it’s best to hunker down for a while.

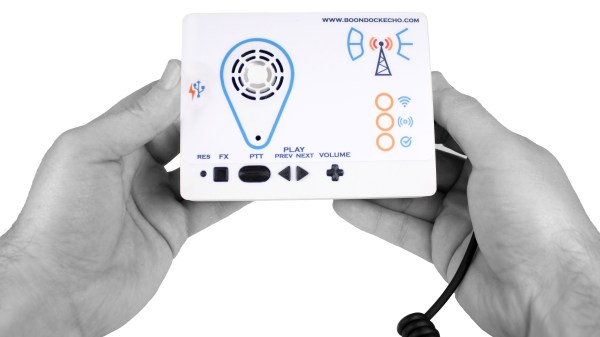
I manage to stay reasonably well-informed in this way, but it’s not like I can listen to my scanner every minute of the day. That’s why I was really excited when my friend Mark Hughes started a project he called Boondock Echo, which aims to change the two-way radio communications user experience by enabling internet-backed recording and playback. It sounded like the perfect system for me — something that would let my scanner work for me, instead of the other way around. And so when Mark asked me to participate in the beta test, I jumped at the chance.

Continue reading “Hands On With Boondock Echo”

Explore FFmpeg From The Comfort Of Your Browser

If you’re looking to manipulate video, FFmpeg is one of the most powerful tools out there. But with this power comes a considerable degree of complexity, and a learning curve that looks suspiciously like a brick wall. To try and make this incredible tool a bit less obtuse, [Sam Lavigne] has developed a web interface that lets you play around with FFmpeg’s vast collection of audio and video filters.

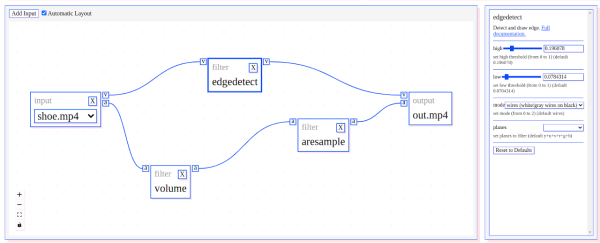
To try out a filter, you just need to select one from the window on the left and it will pop up in the central workspace. Here, the input, output, and any enabled filters will show up as boxes that can be virtually “wired” together. Selecting a filter will populate its options on the right hand side, with sliders and input boxes that allow you to play around with their parameters. When you want to see the final result, just click “Render Preview” and wait a bit.

If there was any downside, it seems like whatever box the site is running on the overhead of running in the browser doesn’t provide it a lot of horsepower. Even with the relatively low resolution of the demo videos available, the console output at the top of the page shows FFmpeg sometimes flirts with a processing speed measured in single-digit frames per second. Still, for a filter playground, it gets the job done. Perhaps the best part of the whole tool is that you can then copy your properly formatted command right out of the browser window and into your terminal so you can put it to work on your local files.

FFmpeg is one of those programs you should really be familiar with because it often proves useful in unexpected ways. The ability to manipulate audio and video with just a few keystrokes can really come in handy, and we’ve seen this open-source tool used for everything from compressing podcasts onto floppy disks to overlaying real-time environmental data onto a video stream.

Break Free From Proprietary Digital Radio

Digital modes are all the rage these days in amateur radio — hams are using protocols like WSPR to check propagation patterns, FT8 to get quick contacts on many bands with relatively low power, and MSK144 to quickly bounce a signal off of a meteor. There’s also digital voice, which has a number of perks over analog including improved audio quality. However, the major downside of most digital voice modes, at least those in use on UHF and VHF, is that they are proprietary with various radio brands having competing digital standards. To get above the noise a more open standard can be used instead.

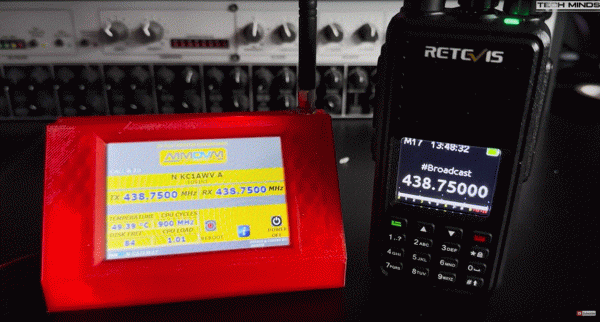
The M17 standard, originally created by [Wojciech Kaczmarski] aka [SP5WWP], uses Codec 2 to convert voice into a digital format before it is broadcast over the air. Codec 2 is an open standard unlike other audio codecs. M17 also supports reflectors, which can link individual radios or entire repeaters together over the Internet. While you can make purpose-built modules that will interface with most standard radio inputs, it’s also possible to modify existing hardware to support this standard as well. The video below from [Tech Minds] shows this being done to a radio with only a few hardware modifications and the installation of a new firmware.

For anyone who has been frustrated that there’s no real universal standard for digital voice in VHF and above, M17 could be a game-changer if enough people get tired of their friends being on other proprietary digital systems. There’s plenty of supported hardware out there that most hams probably already have already, including a number of TNC devices like the Mobilinkd and the DigiRig, so it shouldn’t be too hard to get started. If you’re more into networking over radio, though, take a look at this method for sending high-bandwidth IP networking over the UHF band. Continue reading “Break Free From Proprietary Digital Radio”

picture of finished mp3 player that uses a cartridge to select songs

An MP3 Player That Gives Off Nintendo Vibez

We’re definitely pretty fond of the DIY MP3 players here at Hackaday, but we don’t think we’ve seen one like CartridgeMP3 from [jpet26] before.

All the electrical components are what we’ve come to expect. [jpet26] uses the popular VS1053 decoder to read MP3 files stored on an SD card. He also includes a potentiometer for adjusting volume, a USB C port for power and programming, a headphone jack for the audio output, a general-purpose status LED, and an on/off switch.

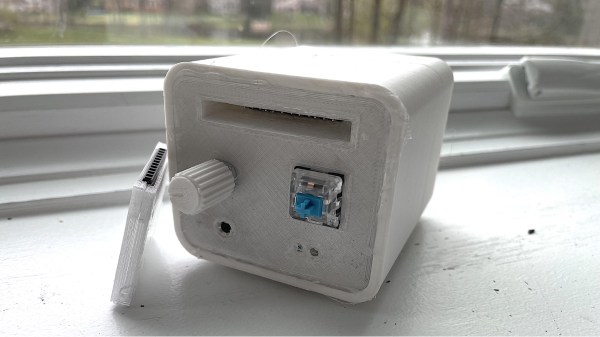
But what really caught our attention is the form factor [jpet26] selected for his MP3 player. Though the MP3 files are stored on an SD card, he uses a cartridge interface, similar to that of a Nintendo 64 or Game Boy of yesteryear, to choose which MP3 to play from the SD card. The cartridge interface is tied to a few GPIO pins and by reading the status of each pin, the device determines which MP3 to select.

You could say that the cartridge is a little unnecessary, and we wouldn’t argue with you. The cartridge doesn’t actually store the MP3 files, the SD card does. It might make a bit more sense if the cartridge housed the SD card itself with a few select MP3s stored on the card. That would be a quirky way of sharing your favorite playlists with your friends. So, yeah some clumsy handshaking there, but who isn’t guilty of that from time to time? We like it and thought you might appreciate it as well.

Cool MP3 player, [jpet26]! May we suggest a speaker for V2? And maybe some flex cables.

Continue reading “An MP3 Player That Gives Off Nintendo Vibez”