Building A Real Wooden Table Saw

A table saw is one of those tools that aren’t strictly necessary to have, but immensely helpful if you do happen to have one around. The folks at [I Build It] have made a three part series that features a homemade table saw build, so you can finally get around to adding one to your makerspace.

The build uses a real table saw arbor and is made from Baltic birch plywood and solid wood, with some plastic sheets for the trunnions and top. The blade is housed in a blade lift made out wooden panels with a pivot point and slot for the lift mechanism. Bearings allow the blade the freedom of movement, while a curved cutout allows it to stay flat against the wall of the slot while the blade lift mechanism moves.

Meanwhile a reused motor from a previous table saw is dusted, cleaned, and rewired to run in reverse. While most table saws only need two trunnions, a third is used for supporting the motor, since it has to move with the lift and tilt. Once the lift/tilt mechanism is complete, the frame for the table saw is more straightforward, with many steps involving clamping, measuring, cutting, fitting, and painting the assembly. For the final few steps, a switched is mounted outside the table saw in a small box that connected to the power supply and motor, as well as a shop vac for handling dust collection from the saw. While the enclosure isn’t a metal box, as long as the connections are secured properly the wires shouldn’t come loose.

If you want to see other examples of homemade table saws, check out this teeny tiny saw and this kid-friendly table saw build.

Continue reading “Building A Real Wooden Table Saw”

Commercial Circuit Simulator Goes Free

If you are looking for simulation software, you are probably thinking LTSpice or one of the open-source simulators like Ngspice (which drives Oregano and QUCs-S), or GNUCap. However, there is a new free option after the closing of Spectrum Software last year: Micro-Cap 12. You may be thinking: why use another closed-source simulator? Well, all the simulators have particular strengths, but Micro-Cap does have very nice features and used to retail for about $4,500.

The simulator boasts a multipage schematic editor, native robust digital simulation, Monte Carlo analysis, 33,000 parts in its library, worst-case and smoke analysis, Smith charts, and it can even incorporate spreadsheets. There’s a built-in designer for active and passive filters. Have a look at the brochure and you will see this is a pretty serious piece of software. And now it’s at least free as in beer.

Continue reading “Commercial Circuit Simulator Goes Free”

A Homebrew Weller RT Soldering Station

Like a number of hackers before him, [MarcelMG] was impressed with Weller’s RT soldering iron tips, but considerably less enthused about the high purchase price on the station they’re designed to go into. Inspired by similar projects, he decided to try his hand at building his own soldering station which reaps the benefits of these active tips without the sticker shock.

The station’s user interface was kept intentionally simple, with little more than a four digit LED display to show the temperature and a rotary encoder to set it. The display alternates between the current temperature and the set temperature every few seconds while the knob is being turned, and if you push it in, the set temperature will be saved as the default for next time.

[MarcelMG] also included a feature that drops the iron’s temperature when it’s sitting in the holder, reducing tip wear and energy consumption. He originally planned on using a Hall effect sensor to detect when the iron was holstered without needing to physically interface with it, but in the end he realized the easiest approach was to simply connect one of the input pins on the microcontroller to the metal holder. Since the tip is grounded, he could easily detect if it was in place with a couple lines of code.

Speaking of which, the station is powered by an ATtiny24A with firmware written in C using the Atmel Studio IDE. [MarcelMG] mentions that the limited storage on the 24A was a bit of a challenge to work around, and suggests that anyone looking to follow in his footsteps uses something with a bit more flash under the hood. The LED display is a very common TM1637 type, the rotary encoder was salvaged from a radio, and the power supply was from an old laptop. All told, this looks like a very economical build.

Depending on your needs, a DIY soldering station can either have features to rival the commercial models or be exceedingly simplistic. In either case, the advent of low-voltage irons and active tips have made self-built soldering stations much more approachable. Attempts without the use of these modern niceties tended to be somewhat less glamorous.

3D-Printed Tools Turn Bench Vise Into Expedient Press Brake

Chances are pretty good that most of us have used a bench vise to do things far beyond its intended use. That’s understandable, as the vise may be the most powerful hand tool in many shops, capable of exerting tons of pressure with the twist of your wrist. Not taking advantage of that power wouldn’t make any sense, would it?

Still, the clamping power of the vise could sometimes use a little finesse, which is the thinking behind these 3D-printed press brake tools.  [Brauns CNC] came up with these tools, which consist of a punch and a die with mating profiles. Mounted to the jaws of the vise with magnetic flanges, the punch is driven into the die using the vise, forming neat bends in the metal. [Braun] goes into useful detail on punch geometry and managing springback of the workpiece, and handling workpieces wider than the vise jaws. The tools are printed in standard PLA or PETG and are plenty strong, although he does mention using his steel-reinforced 3D-printing method for gooseneck punches and other tools that might need reinforcement. We’d imagine carbon-fiber reinforced filament would add to the strength as well.

To be sure, no matter what tooling you throw at it, a bench vise is a poor substitute for a real press brake. Such machine tools are capable of working sheet metal and other stock into intricate shapes with as few setups as possible, and bring a level of power and precision that can’t be matched by an improvised setup. But the ability to make small bends in lighter materials with homemade tooling and elbow grease is a powerful tool in itself.

Continue reading “3D-Printed Tools Turn Bench Vise Into Expedient Press Brake”

Converting A Drill Press Into A Milling Machine

Mills are a huge investment, and for hobbyists without the space to install their own personal mill, it can sometimes be a pain to have to find a facility with a mill to complete your project.

What if you could convert your drill press into a mill instead? YouTuber [Small Metalworking Machines] explores this in his video, where he takes a small Central Machinery drill press and adds a few mods. He took some steps to improve the quill, spindle, and bearings — boring down the quill, replacing the bearings, and finally turning and re-threading the spindle it at 1/2-20.

With the adjustments, he was able to add in a cheap drill chuck, which fit in quite nicely with just a slight wobble of 5 thousandths on either side. To introduce some control, he added in a worm gear to engage a gear on the spindle. A pivot point disengages the worm gear, while bearings provide it controlled movement from the worm wheel.

He also added a cheap milling table from eBay, attached to the base of the drill press, all for a total of $120. While it’s not perfect, it’s still significantly less expensive than buying a mill!

Continue reading “Converting A Drill Press Into A Milling Machine”

Making A Custom Caliper Case For Pros

Every professional has a tool set that they would never part with. Likewise, for experimental physicists, mechanical engineers, and tinkerers, a caliper set can be unspeakably crucial to their work. That’s why [Andrew Birkel] designed his own personal caliper set to fit just the right proportions for his tools while adding a bit of personal flair.

The project uses CNC routing, Solidworks for CAD, laser engraving, and woodworking to design the custom case for a set of calipers, metric and English screw pitch gauges, fillet gauges, and radius gauges. It’s a practical build for a custom tool set that doesn’t already come with a case of its own. The particular tools were chosen for their use in particle physics experiments: for determining threads, inside and outside curvatures, and measuring length, depth, and width.

The box was made from an oversized piece of wood with holes drilled into the sides. After compiling the G-code program for the build, the two halves of the box was was milled from the wood. The first run on the CNC mill with aluminum managed to cause the grain to split, so [Birkel] went with a CNC router instead. Once the piece was sanded, hidden barrel hinges were added. The finished box was wiped down with mineral oil and teak oil to bring out the natural coloration of the wood as well as to add protection (lacquer mixed into the oil). To finish it off, the case was customized with a laser engraved name and email for identification.

It’s a pretty slick build to say the least, and certainly one that can be customized to the dimensions of whatever tools your personal caliper set happens to have.

Unique 3D Printer Turned CNC Engraver

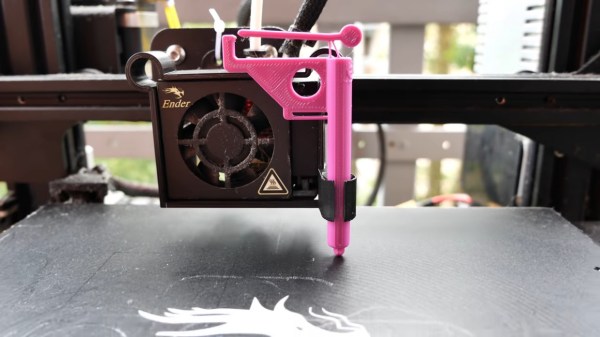
As we’ve said in the past, one of the most exciting things about the proliferation of low-cost desktop 3D printers (beyond all the little boats we get to see on Reddit), is the fact that their motion control systems are ripe for repurposing. Outfitting a cheap 3D printer with a drag knife, pen holder, or even a solid-state laser module, are all very common ways of squeezing even more functionality out of these machines.

But thanks to the somewhat unusual nature of his printer, [Hammad Nasir] was able to take this concept a bit farther. Being considerably more rigid than the $99 acrylic-framed box of bolts we’ve become accustomed to, he was able to fit it with a basic spindle and use it for CNC engraving. He won’t be milling any steel on this rig, but judging by the pictures on the Hackaday.io page for the project, it does a respectable job cutting designs into plastic at least.

The IdeaWerk 3D printer that [Hammad] used for this project is phenomenally overbuilt. We don’t know whether the designers simply wanted to make it look futuristic and high-tech (admittedly, it does look like it could double as a movie prop) or they thought there was a chance it might get thrown down the stairs occasionally. In either event, it’s built like an absolute tank.

While the frame on lesser printers would likely flex as soon as the bit started moving across the workpiece, this thing isn’t going anywhere. Of course this machine is presumably still running on the standard GT2 belt and NEMA 17 arrangement that has been used in desktop 3D printers since the first wooden machines clattered to life. So while the frame might be ready to take some punishment, the drive system could respectfully disagree once the pressure is on.

Modification was simplified by the fact that the hotend and extruder assembly on the IdeaWerk is mounted to the X axis with just a single bolt. This makes it exceptionally easy to design alternate tool mounts, though arguably the 3D printed motor holder [Hammad] is using here is the weak link in the entire system; if it’s going to flex anywhere, it’s going to be there.

If you’re more photonically inclined, you might be interested in this similarly straightforward project that sees a 2.5 W laser module get bolted onto an entry level 3D printer.