(Re)designing The LumenPnP Tape Feeder

Many of the hardware orientated hackers among us will likely have been following along with the story of [Stephen Hawes] and the Lumen pick-and-place project but kind of waiting a bit for the project to mature some more before maybe taking the plunge and ordering a kit. One reason for this might be that whilst the basic machine design is there and working, the tape feeders did need a fair bit of work, and a lack of usable feeders does not make a great PnP machine. [Stephen] has been working on a newer design that addresses some of the identified shortcomings, and has started documenting his progress (video, embedded below) along the way.

Gone is the PCB-based ‘case’, reverting back to a 3D printable affair and a much smaller PCB. After flip-flopping a bit between different geared DC motors, [Stephen] settled back on the original, smaller unit, which after a wee spot of hacking, was convinced to accept an optical encoder stripped from another unit, and this proved that it was indeed more than up to the tape-advancement duty. The reason for this change was physical size — the original motor resulted in an assembly 38mm wide — this limited the number for feeders on the front rail to barely eleven units. This is not really enough, but with the narrower assembly, the width is reduced to 15.5mm allowing 27 feeders to snuggle together on the rail, and that should make the machine much more usable.

Continue reading “(Re)designing The LumenPnP Tape Feeder”

Testing A Laser Cut Wrench VS A Forged Wrench

It is easy to not think much about common tools like screwdrivers and wrenches. But not for [Torque Test Channel]. The channel does a lot of testing of tools and in the video, below, they test a new wrench that is, oddly enough, laser cut instead of forged like the usual wrench.

You would expect a machined wrench to be weaker than a forged wrench. We were impressed, though, that there is so much difference between wrenches when you start making measurements.

Speaking of measurements, we would like to see more details of the test setups shown both in the video and in some of the video clips included. We did enjoy seeing the examination of the internal grain structure of both wrenches.

Be forewarned. Watching this video is likely going to send you to the computer to buy some new wrenches, especially if you don’t have 30/60 head wrenches.

The real question is why laser cut a wrench? It doesn’t seem like it is actually better than the forged variant. It is more expensive, but the setup costs for forging are higher. Particularly for a tool made in the United States, forging is both expensive and it is difficult to find time on the limited number of large-scale forges left in the country.

Continue reading “Testing A Laser Cut Wrench VS A Forged Wrench”

Here’s The World’s Smallest Wood Plane…Probably

Admittedly, we aren’t really in a position to confirm whether or not the miniature wood plane put together by [Daniel d’Entremont] is actually the smallest in the world, but we’re willing to take his word for it. At the very least, we certainly haven’t seen a smaller one.

In the video below, [Daniel] crafts the diminutive tool from a small block of wood by first slicing off a square using a band saw and then switching over to a small hand saw to cut out the individual pieces. These are glued together to make the body of the plane, and the shank of a small drill bit is used to hold down the wedge and blade. All told it’s about 1/2 of an inch long, and is fully functional…or at least, as functional as a 1/2 inch wood plane can be.

Interested in more miniature tools? Believe it or not, we’ve got you covered.

Continue reading “Here’s The World’s Smallest Wood Plane…Probably”

A Steam Box For Not A Lot

If you have ever marveled at the complex wooden curves used by shipbuilders or some furniture makers, then you have probably at some point hankered after a steam box. This is as its name suggests, a chamber in which a piece of wood is steamed until it becomes flexible, at which point it can be pressed into a new shape that it will retain once cooled. The ever-resourceful [Xyla Foxlin] shows us how to make a steam box using easy-to-find parts, as can be seen in the video below the break.

The steam supply comes from a commercial steam boiler of the type used by decorators for wallpaper stripping, and the steam box itself is made from a length of PVC pipe. Inside the pipe are a series of aluminium dowels that form a rack upon which the wood sits away from any condensation, and the whole things sits at a slant with the steam inlet and a condensation drain at the bottom end.

In use, a piece of wood is loaded into the tube and steamed, before being bent using a set of forms in a vice.  The process looks straightforward enough that even we could give it a go, so we’re sure Hackaday readers will find it interesting.

We think this may be the first steam box we’ve brought you, but it’s not the first time we’ve discussed bending wood.

Continue reading “A Steam Box For Not A Lot”

Mapping Out The LEDs On An Outlet Tester

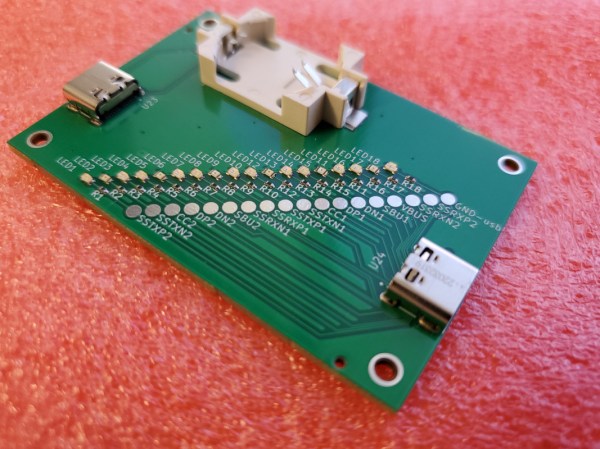
The concept of an outlet tester is pretty simple: plug the gadget into a suspect wall receptacle, and an array of LEDs light up in various patterns to alert the user to any wiring faults. They’re cheap, reliable, and instantaneous. Most people wouldn’t give them much more thought than that, but like any good hacker, [Yeo Kheng Meng] wanted to know how these devices worked.

After picking up a relatively advanced model that featured an LCD display capable of showing various stats such as detected voltage in addition to the standard trio of LEDs, he started by using some test leads to simulate various fault conditions to understand the basic principle behind its operation. The next step was to disassemble the unit, which is where things went briefly sideways — it wasn’t until [Yeo Kheng Meng] and a friend had nearly cut through the enclosure that they realized it wasn’t ultrasonically welded liked they assumed, and that the screws holding it together were actually hidden under a sticker. Oops.

The write-up includes some excellent PCB shots, and [Yeo Kheng Meng] was able to identify several components and ascertain their function. He was even able to find some datasheets, which isn’t always such an easy task with these low-cost devices. Unfortunately the MCU that controls the device’s more advanced features is locked away with a black epoxy blob, but he was able to come up with a schematic that explains the rather elegant logic behind the LED display.

This isn’t the first time [Yeo Kheng Meng] has taken apart an interesting piece of hardware for our viewing pleasure, and given the fine job he does of it, we hope it’s not the last either.

Junkbox Build Keeps Tesla Coils Perfectly Varnished

Admittedly, not a lot of people have a regular need to varnish coils. It’s mainly something that Tesla coil builders and other high-voltage experimenters are concerned with. But since that group probably constitutes a not insignificant fraction of the Hackaday audience, and because there are probably more applications for this homebrew coil varnishing setup, we figured it would be a good idea to share it.

For [Mads Barnkob], coil maintenance isn’t something to take lightly. If you check out his Kaizer Power Electronics channel on YouTube, you’ll see that he has quite a collection of large, powerful Tesla coils, some of which are used for demos and shows, and others that seem to be reserved mainly for blowing stuff up. To prevent one of his coils from joining the latter group, keeping the coat of insulating varnish on the secondary coil windings in tip-top condition is essential.

The setup seen in the video below helps with that tedious chore. Built entirely from scraps and junk bin parts, the low-speed, low-precision lathe can be set up to accommodate coils of all sizes. In use, the lathe turns the coil very slowly, allowing [Mads] to apply an even coat of varnish over the coil surface, and to keep it from sagging while it dries.

[Mads]’ setup is probably not great for coil winding as it is, but for coil maintenance, it’s just the thing. If your needs are more along the lines of a coil winder, we’ve got a fully automated winder that might work for you.

Continue reading “Junkbox Build Keeps Tesla Coils Perfectly Varnished”

3D Printed Braiding Machine Brings Back Some History

Mechanizing the production of textiles was a major part of the industrial revolution, and with the convenience of many people are recreating the classic machines. A perfect example of this is [Fraens]’ 3D printed braiding machine, which was reverse engineered from old photos of the early machines.

The trick behind braiding is the mesmerizing path the six bobbins need to weave around each other while maintaining the correct tension on the strands. To achieve this, they slide along a path in a guide plate while being passed between a series of guide gears for each section of the track. [Fraens] cut the guide plate components and the base plate below it from acrylic and mounted them together with standoffs to allow space for the guide gears.

Each of the six bobbins contains multiple parts to maintain the correct tension. The strands are fed through a single guide ring, where the braid is formed, and through pair of traction gears. All the moving parts are driven by a single 24 V motor and can produce about 42 cm of a braided cord per minute, and you can even set up the machine to braid around an inner core.

This braiding machine is just one in a series of early industrial machines recreated by [Fraens] using 3D printing. The others include a sewing machine, and a power loom, and a generator.

Continue reading “3D Printed Braiding Machine Brings Back Some History”