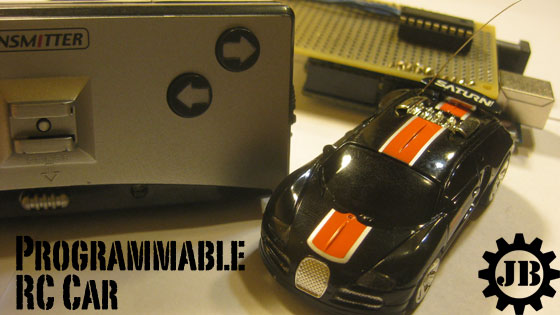
Worried About Haloween This Year? Why Not A Giant T-Rex Costume?

Although some might note that [Jamie]’s creation could mistaken for a Velociraptor or even Allosaurus, his giant T-Rex costume/model is quite a feat of artistry. It stands at over 14 feet tall and 10 feet long. For comparison, the room that you see in the picture above measures 25 x 25 feet. If you happen to live in the Atlanta area, or are willing to travel, this costume is expected to make an appearance at Dragon*Con in 2012, so be sure to look for it there.

The whole thing is made from poly foam plank cut with a CNC router.  It also has a metallic support structure. As noted in the article, you could, in theory, cut all these parts out by hand. Persistence would be required though, since there are over 140 parts!

[Jamie]’s making capabilities are obviously quite advanced at this point, but he’s trying to expand them by winning a router in the Instructables Shopbot contest. If you like his creation, be sure to vote for him! Check out the video of this costume in action after the break. Continue reading “Worried About Haloween This Year? Why Not A Giant T-Rex Costume?”

Hexbug Code Rewrite Makes It A Walking Line-follower

You know you’ve got a good hardware platform if you can easily repurpose it with a code rewrite. And that’s what [Eric] continues to do with these little Hexbugs. This time around he’s bent the IR emitter and receiver downward to use as a reflectance sensor. This gives it the ability to follow a dark line on a light surface.

He originally patched an MSP430 into the $25 RC toy. The IR pair was intended for obstacle avoidance, which we saw in a recent links post. This hack does a great job of repurposing the avoidance system. Since the add-on hardware is mounted on a motorized turret, the single sensor pair can sweep back and forth to find the line it will follow. In one way this is better than most line followers which use multiple sensors mounted to the body. But the drawback is that this results in slower travel and won’t be winning any contests. Don’t miss the demo clip after the break.

Continue reading “Hexbug Code Rewrite Makes It A Walking Line-follower”

Robotic Etch-a-Sketch Draws Grayscale Images

[Patrick] decided to make a computer controlled etch-a-sketch. While the idea is not that new, there is always a different way to accomplish a goal. An Arduino is used to control a pair of stepper motors which were sourced for pretty cheap, and even came with their own driver. Next a stand was mocked up using foam board, which helps determine where all the parts should live.

Next was a way to attach the steppers to the knobs, gears would be used and a collet meant for model airplanes was sourced to make the mechanical connection between gear and shaft. With everything set in place via foam board and paper printouts, it is off to get some thin plywood. The plywood is sent though a laser cutter creating most of the stand and gears. Now its all software, a program was whipped up for OSX which converts low res pictures into squiggly lines perfect for the etch-a-sketch to draw on its screen.

The results are quite impressive, join us after the break for a quick video.

Continue reading “Robotic Etch-a-Sketch Draws Grayscale Images”

Rapid Fire, Remote Controlled Ping Pong Ball Turret

remote-ping-pong-ball-turret

[Andrew] and his brother had some time (and a lot of ping pong balls) on their hands, so they decided to have some fun and built a remote-controlled ping pong ball turret.

Arduino aside, the turret is cheap and easy to build as [Andrew’s] writeup explains. The firing mechanism was constructed using a pair of foam wheels and motors, which is used to launch the ping pong balls much like a baseball pitching machine. The balls are stored above the wheels in a cardboard tube and released by a mechanical flap when triggered.

When [Andrew] is ready to release the turret’s payload, he sends a command to his computer over VNC, which relays the command to the Arduino over a serial connection, triggering the flap. While the control scheme could certainly benefit from direct, wireless phone-to-Arduino communications, it seems to work well enough for [Andrew’s] needs.

Check out the video dramatization below to see [Andrew] “surprise” his brother with a hail of ping pong balls after the jump.

Continue reading “Rapid Fire, Remote Controlled Ping Pong Ball Turret”

Reverse Engineering A 1.5 Inch Photoframe

Little, no name, 1.5 inch LCD photo key-chains are all over the place for practically nothing. Not too surprisingly these things do not vary much in the parts that they use, some flash ram, a little lipo battery and a 16 bit color LCD. Wanting to find a way to reuse that LCD [Simon] Has an excellent tutorial on how to reuse a FTM144D01N LCD with a ILITEK ILI9163 LCD driver for your electronic projects.

Two units were used, one was ripped apart and soldered to a home made breakout board, the other was kept intact so its logic could be sniffed out with an oscilloscope. A pin-out was quickly determined since these things typically use a 8 or 16 bit data bus. Then a driver library was put together for AVR micro controllers, which includes some basic shape drawing and a 5×8 font.

While you may not be lucky enough to get this exact LCD screen from your local bargain store, there are a lot of pointers in here to hopefully get you up and going. We will be trying our luck on a very similar screen this afternoon as these things do have a decent picture and fairly quick response times already packaged in a hand-held case.

Join us after the break for a quick video.

Continue reading “Reverse Engineering A 1.5 Inch Photoframe”

Jam A Remote Helicopter

The Syma S107 IR is a popular little remote controlled helicopter. When a friend of [Michael]’s started flying one around the office he decided to try and jam the signal, creating a no fly zone. Luckily some people on the internet have already decoded the IR signals used by the flying menace. From there, a quick browsing of Mouser to source some LEDs, and to whip up some code for a TI MSP430 was all that was left.

The software on the micro controller is set to broadcast a “thrust off” signal, but [Michael] admits he is not 100% sure if the helicopter is actually receiving that, or if the signal from the no fly zone is mixing with the remote’s signal, causing garbage to be received. Either way when the helicopter gets in range of the no fly zone pad it drops from the air.

Things didn’t go perfectly though, overestimating the current capabilities of the MSP was causing the micro controller to reset and crash the debugger. But a simple rearrangement of how the signals are sent quickly solved this problem.

Join us after the break for a quick video.

Continue reading “Jam A Remote Helicopter”