Back in 1996, the Tamagotchi was a triumph of hardware miniaturization. Nearly 25 years later, our expectations for commercially designed and manufactured gadgets are naturally quite a bit higher. But that doesn’t mean we can’t be impressed when somebody pulls off a similar feat in the DIY space.
The Xling by [dsl] follows the classic Tamagotchi concept. A little creature, apparently inspired by the demon from Netflix’s Disenchantment, lives in your pocket and needs occasional attention to remain healthy. The user pushes a few buttons to interact with the creature displayed on the display to do…whatever it is you do with a pet demon. Feed it souls and what have you.
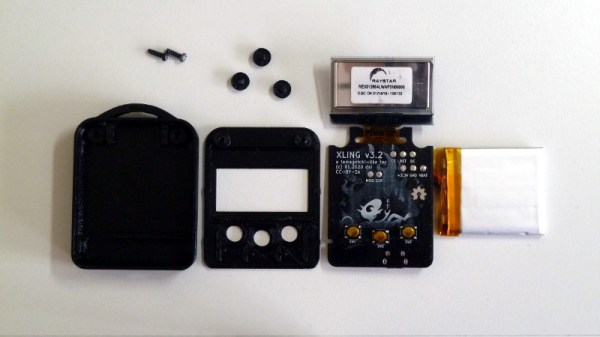
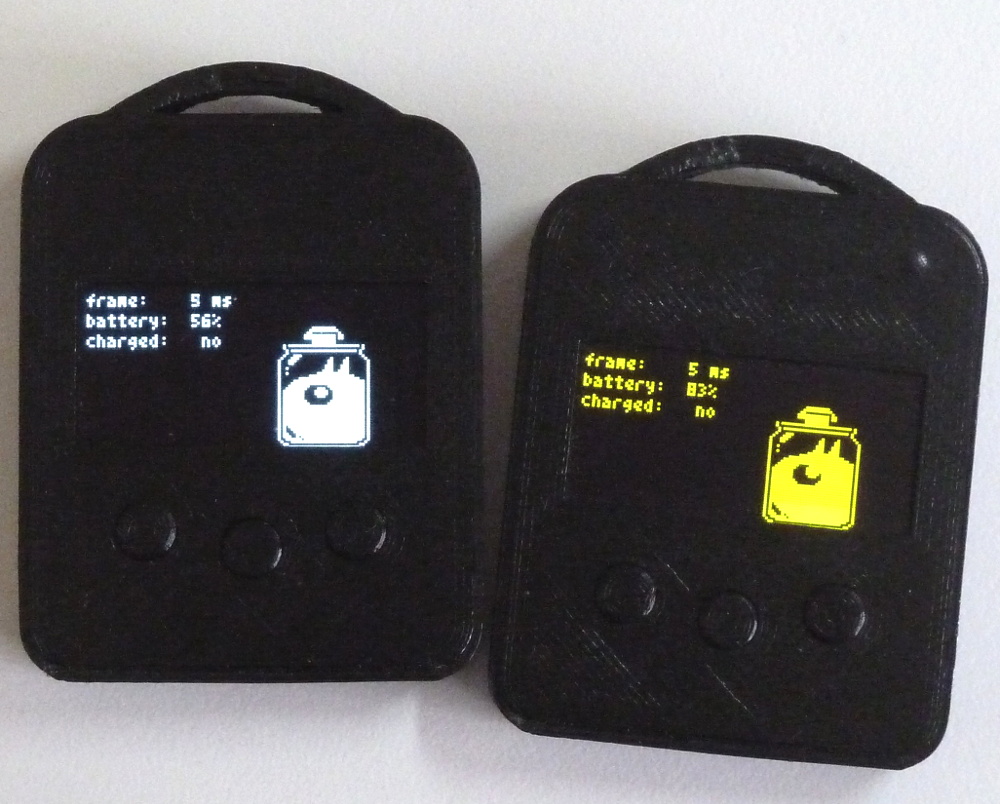 But unlike the iconic 90s toy, both the hardware and software for the Xling are open source. The CERN-OHL-W licensed PCB was designed in KiCad and features an ATmega1284P microcontroller and SH1106G controller for the 128 x 64 OLED display.
Power is provided by an AP3401 DC-DC converter, MCP73831 charge controller, and a 400 mAh 3.7 V battery. Everything fits inside of a 3D printed case that looks like it could easily hang off of a keyring.
While the hardware is admirable enough, the software side of things is quite interesting as well. The Xling is running on a FreeRTOS kernel ported to the ATmega, but the GPLv3 licensed firmware sill needs some work. Right now only a few core functions are implemented, and [dsl] is hoping to get some ideas and feedback from the community so his dream of a fully open source demonic Tamagotchi can finally be realized.
Build enough of them, and you might even be able to implement another virtual pet Singularity. But to be safe, maybe you shouldn’t.