The crank/keying assembly

Hacking A Guitar Into A Hurdy-Gurdy Hybrid With 3D Prints

If you’re looking for a long journey into the wonderful world of instrument hacking, [Arty Farty Guitars] is six parts into a seven part series on hacking an existing guitar into a guitar-hurdy-gurdy-hybrid, and it is “a trip” as the youths once said. The first video is embedded below.

The Hurdy-Gurdy is a wheeled instrument from medieval europe, which you may have heard of, given the existence of the laser-cut nerdy-gurdy, the electronic midi-gurdy we covered here, and the digi-gurdy which seems to be a hybrid of the two. In case you haven’t seen one before, the general format is for a hurdy-gurdy is this : a wheel rubs against the strings, causing them to vibrate via sliding friction, providing a sound not entirely unlike an upset violin. A keyboard on the neck of the instrument provides both fretting and press the strings onto the wheel to create sound. 

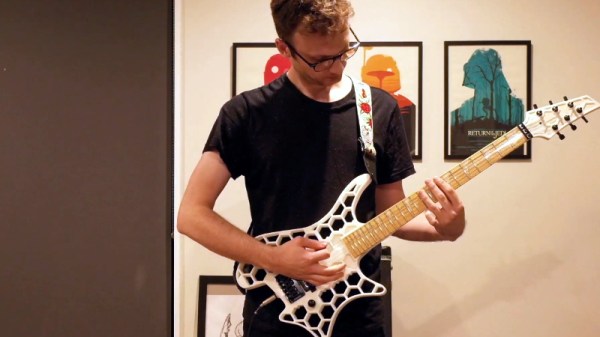
[Arty Farty Guitars] is a guitar guy, so he didn’t like the part with about the keyboard. He wanted to have a Hurdy Gurdy with a guitar fretboard. It turns out that that is a lot easier said than done, even when starting with an existing guitar instead of from scratch, and [Arty Farty Guitar] takes us through all of the challenges, failures and injuries incurred along the way. 

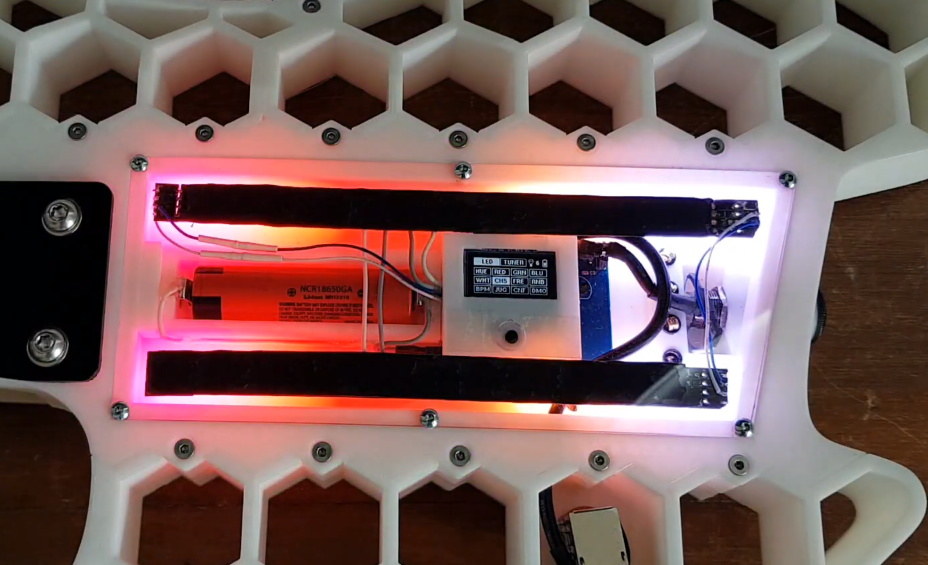
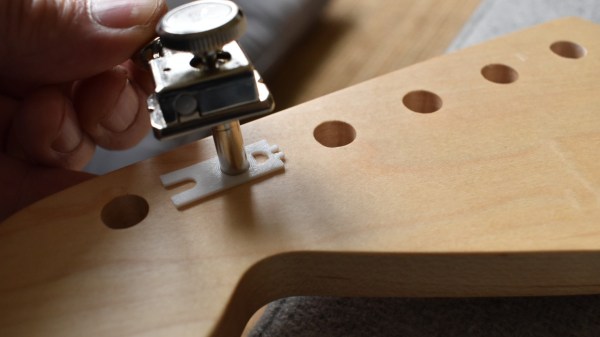
Probably the most interesting piece of the puzzle is the the cranking/keying assembly that allows one hand to control cranking the wheel AND act as keyboard for pressing strings into the wheel. It’s key to the whole build, as combining those functions on the lower hand leaves the other hand free to use the guitar fretboard half of the instrument. That controller gets its day in video five of the series. It might inspire some to start thinking about chorded computer inputs– scrolling and typing?

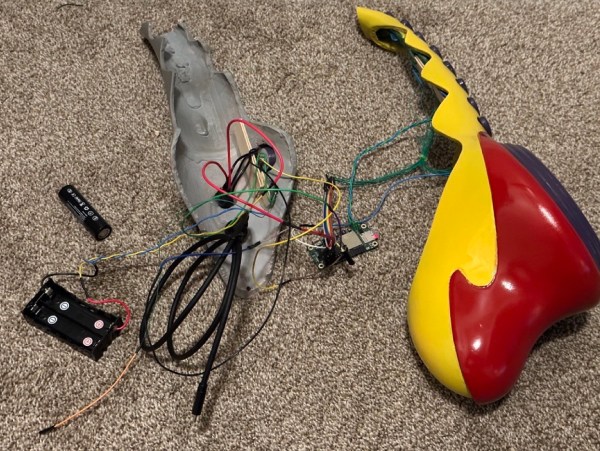
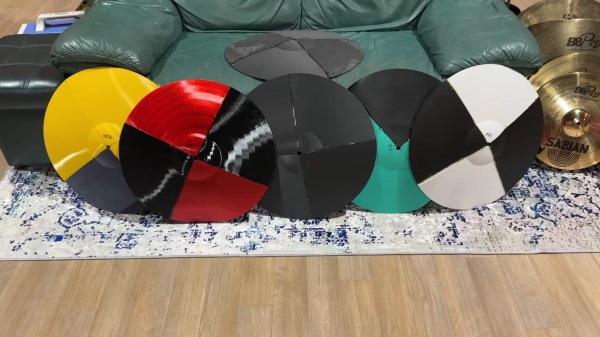
If you watch up to the sixth video, you learn that that the guitar’s fretting action is ultimately incompatible with pressing strings against the wheel at the precise, constant tension needed for good sound. To salvage the project he had to switch from a bowing action with a TPU-surfaced wheel to a sort of plectrum wheel, creating an instrument similar to the thousand-pick guitar we saw last year.

Even though [Arty Farty Guitars] isn’t sure this hybrid instrument can really be called a Hurdy Gurdy anymore, now that it isn’t using a bowing action, we can’t help but admire the hacking spirit that set him on this journey. We look forward to the promised concert in the upcoming 7th video, once he figures out how to play this thing nicely.

Know of any other hacked-together instruments that possibly should not exist? We’re always listening for tips. 


We’ve Got A Saxaboom At Home Son

Most parents have heard a familiar story. Their lovely child comes up, having seen a celebrity rocking out with a funny $20 toy from the 80s, and asks for it. Of course, you reply, it’s just 20 dollars. However, a quick scan through eBay reveals that everyone else’s kid has also been asking for this obscure toy for a school event, which now costs around $700. [Ben] found himself in that exact position and made a crucial off-hand comment, “I bet I could make one of those.” That was how his hectic journey into the world of toy reproduction began.

All [Ben] had for reference when recreating a Sax-A-Boom were pictures and sound clips. Modeling complex sweeping shapes in CAD is difficult, and [Ben] commissioned a 3d model from a professional on Fiverr. [Ben] broke down the model into printable sections and tweaked it to account for buttons. After a concerning amount of putty, wet sanding, and elbow grease, [Ben] had a decently smooth body for an instrument. The device’s guts is an ESP32-based board called Sonatino, built around music generation. The music samples came from a virtual instrument clone on GitHub and loaded onto an SD card.

Time pressure crept in towards the end, and [Ben] had to go for some dirty solution that he would have preferred (popsicle sticks and epoxy for button mounting). Yes, there were some gaps and paint flaws, but ultimately [Ben’s] son rocked the school presentation. It’s a beautiful journey through creating something with a high level of finish on a limited timescale.

Perhaps future versions of the Sax-A-Boom can take it further by adding a breath sensor, like this 3d printed MIDI instrument.

Continue reading “We’ve Got A Saxaboom At Home Son”

A series of five cymbals sitting on white and black speckled carpet in front of a green loveseat. Each cymbal is assembled from four printed sections. Their colors from left to right are yellow and grey, red and black, black, teal and black, and white and black. A sixth, grey and black cymbal is sitting in the middle of the loveseat cushion.

Challenging The Limits Of 3D Printing With Cymbals

We’re big believers in 3D printing here at Hackaday, but it’s important to recognize that there are plenty of applications where additive manufacturing (at least, from a desktop machine) just isn’t suitable. But that doesn’t mean we don’t want to see what happens if you try. For example, [The Drum Thing] wanted to test the limits of 3D printing by printing a set of cymbals.

[The Drum Thing] had a friend design a cymbal in CAD and then the printed quarters were glued together. In the name of science, they produced them in six different materials to compare performance. Each cymbal was played for a short period or until it failed, including some very interesting slow motion camera work showing the vibrations traveling through the cymbals.

As one might expect, bashing “wafer thin” pieces of printed plastic with a wooden drumstick didn’t work out well for most of the cymbals, although the TPU, carbon fiber, and nylon cymbals were did largely survive their time in the limelight. The other cymbals all failed, either shattering, cracking, or failing at the glue joints. Based on the video, it seems the same glue was used for all of the cymbals, so making sure to have a better match between material and adhesive could help with the glue failures.

Maybe future testing can involve playing these cymbals with a quadrotor?

Continue reading “Challenging The Limits Of 3D Printing With Cymbals”

Illuminated 3D Printed Guitar Is Ready To Rock

When we think of 3D printed parts for our projects, most of us imagine little bits like brackets and mounting plates. Perhaps the occasional printed project enclosure. But if you’ve got a big custom printer as [Joshendy] does, plus plenty of time, it opens up a whole new world of large scale projects. Take for example the gorgeous RGB LED guitar body he recently completed.

Despite the considerable 300 x 300 mm build area of his custom 3D printer, [Joshendy] still had to design the guitar body in sections that could be bolted together after being printed in ABS. It took around 60 hours to run off all the parts, with the large central section taking the longest to print at 28 hours. With the generous application of heat-set inserts, the assembled guitar should be plenty strong.

The white ABS of the guitar body helps diffuse the LEDs.

While the skeletal plastic body of the guitar is certainly visually interesting in itself, it only makes up for half of the final look. Inside the central cavity, [Joshendy] has embedded two strips of RGB LEDs, a 128×64 OLED screen, and a custom PCB that plays host to a STM32L4 microcontroller the appropriate voltage regulators necessary to run it all on a battery pack.

The board taps into the audio being produced by the guitar and uses a fast Fourier transform (FFT) to get the LEDs reacting to the beat. As demonstrated in the video after the break, you can use the screen to navigate through the different lighting modes in real-time right on the instrument itself.

We covered the equally impressive large-format 3D printer that [Joshendy] used to produce this guitar earlier in the month, and it’s quite exciting to see the sort of things he’s printing on it already. This project has already set the bar very high, and we can’t wait to see what he comes up with next.

Continue reading “Illuminated 3D Printed Guitar Is Ready To Rock”

3D-Printed Adapter Keeps Your Guitar In Tune And In Style

If you like building or upgrading guitars, you may have already learned the valuable lesson that the devil absolutely is in the detail when it comes to to replacement parts. Maybe you became aware that there are two types of Telecaster bridges right after you drilled the holes through the body and noticed things just didn’t quite fit. Or maybe you liked the looks of those vintage locking tuners and the vibe you associate with them, only to realize later that the “vintage” part also refers to the headstock, and the holes in your modern one are too big.

The latter case recently happened to [Michael Könings], so he did what everyone with a 3D printer would: make an adapter. Sure, you can also buy them, but where’s the fun in that? Plus, the solution is as simple as it sounds. [Michael] modelled an adaptor to bridge the gap between the headstock holes and the tuner shaft, but unlike the commercial counterpart that are mounted only on one side, his fills up the entire hole and fits the entire construct tightly together. For even more overall stability, he added an interlocking mechanism on the back side that keeps all the adaptors in line, and also allows for some possible distance differences.

[Michael] initially considered using wood filament for cosmetic reasons, but due to lack of the material went with simple white PLA instead. In the end, it doesn’t matter too much, as most of it hides under the new tuners’ metal covers anyway — and the small parts that are visible will serve as a great reminder of this lesson in guitar variety. Speaking of 3D printing and guitar variety, now that we reached the headstock, and have seen bodies for a while already (including bass), only 3D-printed guitar necks are missing. Well, we’ve had them on violins though, even with 6 strings, but they also don’t have to deal with frets and have a bit less tension going on.

Students Hack An Unusual Violin

[Sean Riley] is a violinist who had a problem. He wanted to play one particular piece, but he couldn’t. It wasn’t that he lacked the skill — he a doctoral student at the University of Texas and has two degrees in violin performance from The Julliard School. The problem was that “The Dharma at Big Sur” by [John Adams] is made for an instrument with six strings, while most violins only have four. So he did what any of us would do. He stopped by the local hackerspace and fabricated one. You can hear (and see) [Sean] performing with the instrument in the video, below.

The University of Texas operates “The Foundry” which is a hackerspace with all the usual items: laser cutters, 3D printers, and the like. It is open to all their students and staff. [Sean] needed some help with the engineering, and was lucky to find a mechanical engineering senior, [Daniel Goodwin], working at The Foundry.

Continue reading “Students Hack An Unusual Violin”

3D Printed Instrument Roundup

3d printed instruments

We just stumbled upon a great repository of all musical things that are 3D printed. It’s a wiki dedicated to sharing and recording these 3D printed instruments to help encourage further ideas and projects.

The people maintaining the site find different projects and share them, adding descriptions which would go great into a database search. They explain the type of instrument, it’s history, a picture or video of it and the method of manufacture used to create, whether it be traditional 3D printing, laser cutting, or another process.

Some of our favorites include the 3D printed guitar bodies, the strange looking multi-horn trumpet (that’s the weird one, bottom right) by the MIT Media Lab, and of course the humongous bass recorder (top right).

Stick around after the break for a few videos of these different unconventional, unorthodox instruments!

Continue reading “3D Printed Instrument Roundup”