Amazing Mechanical Linkages And The Software To Design Them

Most of us are more bits-and-bytes than nuts-and-bolts, but we have the deepest appreciation for the combination of the two. So, apparently, does [rectorsquid]. Check out the design and flow of his rolling ball sculpture (YouTube, embedded below) to see what we mean. See how the arms hesitate just a bit as the ball is transferred? See how the upper arm gently places it on the ramp with a slight downward gesture? See how it’s done with one motor? There’s no way [rectorsquid] designed this on paper, right?

Of course he didn’t (YouTube). Instead, he wrote a simulator that lets him try out various custom linkages in real time. It’s a Windows-only application (sigh), but it’s free to use, while the video guides (more YouTube) look very comprehensive and give you a quick tour of the tool. Of special note is that [rectorsquid]’s software allows for sliding linkages, which he makes very good use of in the rolling ball sculpture shown here.

We’ve actually secretly featured [rectorsquid]’s Linkage software before, in this writeup of some amazing cosplay animatronic wings that used the program for their design. But we really don’t want you to miss out if you’re doing mechanical design and need something like this, or just want to play around.

If you’d like to study up on your nuts and bolts, check out our primer on the ubiquitous four-bar linkage, or pore through Hackaday looking for other great linkage-powered examples, like this automatic hacksaw or a pantograph PCB probe for shaky hands.

Anyone know of an open-source linkage simulator that can also output STL files for 3D printing? Or in any format that could be easily transformed into OpenSCAD? Asking for a “friend”.

Continue reading “Amazing Mechanical Linkages And The Software To Design Them”

Repairing A Sunburned Game Boy Screen

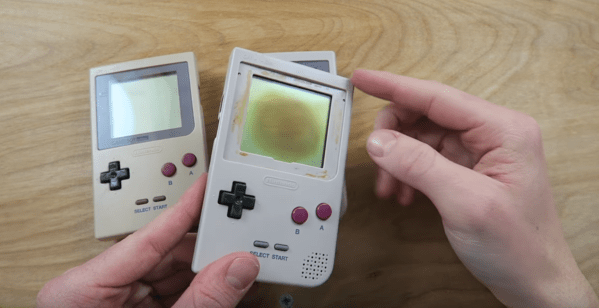
The original Game Boy is a classic. Sure, it had no backlight, but there is something special about playing on that classic green screen. Unfortunately, some of these older systems are suffering a terrible fate — screen burn. Game Boy’s played best with lots of light — especially out in the sun. But that same sun did terrible things to the screen. A black splotch in the center of the LCD is the telltale sign of a burned Game Boy. You might think that screen replacement is the only option, but [The Retro Future] shows us how to repair this issue.

A reflective LCD is a layer cake made up of polarizers, two panes of glass, and a reflector. The burns often seen on Game Boy screens usually are in the polarizer and the optically clear glue which attaches the plastic polarizer to the glass. We’re guessing these burns happen when someone leaves their Game Boy out in the sun. Between the sun rays directly striking the top polarizer and the rays bounced back from the reflector at the rear of the screen, that poor polarizer doesn’t stand a chance.

Repairing the burn is a delicate operation, as one false move could crack the thin LCD glass. The first step is to carefully peel off the burned polarizer. This leaves a mess of dried glue, which can be scraped off or dissolved with alcohol. A new linear polarizer can then be placed on the front of the screen. [The Retro Future] chose not to glue the polarizer, but we’re betting some UV cure LOCA (Liquid Optically Clear Adhesive) from a cell phone screen protector would do the trick.

If you love the look of the classic Game Boy, but want to play just about any classic game, grab a Raspberry Pi zero, and build a retro Pi Boy.

Continue reading “Repairing A Sunburned Game Boy Screen”

Counting Is For Sheep: Use A Light To Fall Asleep

How do you get to sleep at night? For some of us, it can be the most difficult thing we do all day. Worrying about falling asleep and letting other intrusive thoughts in night after night only compounds the problem, as less sleep leads to depression which (for us) leads to even less sleep. We lay there, trapped inside a vortex of churning thoughts, imprisoned in a mind that feels like it’s malfunctioning and half-wishing for a future where instructor-led meditation videos can be beamed to the insides of our eyelids. In the meantime, there is FADing, the Fall Asleep Device.

FADing takes its cues from a relaxation technique that uses light to focus your attention and control your breathing. The light’s intensity waxes and wanes on a schedule designed to get you down from the average eleven breaths per minute to a zen-like six breaths per minute. You surrender to the light, breathing in as it intensifies and breathing out as it fades. There are commercial products that bring this technique to the bedroom, but they aren’t cheap and don’t offer much control. Fail to fall asleep in the prescribed window and you’re back to square one with one more thing to think about: buyer’s remorse.

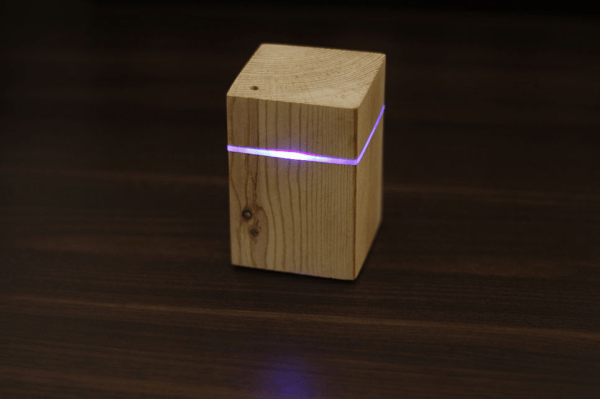
[Youz] was inspired by these devices but dissatisfied with the price tag and lack of options, so he created his own version with a flexible window of operation that appeals to both back- and side-sleepers. It uses an Arduino Nano and two momentaries to control two LEDs, a relay to hold the power after startup, a 9V, and a diode to protect the Nano. One LED projects on the ceiling, and the other radiates through a slice of acrylic which has been shaded blue. One button is for power, and the other lets you add time by two-minute increments. You can see the build video after the break and then tell us how you’d do it with a 555, a coin cell, and a chunk of uranium glass in the comments.

Once you can focus on your breathing without a light, reuse that Nano to measure the quality of all that sleep you’re getting.

Continue reading “Counting Is For Sheep: Use A Light To Fall Asleep”

Students Hack An Unusual Violin

[Sean Riley] is a violinist who had a problem. He wanted to play one particular piece, but he couldn’t. It wasn’t that he lacked the skill — he a doctoral student at the University of Texas and has two degrees in violin performance from The Julliard School. The problem was that “The Dharma at Big Sur” by [John Adams] is made for an instrument with six strings, while most violins only have four. So he did what any of us would do. He stopped by the local hackerspace and fabricated one. You can hear (and see) [Sean] performing with the instrument in the video, below.

The University of Texas operates “The Foundry” which is a hackerspace with all the usual items: laser cutters, 3D printers, and the like. It is open to all their students and staff. [Sean] needed some help with the engineering, and was lucky to find a mechanical engineering senior, [Daniel Goodwin], working at The Foundry.

Continue reading “Students Hack An Unusual Violin”

Drink Lots Of Beer To Raise Your Monopole

When we published a piece about an ADS-B antenna using a Coke can as a groundplane, Hackaday reader [2ftg] got in contact with us about something with a bit more… stature.

A monopole groundplane antenna is a single vertical conductor mounted on an insulator and rising up above a conductive groundplane. In radio terms the groundplane is supposed to look as something of a mirror, to provide a reflection of what would come from the other half of a dipole were there to be two conductors. You can use anything conductive as your monopole, a piece of wire, (in radio amateur humour) a piece of wet string, or even beer cans. “Beer cans?” you ask incredulously, expecting this to be another joke. Yes, beer cans, and [2ftg] has been good enough to supply us with a few examples. The first is a 57-foot stack of them welded together in the 1950s for use on the 80 metre band ( we suspect steel cans may have been more common than aluminum back then), the second is a more modest erection for the 2 metre band, and the final one consists of photographs only of an HF version that looks a little wavy and whose cans are a little less beery.

The reporting in the 1950s piece is rather cheesy, but does give a reasonable description of it requiring welding rods as reinforcement. It also gives evidence of the antenna’s effectiveness, showing that it could work the world. Hardly surprising, given that a decent monopole is a decent monopole no matter how many pints of ale you have dispatched in its making.

The Coke can ADSB can be seen in all its glory here, and if all this amateur radio business sounds interesting, here’s an introduction.

Beer cans picture: Visitor7 [CC BY-SA 3.0].

The Coolest Electronic Toys You’ll See At NAMM

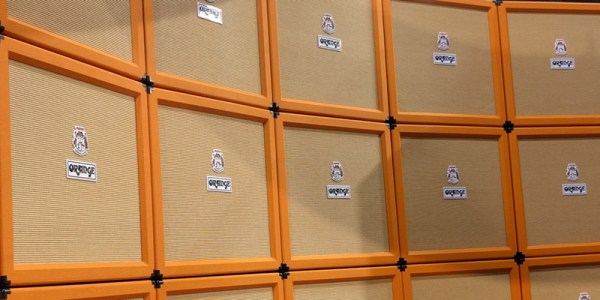
Winter NAMM is the world’s largest trade show for musical instrument makers. It is a gear head’s paradise, filled to the brim with guitars, synths, amps, MIDI controllers, an impossibly loud section filled with drums, ukuleles, and all sorts of electronic noisemakers that generate bleeps and bloops. Think of it as CES, only with products people want to buy. We’re reporting no one has yet stuffed Alexa into a guitar pedal, by the way.

As with all trade shows, the newest gear is out, and it’s full of tech that will make your head spin. NAMM is the expression of an entire industry, and with that comes technical innovation. What was the coolest, newest stuff at NAMM? And what can hackers learn from big industry? There’s some cool stuff here, and a surprising amount we can use.

Continue reading “The Coolest Electronic Toys You’ll See At NAMM”

Home Brew Solar Cells For The Chemically Curious

The idea of making your own semiconductors from scratch would be more attractive if it weren’t for the expensive equipment and noxious chemicals required for silicon fabrication. But simple semiconductors can be cooked up at home without anything fancy, and they can actually yield pretty good results.

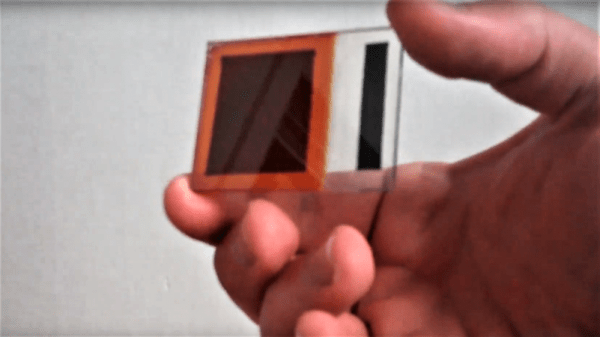
Granted, [Simplifier] has been working on the method detailed in the video below for about a year, and a look at his post on copper oxide thin-film solar cells reveals a meticulous approach to optimize everything. He started with regular window glass, heated over a propane burner and sprayed with a tin oxide solution to make it conductive while remaining transparent. The N-type layer was sprayed on next in the form of zinc oxide doped with magnesium. Copper oxide, the P-type layer, was electroplated on next, followed by a quick dip in copper sulfide to act as another transparent conductor. A conductive compound of sodium silicate and graphite was layered on the back to form the electrical contacts. The cell worked pretty well — 525 mV open circuit voltage and 6.5 mA short-circuit current. Not bad for home brewed.

If you want to replicate [Simplifier]’s methods, you’ll find his ample documentation of his site. Of course, if you yearn for DIY silicon semiconductors, there’s a fab for that, too.

Continue reading “Home Brew Solar Cells For The Chemically Curious”