Watering circuit

Solar Powered Circuit Waters Your Plants


If you want your plants to stay healthy, you need to make sure they stay watered. [Dimbit] decided to build his own solar powered circuit to help automatically keep his plants healthy. Like many things, there is more than one way to skin this cat. [Dimbit] had seen other similar projects before, but he wanted to make his smarter than the average watering project. He also wanted it to use very little energy.

[Dimbit] first tackled the power supply. He suspected he wouldn’t need much more than 5V for his project. He was able to build his own solar power supply by using four off-the-shelf solar garden lamps. These lamps each have their own low quality solar panel and AAA NiMH cell. [Dimbit] designed and 3D printed his own plastic stand to hold all of the solar cells in place. All of the cells and batteries are connected in series to increase the voltage.

Next [Dimbit] needed an electronically controllable water valve. He looked around but was unable to find anything readily available that would work with very little energy. He tried all different combinations of custom parts and off-the-shelf parts but just couldn’t make something with a perfect seal. The solution came from an unlikely source.

One day, when [Dimbit] ran out of laundry detergent, he noticed that the detergent bottle cap had a perfect hole that should be sealable with a steel ball bearing. He then designed his own electromagnet using a bolt, some magnet wire, and a custom 3D printed housing. This all fit together with the detergent cap to make a functional low power water valve.

The actual circuit runs on a Microchip PIC microcontroller. The system is designed to sleep for approximately nine minutes at a time. After the sleep cycle, it wakes up and tests a probe that sits in the soil. If the resistance is low enough, the PIC knows that the plants need water. It then opens the custom valve to release about two teaspoons of water from a gravity-fed system. After a few cycles, even very dry soil can reach the correct moisture level. Be sure to watch the video of the functioning system below. Continue reading “Solar Powered Circuit Waters Your Plants”

Printing In Metal With A MIG Welder

Whenever the question of metal 3D printers comes up, someone always chimes in that a MIG welder connected to a normal 3D printer would work great. A bit of research would tell this person that’s already been done, but some confirmation and replication is nice. A few students at TU Delft University strapped a welder to a normal, off-the-shelf 3D printer and made a few simple shapes.

This project builds on the work of [Joshua Pearce] et al. at Michigan Tech where an MIG welder and delta bot was used to lay down rather complex shapes on a metal plate substrate. The team at TU Delft used a cartesian bot – a Prusa i3 – for their replication because of the sheer mass of moving a metal build plate, firebricks, and welder around.

In the first few prints on their machine, the team was able to lay down enough metal to build a vertical wall. It’s not much, and to turn this into a finished part would require some machining, but these are only the beginning steps of what could become a legitimate way of creating metal parts. Video below.

Continue reading “Printing In Metal With A MIG Welder”

Making A Speaker With Resin, Magnets, And Wire

A speaker is just about the simplest electronic component possible, just barely more complex than resistors and wire. They’re also highly variable in their properties, either in size, shape, frequency response, and impedance. Obviously, building custom speakers would be of interest to a lot of people, but there aren’t many people out there doing it. [Madaeon] is one of those people. He created a speaker from scratch, using nothing but magnets, wire, and a bit of UV curing resin.

The frame of the speaker contains a magnet, and the coil of wire is carefully attached to the 0.1mm thin speaker cone with a bit of UV curing resin. All the parts are available on Thingiverse, but you will need a UV resin printer with a low layer height to print this thing out.

The speaker was built by [madaeon] as a demonstration of what the printer he built can do. It’s a fairly standard resin-based 3D printer built around a DLP projector. It’s also cheap, and unlike some other cheap resin-based 3D printers, there’s a reasonable likelihood his will ship within the next few months.

Make Flexible PCBs With Your 3D Printer

The last few years have seen great strides in budget printed circuit board manufacturing. These days you can have boards made in a week for only a few dollars a square inch. Flexible PCBs still tend to be rather expensive though. [Mikey77] is changing that by making flex circuits at home with his 3D printer. [Mikey77] utilized one of the properties of Ninjaflex Thermoplastic Elastomer (TPE) filament – it sticks to bare copper!

The TPE filament acts as an etch resist, similar to methods using laser printer toner. For a substrate, [Mikey77] lists 3 options:

.004″ thick “Scissor cut” copper clad board from Electronics Goldmine

.002″ thick pure copper polyester taffeta fabric from lessEMF.com

<.001″ Pyralux material from Adafruit, which is one of the materials used to make professional flex PCBs.

A bit of spray adhesive will hold the Flex PCB down on the printer’s bed. The only issue is convincing the printer to print a few thousandths of an inch higher than the actual bed level. Rather than change the home position on his Z axis, [Mikey77] used AutoDesk 123D to create 3D PCB designs. Each of his .stl files has a “spacer bar”, which sits at the bed level. The actual tracks to be printed are in the air a few thousandths of an inch above the bed – exactly the thickness of the substrate material. The printer prints the spacer bar on the bed, then raises its Z height and prints on the flexible PCB material. We’re sure that forcing the printer to print in mid-air like this would cause some printer software to throw errors, but the system worked for [Mikey77] and his Makerbot.

Once the designs have been printed, the boards are etched with standard etching solutions such as ferric chloride. Be careful though – these thin substrates can etch much faster than regular PCB.

The Triple Delta Robot Arm (and Leg)

delta By now you’d think we’ve seen just about every means of robotic actuator possible. We have Cartesian bots, Stewart platforms, SCARA bots, Delta bots, and even some exceedingly bizarre linkages from [Nicholas Seward]. We’re not done with odd robotic arms, it seems, and now we have Delta-ish robots that can move outside their minimum enclosed volume. They’re fresh from the workshop of [Aad van der Geest], and he’s calling them double and triple Deltas.

Previous Delta robots have used three universal joints to move the end effector up and down, and side to side. They’re extremely fast and are a great design for 3D printers and pick and place machines, but they do have a limitation: the tip of a single Delta can not move much further than the base of the robot.

By adding more parallelograms to a Delta, [Aad] greatly increases working volume of a his robots. One of the suggested uses for this style of bot is for palletizers, demonstrated in the video below by stacking Jenga blocks. There is another very interesting application: legs. There’s footage of a small, simple triple Delta scooting around the floor, supported by wire training wheels below. It makes a good cat toy, but we’d love to see a bipedal robot with this style of legs.

Continue reading “The Triple Delta Robot Arm (and Leg)”

CNC Router Converted to 3D Printer

CNC Router Converted To 3D Printer

3D Printers have come down significantly in price over the past few years. Nowadays it is even possible to get a 3D printer kit for between $200-300. It’s arguable how well these inexpensive printers perform. [Jon] wanted a printer capable of quality prints without breaking the bank. After researching the different RepRap types that are available he concluded he really wasn’t up for a full machine build. He had previously built a CNC Router and decided it was best to add a hot end and extruder to the already built 3 axis frame.

The CNC Router frame is made from aluminum, is very rigid and has a 2′ by 2′ cutting area. All axes glide smoothly on THK linear bearings and are powered by NEMA 23 motors driven by Gecko 540 stepper drivers. The router was removed from the machine but the mounting bracket was left on. The bracket was then modified to hold the extruder and hot end. With 3D Printers there is typically a control board specifically designed for the task with dedicated outputs to control the temperature of the hot end. Since [Jon] already had the electronics set up for the router, he didn’t need a specialized 3D Printer control board. What he does need is a way to control the temperature of the hot end and he did that by using a stand-alone PID. The PID is set manually and provides no feedback to the computer or control board.

Huge Whistle[Jon] used liked Mach3 for controlling his CNC Router so he stuck with it for printing. He’s tried a few slicers but it seems Slic3r works the best for his setup. Once the g-code is generated it is run though Mach3 to control the machine. [Jon] admits that he has a way to go with tweaking the settings and that the print speed is slower than most print-only machines due to the mass of the frame’s gantry and carriage. Even so, his huge whistle print looks pretty darn good. Check it out in the video after the break…

Continue reading “CNC Router Converted To 3D Printer”

THP Hacker Bio: Neil Jansen

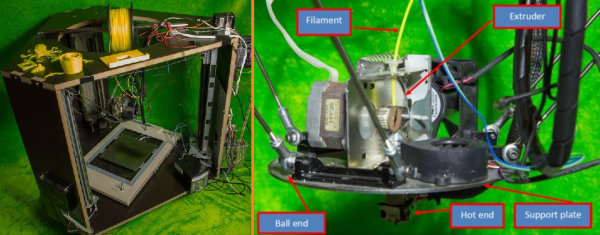
If we were running a contest to give away a trip to space for building the most innovative open hardware project a few years ago, the winner would inevitably be a 3D printer. Times have changed, 3D printing is reaching the limits of what can be done with simple plastic extrusion, and there are new hardware challenges to be conquered. One of the challenges facing hardware designers is the ability to create and assemble electronic circuits quickly. For that, there are a few pick and place machines being developed, the lowest cost being the FirePick Delta. It sells itself as a $300 pick and place machine borrowing heavily from the RepRap project, enabling tinkerers and engineers to assemble PCBs quickly.

[Neil Jansen] is the project lead for the FirePick Delta, and along with team members ranging from software developers in the bay area, to electronics technicians and high school students, they’ve created what will become the lowest cost and most capable pick and place machine available. Already the machine has tape feeders, tray feeders, a vision system, and modules to dispense solder paste. It’s an astonishing accomplishment, and were it not for some damage in shipping, we would have a video of [Neil] demoing the FirePick at Maker Faire NY.

In lieu of that, we do have a bio on [Neil] and what challenges he’s faced in building the FirePick. You can read that below, or check out their second demo video for The Hackaday Prize:

https://www.youtube.com/watch?v=46pLeLBYVTs

Continue reading “THP Hacker Bio: Neil Jansen”