Tearing Apart A Hot Glue Gun For A 3D Printer

If you’re building a 3D printer, the most complicated part is the extruder. This part uses a series of gears to pull plastic filament off of a spool, heats it up, and squirts it out in a manner precise enough to build objects one layer at a time. [Chris] made his own extruder out of a hot glue gun and made it so simple we’re surprised we haven’t seen this build before.

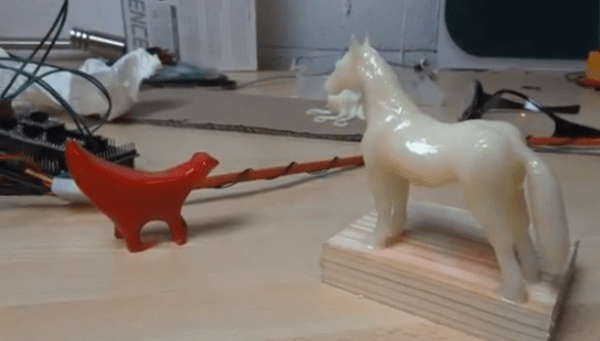
The basic operations of a plastic extruder – pushing a rod of plastic through a heated nozzle – already exists in a hot glue gun available for $3 at WalMart. To build his printer, [Chris] tor apart the hot glue gun and mounted the nozzle on a piece of plywood. The hot glue sticks are fed into the nozzle with the help of a 3D printed gear and a stepper motor driver.

After the break, you can see [Chris]’s hot glue gun RepRap printing a 10cm cube. It’s not fast, but the quality is exceptional, especially considering he made it out of a hot glue gun.

Continue reading “Tearing Apart A Hot Glue Gun For A 3D Printer”

A Personal Manufacturing Stack Exchange

Over on Stack Exchange, there’s a proposal for a new CNC/3D printer site. It’s a personal manufacturing stack exchange, and hopefully we’ll see some awesome discussion when it’s eventually created.

Stack Exchange is already well-known for hosting the most useful programming site as well as awesome sites/forums covering everything from LaTeX to grammar. The proposed Personal Manufacturing site is sure to provide a ton of advice and discussion covering the hardware, software, electronics, and toolchains of CNC routers, RepRaps and mills.

The personal manufacturing stack exchange hasn’t been created yet – a few more people still need to commit to use it. Once that’s done, though, we’re sure to see a lot of very helpful advice and discussion from the Stack Exchange community.

Kudos to [Michael] for sending this in.

Your Face In Chocolate

We think in might be absurdly vain, but wouldn’t it be fun to give everyone in your family a chocolate modeled after your mug this holiday season? [Eok.gnah] has already worked out a system to make this possible. It consists of three parts: scanning your head and building a 3D model from it, using that model to print a mold, and molding the chocolate itself.

He used 123D to scan his face. No mention of hardware but this face scanning rig would be perfect for it. He then cleaned up the input and used it to make a mold model by subtracting his face from a cube in OpenSCAD. That needs to be sliced into layers for the 3D printer, and he used the Slic3r program which has been gaining popularity. Finally the mold was printed and the face was cast with molten chocolate. We’d suggest using a random orbital sander (without sand paper) to vibrate the bottom of the mold. This would have helped to evacuate the bubble that messed up his nose.

You know, it doesn’t have to be your face. It could be another body part, even an internal one… like your brain!

3D Printed Circuit Boards Using Conductive Ink

The thought of using a 3D printer to fabricate PCBs is tantalizing and the good news is that it’s a reality. This project shows that it’s possible to use a special printer head to apply traces to an extruded substrate.

This is similar to the point-to-point 3D printer circuits with one big upgrade. Now the traces can be printed directly onto the ABS using conductive ink. The process starts with the design files, which are used to model a substrate that has a trench for each trace. A Makerbot then prints out this model. Once complete, the ABS extruder head is swapped for a special ink head. Each trace is then filled with the conductive fluid, which is kept in place by the trench walls until it can dry. We think this improves on the trace printing techniques we’ve seen before because it doesn’t require your printer heat to use molten metals.

The circuit above uses printed traces for the high and low side of an LED circuit. It’s a bit rough at the edges, but it shows a lot of promise. Don’t miss the demo video embedded after the jump.

Continue reading “3D Printed Circuit Boards Using Conductive Ink”

Win $40,000 For Squirting Plastic Out Of A Nozzle

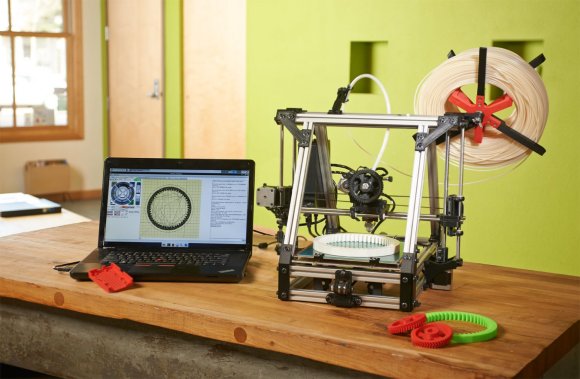
3D printers such as the RepRap and Makerbot turn spools of plastic filament into just about any object imaginable. There’s a problem though: this filament costs about $40 a kilogram, and raw plastic pellets cost about 1/10th of that. Obviously, there’s a lot of room for improvement. The folks at Inventables are throwing $40,000 at the problem in a contest to build a machine that takes plastic pellets and turns it into usable plastic filament.

The object is simple: build a device that takes ABS or PLA pellets and turns them into a 1.75mm filament. The machine has to cost less than $250, be able to add colorant to the plastic, and be usable in a 3D printer. The winner gets $40,000, a laser cutter, a 3D printer, and a CNC milling machine courtesy of Inventables. Sign up on the official contest website and don’t be shy about sending your progress into the Hackaday tip line

If you’d like to get started, here’s a great page that goes over the basics of plastic extrusion, and a few attempts (1, 2) from [Adrian Bowyer] and [Forrest Higgs] that show exactly how hard this is. There’s also the Filabot that had a successful Kickstarter, but there’s apparently been no (or very limited) progress in the four months since the Kickstarter. I’ve even given this idea a go, but am currently stuck at manufacturing a proper auger. To put this in perspective, this is the moonshot of the current crop of 3D printers; a simple device to lower the barrier of entry to 3D printing is desperately needed, and we’ve got to give props to the Inventables crew for putting this contest together.

Hackaday Links: May 21, 2012

Turning anything into a touch sensor

Makey Makey is a small board with a USB plug and bunch of contact points for alligator clips. Plug the Makey into your computer and attach just about anything to the contacts, and you can make anything into a video game controller, a keyboard, a piano, or pretty much anything you can imagine. If [Sprite_tm] copied it, you know it has to be cool.

RepRaps will finally cost a million dollars

The Pentagon is throwing money at 3D printers. It’s “only” $60 Million the DoD is putting into 3d printer research, but hopefully our most brilliant researchers will help refine some of the ‘unsolved problems’ – like metal and circuit printing – the 3D printer community is facing.

Getting started with FPGAs

[Tim] found a neat little $40 FPGA board aimed right at the hobby hacker. The good news: It’s compatible with Arduino shields, and it’s very cheap. The bad news: it only has 1280 logic cells, so you probably won’t be emulating CPUs on this thing. If anyone has a teardown / project with this board, send it in.

Improving a Bluetooth dongle with a bit of wire

Unsurprisingly, the extremely cheap Bluetooth dongle [Mike] bought on eBay didn’t have great reception or range. No problem, because you can just replace the internal antenna with a piece of wire cut to length. Now bluetooth devices are recognized instantly, and there are no Bluetooth ‘dead spots’ around [Mike]’s computer.

Come to France, make stuff

The Toulouse Hackerspace is having a little shindig this coming weekend (May 25-27) featuring a conference, workshop, concerts and performances. If you’re in the area, drop on by,

Printing Circuitry On A RepRap

Over on the RepRap blog, [Rhys] has been experimenting with molten metal to build circuits with the RepRap.

Last June, [Rhys] found a neat alloy made of Tin, Bismuth, and a little bit of Indium that melts at around 130° C, and has just the right properties to be extruded with a standard RepRap setup. The results were encouraging, but the molten metal quickly dissolved the brass and aluminum nozzles [Rhys] was pushing liquid metal through.

The solution to this problem was solved by anodizing the heck out of a RepRap nozzle to make a hard, protective oxide layer. Already [Rhys] has logged hundreds of hours squirting molten metal out of his RepRap with no signs of any damage to the nozzle.

Since [Rhys] figured out how to print in metal, he whipped up an extremely minimal Sanguino board. You can see this RepRapped PCB running a LED blink program after the break. Now to work on the RepRap pick and place…

Continue reading “Printing Circuitry On A RepRap”