Boat Anchor Twins Get A Little Digital Help Staying On Frequency

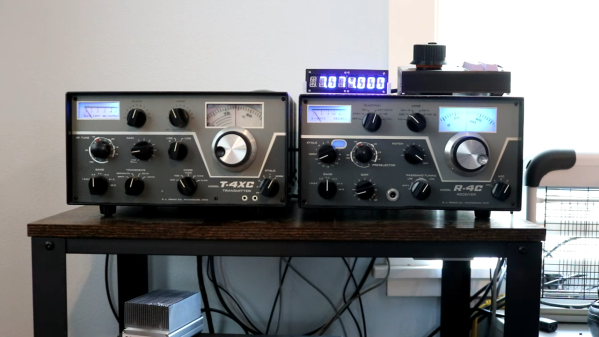
In the ham radio trade, gear such as the old Drake units [Dr. Scott M. Baker] has in his radio shack are often referred to as “boat anchors.” It refers to big, heavy radios that were perhaps a bit overengineered compared to the state of the art at the time they were designed, and it’s actually a shame that the name has taken on something of a pejorative connotation, since some of this gear is rock solid half a century or more after it was built.

But older gear is often harder to use, at least compared to the newer radios with microcontrollers and more stable oscillators inside. To make his 1970s-era Drake “Twins” setup of separate but linked receiver and transmitter a little more fun to use, [Scott] came up with this neat Raspberry Pi-based DDS-VFO project to keep his boat anchors afloat. Compared to the original mechanically tuned variable frequency oscillator in the Drake receiver, the direct-digital synthesis method promises more stability, meaning less knob-nudging to stay on frequency.

The hardware used for the DDS-VFO is actually pretty simple — just a Raspberry Pi Zero W driving an AD9850-based signal-generator module. Sending the signal to the Twins was another matter. That was done by tapping into the injection cable linking both units, which meant a few circuit complications to deal with signal attenuation. [Scott] also added amenities like a digital frequency display, optical encoder with crank-style knob to change frequency, and a host of Cherry MX keyswitches for quick access to different features.

From the look of the video below, the Twins are now rock-solid and a lot easier to use. This project is loosely based on a recent panadapter project [Scott] undertook for the receiver side of the Twins.

Continue reading “Boat Anchor Twins Get A Little Digital Help Staying On Frequency”

Silicon Bugs In The FTDI FT232R, And A Tidy RF VCO Project

[Scott Harden] wrote in to tell us of some success he’s having using the FT232 chip to speak SPI directly from his laptop to a AD98850 digital signal generator. At least that was his destination. But as so often in life, more than half the fun was getting there, finding some still-unsolved silicon bugs, and (after simply swapping chips for one that works) potting it with hot glue, putting it in a nice box, and putting it up on the shelf.

In principle, the FTDI FT232 series of chips has a bit-bang mode that allows you to control the individual pins from a fairly simple API on your target computer, using their drivers and without installing anything on basically any platform. We wrote this feature up way back in 2009, and [Scott] was asking himself why he doesn’t see more hacks taking advantage of bit-bang mode.

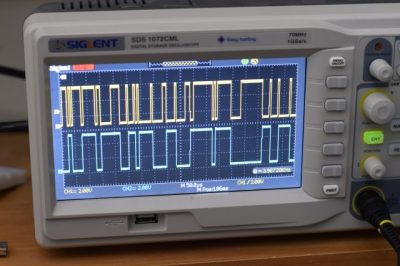
“Square” waves

Then he answered his own question the hard way, by spending hours “debugging” his code until he stumbled on the FTDI errata note (PDF), where they admit that bit-bang mode doesn’t get timings right at all on the FT232R and FT232RL parts. FTDI has made claims that they fixed the bug in subsequent chip revisions, but the community has not been able to confirm it. If you want to use bit-bang mode, which is plenty cool, steer clear of the FT232R chips — the ones found in the ever-popular FTDI cables and many adapter dongles.

The good news here is twofold. First, now you know. Second, bit-bang mode is tremendously useful and it works with other chips from the vendor. Particularly, the FT232H and FT230X chips work just fine, among others. And [Scott] got his command-line controlled digital VCO up and running. All’s well that ends well?

We’ll wrap up with questions for the comment section. Do other manufacturers’ cheap USB-serial chips have an easily accessible bit-bang mode? Are any of you using USB bit-bang anyway? If so, what for?

$40 Antenna Analyzer With Arduino And AD9850

If you are a hacker, you might consider ham radio operators as innovative. Most people, however, just see them as cheap. So it is no surprise that hams like [jmharvey] will build an antenna analyzer from a DDS module and an Arduino instead of dropping a few hundred dollars on a commercial unit. As he points out, you probably only need an analyzer for a day or two while you set up an antenna. Unless you are a big time antenna builder, the unit will then sit idle on the shelf (or will wind up on loan to hams even cheaper than you are).

The design is rooted in another proven design, but changed to take advantage of parts he happened to have on hand. Although the build is on a universal circuit board, [jmharvey] used Eagle to lay out the circuit as though it were a PCB. Since placement can be important with an RF circuit, this isn’t a bad idea. It’s always easier to move stuff around on the screen than on the perf board.

Since this is a no frills, unit, you are expected to grab the output from the Arduino and manually put it in a spreadsheet to plot the results. There is another version of the Arduino code that drives an OLED screen, although you still need a PC to kick the process off. One interesting feature of the Arduino code is how it deals with the nonlinear nature of the diodes used in the circuit. After plotting the values with known loads, [jmharvey] broke the diode operation into three regions and used different equations for each region. Even so, he warns that readings higher than 1:1 VSWR are only accurate to 10% or 20% – still good enough for ham shack use.

If you want an antenna analyzer for $40 (or less, if you have a good stock of parts) this looks like a worthwhile project. If, however, you want to repurpose it to Rickroll your neighbor’s AM radio, you might want to go with the commercial unit.

Click past the break to see the analyzer in action.

Continue reading “$40 Antenna Analyzer With Arduino And AD9850”

Arduinofied QRP Radio Beacon

moxpd

A while back, [m0xpd] picked up an unbearably cheap AD9850 DDS module from ebay. He turned this in to a Raspberry Pi-powered radio beacon, but like so many builds that grace our pages, the trolls didn’t like using such an overpowered computer for such a simple device. To keep those trolls quiet, [m0xpd] is back again, this time using the AD9850 DDS module as a radio beacon with an Arduino.

The previous incarnation of this build used a Raspberry Pi, and as a consequence needed a level converter. This was thrown out as [m0xpd]’s own Arduino clone, the WOTDUINO – pronounced, ‘what do I know’ – is able to handle the 5 Volt IO of the AD9850.

In addition to fabbing a shield for the DDS module, [m0xpd] also constructed a transmitter shield to amplify the signal and allow the ‘duino to key out a few simple messages. It’s a quite capable device – one of [m0xpd]’s messages traveled from merry olde England to Arizona, his best ever westward distance.

Raspberry Pi Used As A Beacon Transmitter

rpi-beacon-transmitter

[m0xpd] got his hands on an inexpensive AD9850 DDS Module from eBay but needed a way to control it. He took inspiration from the projects that used a PIC microcontroller, but decided to add his own twist by using a Raspberry Pi to build a multi-mode beacon transmitter.

At the center of this breadboarded circuit lies the green AD9850 module. To its left is a level converter he built to get the 3.3V levels from the RPi board to work with the rest of the 5V hardware. The signal then feeds into a QRP amplifier and a low pass filter.

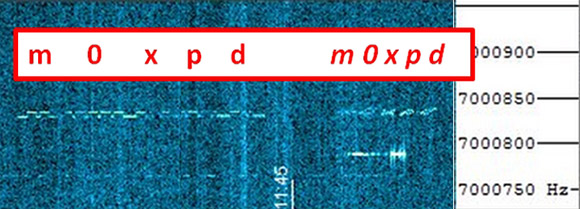
He didn’t start from square one when it came time to write the code for the RPi. Instead he grabbed an Arduino sketch for the very same DDS and ported it over to Python. The first test signal was his call sign sent in Morse code at QRSS speeds. But he also managed to get Hellschreiber messages working, making it a multiple-mode device.

[via Solder Smoke]