The Adafruit Feather Is A Thing

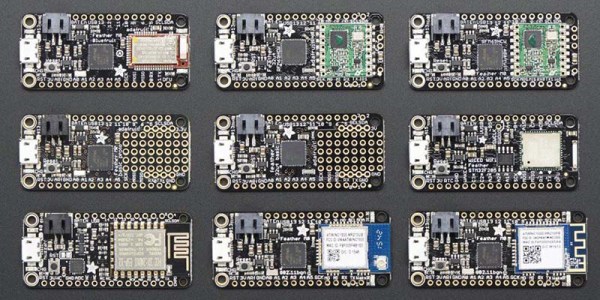
A few years ago, Adafruit launched the Feather 32u4 Basic Proto. This tiny development board featured — as you would expect — an ATMega32u4 microcontroller, a USB port, and a battery charging circuit for tiny LiPo batteries. It was, effectively, a small Arduino clone with a little bit of extra circuitry that made it great for portable and wearable projects. In the years since, and as Adafruit has recently pointed out, the Adafruit Feather has recently become a thing. This is a new standard. Maxim is producing compatible ‘wings’ or shields. If you’re in San Francisco, the streets are littered with Feather-compatible boards. What’s the deal with these boards, and why are there so many of them?

The reason for Adafruit’s introduction of the Feather format was the vast array of shields, hats, capes, clicks, props, booster packs, and various other standards. The idea was to bring various chipsets under one roof, give them a battery charging circuit, and not have a form factor that is as huge as the standard Arduino. The Feather spec was finalized and now we have three-phase energy monitors, a tiny little game console, LoRaWAN Feathers, and CAN controllers.

Of course, the Feather format isn’t just limited to Adafruit products and indie developers. The recently introduced Particle hardware is built on the Feather format, giving cellular connectivity to this better-than-Arduino format. Maxim is producing some development boards with the same format.

So, do we finally have a form factor for one-off embedded development that isn’t as huge or as wonky as the gigantic Arduino with weirdly offset headers? It seems so.

On A Quest For The Perfect Numpad

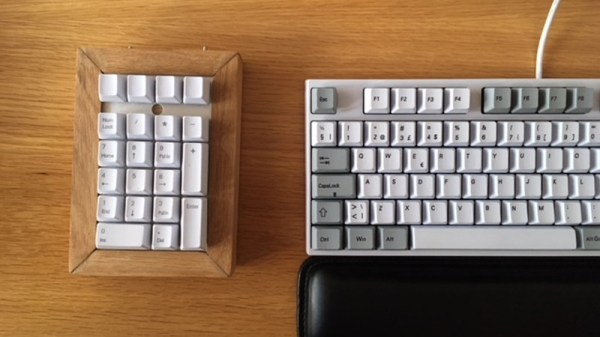
Often times, the only way to get exactly what you want in a device is to just build it yourself. Well, maybe not the only way, but we’ve all certainly told ourselves it was the only way enough that it might as well be true. We don’t know if the DIY imperative felt by [Olav Vatne] to construct his own Bluetooth mechanical number pad was genuine or self-imposed, but in either event, we’re glad he documented the process for our viewing pleasure.

Broken up into three separate posts on his blog, the construction of his custom numpad starts innocently enough with buying a kit from AliExpress. In a rather bizarre twist, the kit arrived assembled, which lead to an arduous period of desoldering to separate all the principle parts [Olav] wanted in the first place. So much for saving time.

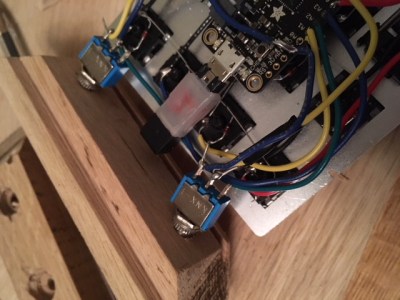
Once he freed all the mechanical keys from the kit’s PCB, he went to town hand-wiring the matrix. After testing to make sure all the keys were wired correctly, the matrix got connected to an Adafruit Feather 32u4 Bluefruit. With the electronics sorted, [Olav] moved on to the software side. Here he was able to accomplish one of his primary goals, having a numpad that works over both USB and Bluetooth.

The last step of the process was creating the wooden enclosure. It basically goes together like a picture frame, with special care given to make sure there are appropriate openings in the case for the switches and USB port to pop through without ruining the overall look of the device.

Thanks to cheap USB-capable microcontrollers, hand-made artisan keyboards are now a thing. This project is a nice way to get started with custom input devices, and it only gets better from here.

Solar Tide Clock Keeps Track Of The Moon

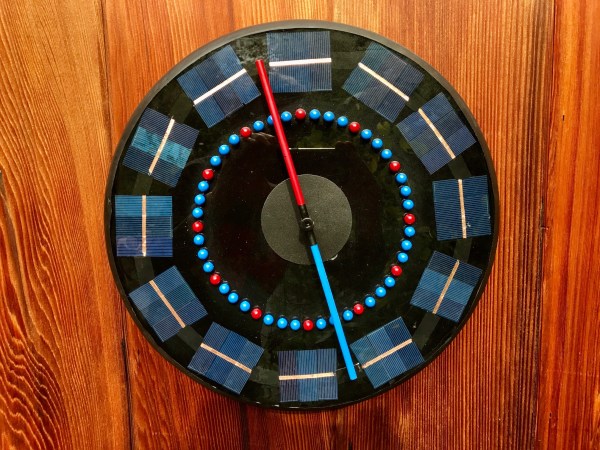
Old fashioned tide clocks were an attempt to predict high tide by timing the rising and setting of the moon. When you looked at one you could see how many hours until the next high tide. [rabbitcreek] wanted to make his own version of the tide clock that does a better job of predicting the actual high tide than those old clocks, which were essentially glorified timers tuned to the moon’s phases.

[rabbitcreek] based his the tide prediction software off of [Luke Miller’s] Tide Clock, which applies location-specific adjustments to the standard lunar clock, taking into consideration such factors as the geographic features (basin depth, etc.) that modify the default timing. [Miller]’s Arduino code includes a library of common locations organized by NOAA station number.

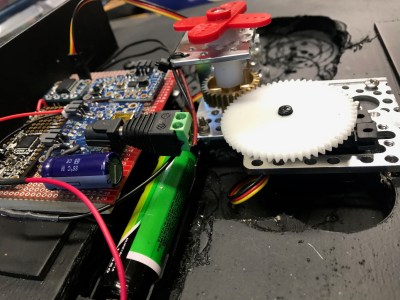
[rabbitcreek]’s project consists of a Adafruit Feather board hooked up to a DS3231 RTC breakout and a HS-225BB servo, which turns the clock’s hand. It’s an 180-degree servo, attached to a hacked-down Actobotics gearbox gearing the servo down 2:1 to permit 360 degrees of movement.

He also wanted his creation to be left to operate unattended for years, theoretically — so solar power was a natch. The face of the clock consists of individual wavers of solar panel glued into a huge clock-like array. The solar cells feed into an Adafruit PowerBoost 500, a TPL5111 low power timer breakout, and a LiPo battery for when it’s dark out.

If you’re looking for more solar clocks check out this one that uses capacitors as hour markers.

Sniff Your Local LoRa Packets

As the LoRa low-bandwidth networking technology in license-free spectrum has gained traction on the wave of IoT frenzy, LoRa networks have started to appear in all sorts of unexpected places. Sometimes they are open networks such as The Things Network, other times they are commercially available networks, and then, of course, there are entirely private LoRa installations.

If you are interested in using LoRa on a particular site, it’s an interesting exercise to find out what LoRa traffic already exists, and to that end [Joe Broxson] has put together a useful little device. Hardware wise it’s an Adafruit Cortex M0 Feather with onboard LoRa module, paired with a TFT FeatherWing for display, and software wise it scans a set of available frequencies and posts any packets it finds to the scrolling display. It also has the neat feature of logging packets in detail to an SD card for later analysis. The whole is enclosed in a 3D printed case from an Adafruit design and makes for a very attractive self-contained unit.

We’ve featured quite a few LoRa projects here, including this one with a Raspberry Pi Compute module in a remote display. Of more relevance in a LoRa testing sense though is this look at LoRa range testing.

Hackaday Prize Best Product Finalist: PewPew

This year for the Hackaday Prize, we’re doing something very, very cool. We’re encouraging hardware entrepreneurs to come up with the next big electronic thing. We’re giving the Best Product in the Hackaday Prize $30,000, and an opportunity to work in a lab filled with tools to turn that prototype into a marketable reality.

Last week, we announced the twenty finalists of the Hackaday Prize Best Product competition. There’s still a lot of work these hackers and tinkerers need to do before the final judging round, but until then we can start taking a look at what are already some of the finest products in this year’s Hackaday Prize.

For his entry into the Best Product finals, [Radomir] is working on a game machine. Consider this an educational toy. Game programming is hard, and some talent is required to go from the main loop to handling buttons to pushing pixels. This project is the minimal game machine. It’s a FeatherWing for Adafruit’s family of micro dev boards meant to teach PyGame programming.

On this board is an 8×8 matrix of bi-color LEDs, a few switches, resistors, and a chip that turns those LEDs into something that can be memory mapped. It’s simple, but that’s the point: it’s a minimum viable product to teach game programming.

Right now, the business plan is to develop games and examples for this add-on board, build a community, write a few tutorials, and sell a few of these boards on Tindie. From there, it’s just a matter of growing, and there are already plans for a PewPew wing with a TFT screen, an STM32 processor, and a tile and sprite engine built in. This could very well be the beginnings of a very cool educational toy, and we’re happy to have it as a finalist in the Best Product competition of the Hackaday Prize.