Pulling Display Data Off Of A Fitness Tracker

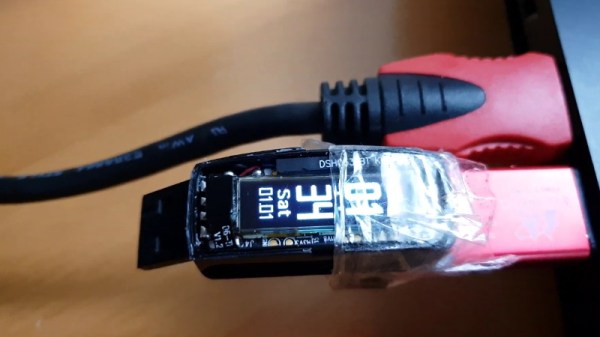
[Aaron Christophel] writes in with yet another clever hack for his D6 Fitness Tracker. Using OpenOCD and Pygame, he shows how you can pull data right off the tracker’s screen and sent it to the computer.

This one appealed to us for its brevity. First [Aaron] launches the OpenOCD server which connects to the D6. Then, a short Python script connects to the server through telnet, reads the screen data, and uses a look-up table to turn the data into a duplicate display on the PC screen. If you’re more of a visual learner, there’s a demonstration video after the break.

The D6 is a popular fitness tracker that’s often re-branded and sold at a very low cost. [Aaron] is a big fan of these Nordic nRF52 powered devices, and we’ve covered some of his hacks before. If you’d like to learn more about these interesting little devices there’s quite a write-up on their inner-workings here.

Continue reading “Pulling Display Data Off Of A Fitness Tracker”

A Retro Gaming Console For The New Generation

Ostensibly the ESPboy is an open-source hackable game engine built as an IoT platform for STEM education and play, but there’s no way [RomanS] could have been inspired by anything other than retro gaming consoles from the near past. For anyone who grew up playing with Tamagotchi pets or Palm Pilots, this project is going to be a major throwback.

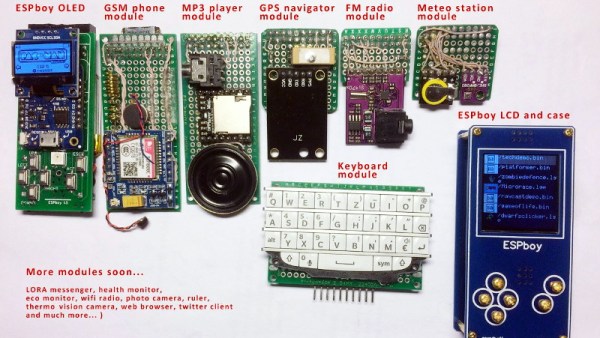
The Saint Petersburg-based microcontroller hobbyist utilizes a ESP8266 microcontroller to build a series of modules for different game play modes, including a TFT display, GSM phone, MP3 player, GPS navigator, FM radio, and keyboard module. He has plans to build even more modules, including a LoRa messenger and thermal camera, to really expand the system’s capabilities.

Since the board has built-in WiFi, firmware can be uploaded to the device without a wired connection and compiler. The nature of the project makes the board compatible with the Arduino IDE and Micropython, which makes hacking the software even easier.

A TP4056 battery charging module charges the LiPo, although depending on the battery capacity, the charging current (set by the R3 resistor on the controller) does require some change. A MCP4725 I2C DAC is used for smooth driving the LCD’s backlight. In order to extend the battery life, the battery controller uses sleep mode to periodically wake up to measure and send data, which allows it to extend its battery life without external power. There’s also transistor driven buzzers that provide a little extra feedback to the user when playing games, complete with a variable resistor to adjust the sound volume.

A number of free pins run along the periphery for connecting to other modules, including pins for GPIO extension, sensor adapters, connectors to addressable LEDs, and an extension slot for actuators. For anyone interested in making their own version of the ESPboy, the PCB schematics are accessible online.

Projects like the Arduboy have shown that a small microcontroller-based game system can be equal parts fun and educational, so we’ve been excited to see more of these types of projects popping up during the course of the 2019 Hackaday Prize.

Continue reading “A Retro Gaming Console For The New Generation”

OTA Flash Tool Makes Fitness Tracker Hacking More Accessible

Over the last several months, [Aaron Christophel] has been working on creating a custom firmware for cheap fitness trackers. His current target is the “D6 Tracker” from a company called MPOW, which can be had for as little as $7 USD. The ultimate goal is to make it so anyone will be able to write their own custom firmware for this gadget using the Arduino IDE, and with the release of his new Android application that allows wirelessly flashing the device’s firmware, it seems like he’s very close to realizing that dream.

Previously, [Aaron] had to crack open the trackers and physically connect a programmer to update the firmware on the NRF52832-based devices. That might not be a big deal for the accomplished hardware hacker, but it’s a bit of a hard sell for somebody who just wants to see their own Arduino code running on it. But with this new tool, he’s made it so you can easily switch back and forth between custom and original firmware on the D6 without even having to take it off your wrist.

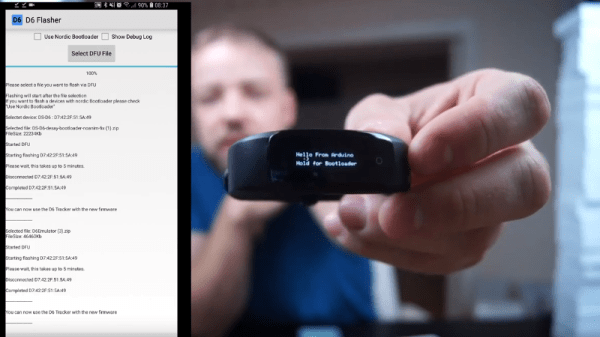
After the break, you can see the video that [Aaron] has put together which talks about the process of flashing a new firmware image. It’s all very straightforward: you simply pick the device from the list of detected BLE devices, the application puts the tracker into bootloader mode, and then you select the DFU file you want to flash.

There are a couple of ready-made firmwares you can put on the D6 right now, but where’s the fun in that? [Aaron] has put together a customized version of the Arduino IDE that provides everything you need to start writing and flashing your own firmware. If you’ve ever dreamed about creating a wearable device that works exactly the way you want, it’s hard to imagine a cheaper or easier way to get in on the action.

When we last heard from [Aaron] earlier this year, he was working on the IWOWN I6HRC tracker. But it looks like the availability of those devices has since dried up. So if you’re going to try your hand at hacking the MPOW D6, it might be wise to buy a few now while they’re still cheap and easy to find.

Continue reading “OTA Flash Tool Makes Fitness Tracker Hacking More Accessible”

Hacking This Smart Bulb Is Almost Too Easy

The regular Hackaday reader no longer needs to be reminded about how popular the ESP8266 is; they see the evidence of that several times a day. But what might not be quite so obvious is that it isn’t just us hacker types that are in love with the inexpensive IoT microcontroller, it’s also popping up more and more frequently in commercial products.

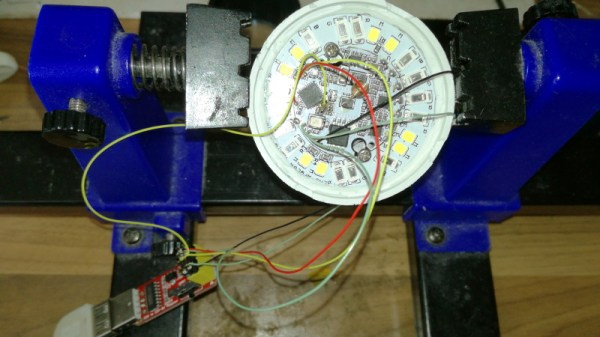
As [Majenko] demonstrates, one of those ESP-powered devices is the LOHAS Smart LED Bulb. Upon cracking one open, he found that these relatively low-cost bulbs are little more than a standard ESP8266 chip and a couple of LED drivers. He wanted to see how hard it would be to get his own code running on the bulb, and by the looks of it, it took longer to get the thing open then it did to load it up with a custom firmware.

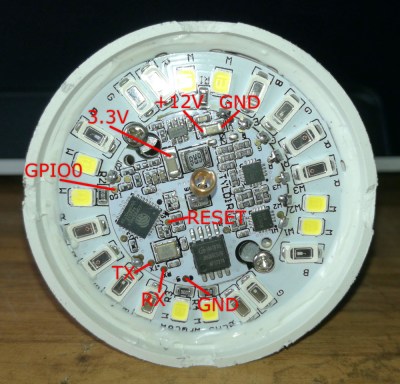
The bulb’s PCB features the aforementioned ESP8266, a 1MB 25Q80 flash chip, and MY9231 LED drivers. Whoever put the board together was nice enough to label the RX, TX, and GPIO test points, though [Majenko] notes that what’s labeled as 3.3 V appears dead. With a ESP-01 programmer wired up to the board and the appropriate board settings (which he provides), you can use the Arduino IDE to upload whatever you like to it.

Running “Hello World” on a smart bulb is fun and all, but what about kicking on those LEDs? [Majenko] found a library that works with the MY9231 drivers, and it didn’t take long to figure out which of the ESP’s pins were used to communicate with them. All in all, he said it was far easier than he expected.

You’ll probably want to put this bulb back into service after reprogramming, so [Majenko] advises caution when cracking open the shell. There are clips holding on the diffuser which he assures us are going to break no matter what you do, plus some silicone adhesive. He suggests super glue to hold it together when you’re done programming it, and using an OTA firmware so you don’t need to get back in there.

In the past we’ve shown how some hackers are rolling their own smart bulb hardware, but with cheap commercial offerings that are so easily hackable, it frankly doesn’t seem worth the effort. On the other hand, an influx of cheap ESP-powered bulbs isn’t all good news.

Hack Together A Whack-A-Mole In A Box!

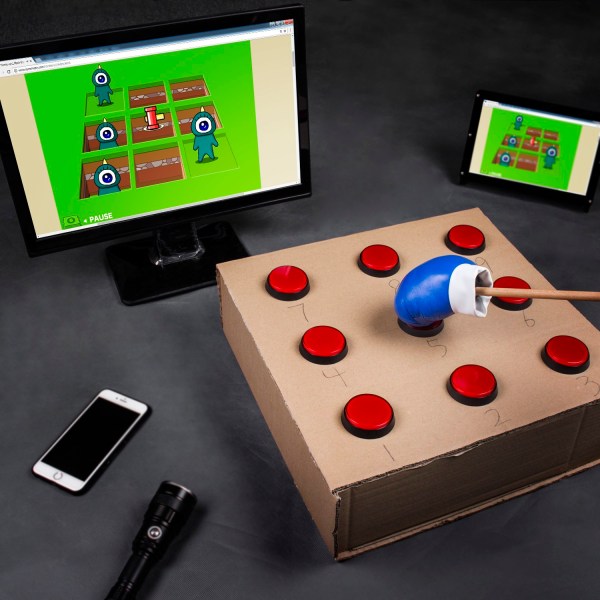
Here’s a project that you can throw together in an afternoon, provided you have the parts on hand, and is certain to entertain. Hackaday.io user [SunFounder] walks us through the process of transforming a humble cardboard box into a whack-a-mole game might be just the ticket to pound out some stress or captivate any children in the vicinity.

A multi-control board and nine arcade buttons are the critical pieces of hardware here, with wires and a USB cable rounding out  the rest of the electronics. Separate the button core from the upper shell, mounting the shell in the box, and connect the button core’s LED cathode to the button’s ON terminal. Repeat eight times. Solder the buttons in parallel and add some more wire to the buttons’ ON terminals to extend their reach. Repeat eight more times.

Place the finished LED+cores into the buttons and connect their ON terminals to their respective buttons on the multi control board. Now for the hard step: use a mini-USB to USB cable to connect the controller to a computer you want to use to run the game’s code in the Arduino IDE. Modify the key-mappings and away you go! Check out the build video after the break.

Continue reading “Hack Together A Whack-A-Mole In A Box!”

Hackaday Links Column Banner

Hackaday Links: June 14, 2015

You know we’re running this gigantic contest to build hardware and send someone to space, right? We’re doing community voting right now. If you’re on Hackaday.io, head over there and pick the best project. We’re giving away t-shirts and $1000 gift cards to people who vote. The drawing for this round is next Friday.

MicroPython is a pretty interesting development in the area of interpreted languages running on microcontrollers. It’s Python, the BASIC of the modern era, and now it’s being funded by the ESA. Great news, there’s going to be a port to SPARC, and it looks like MicroPython is going to be in a few satellites.

[EloquentlyMawkishBunny]’s calculator stopped working on the morning of his AP Physics test. It was the ribbon cable for the display. What did he do? He grabbed some magnet wire and made it work. If I’m reading this right, he did this the day of his AP test. Wow.

[Will] has made a name for himself by building roller coasters in his backyard. He’s also worked on the ProtoPalette, and now he’s building a hackerspace in Concord, California.

[Josh] needed to drill some very large holes with his mill. He decided a hole saw was the easiest way to do this, but his hole saw has a hex shank. He ended up chopping the shank of a hole saw extension, basically turning it into a hex to round adapter.

Did you know the Arduino IDE on Raspbian is stuck at version 1.0.5? The newest version is 1.6.4, and there’s useful stuff like autosave in the IDE now. Amazing. [CRImier] got the latest Arduino IDE working on the Raspberry Pi 2. Yes, there’s an issue up but if for some reason you’re programming Arduinos on the Pi, you should probably do this yourself.

Oooohhhh, case modding. The Intel NUC is a pretty interesting platform for case modding; it’s small, and I shouldn’t have to remind anyone of all the cool case mods that were created when the Mini-ITX format gained popularity in the early ‘aughts. [Femke] got herself an Intel NUC, made a case, and the results are amazing. How’d she get that metal bowl? Metal spinning. Very cool.

Arduino IDE Forked

As if it weren’t confusing enough in the Arduino world these days, now we’re going to have to deal with conflicting version numbers for the IDE. Yup, it’s been forked. Arduino LLC is offering a recently-updated version 1.6.3 at arduino.cc, but Arduino SRL has bumped up the version number to 1.7.0 at arduino.org. The conflict in naming and versioning has not gone unnoticed.

For those of you who’ve been living under a rock lately, the company that developed the Arduino (Arduino LLC) and the company that’s been manufacturing most of the hardware (Smart Projects SRL, now Arduino SRL) have stopped cooperating, filed a bunch of lawsuits, and now maintain separate websites.

According to this article (Google translate here) the versions don’t differ by much, and the 1.7.0 IDE may even be a step backwards versus 1.6.3. It certainly seems to us that the majority of the active developers in the Arduino project have been sticking with [Massimo Banzi] and the Arduino LLC camp. Of course, everything’s open source and there’s nothing stopping Arduino SRL from porting worthwhile IDE changes across to their version of the codebase.

It doesn’t take a clairvoyant to sense that this may be in response to the warning about non-licensed boards that was included in the “official” 1.6.1 release. Nor does it take a psychic to foresee confusing times ahead.

If you’re interested in doing some code-sleuthing, have a look at the two versions and leave a comment below letting us know of any substantive differences you unearth.

Thanks [Kai], and via [Golem.de].