Flexible Web Interface Makes The Universal Remote Nearly Perfect

[Fall Deaf] built an Arduino based universal remote control system. It uses a shield which has both an IR receiver and transmitter. This gives it the tools to learn codes from your existing remotes and play them back in order to control the devices. This functionality is really nothing new, but we think the user interface he developed for the system is absolutely fantastic!

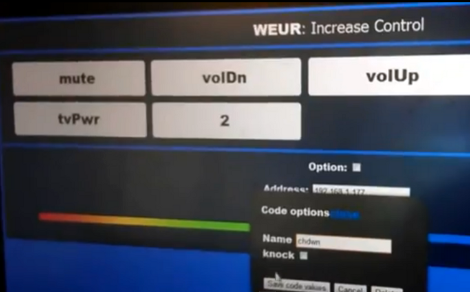
Software is web-based. You can simply point a remote at the Arduino and push a button. The receiver will store the code which can later be assigned to a virtual button. The image above shows the channel-up option being created; it will be added to the list once confirmed. From there any web enabled device – smart phone, tablet, netbook, etc – can be used as the remote for the system. The only feature we think is missing is the ability to alter the layout of the buttons, with larger areas for the most frequently used commands.

After the break you can see a demonstration of this system, as well as the one extra feature we haven’t touched on yet. [Fall Deaf] included a Piezo element in the hardware design which lets him knock on his coffee table to use the remote if a smart-device isn’t close at hand.

Continue reading “Flexible Web Interface Makes The Universal Remote Nearly Perfect”

Simulated Dashboard For A Simulated Race

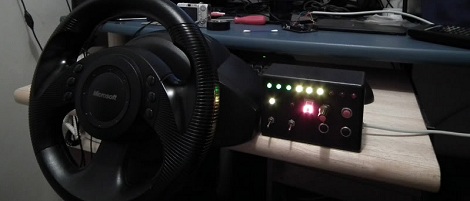
Simulators might have lost their cool for a lot of gamers, but [Fergo] is trying for a comeback. He built an electronic dashboard for a car racing simulator.

[Fergo] spends most of his track time on iRacing, an MMO racing simulator. Possibly due to a little bit of influence from Formula 1 steering wheels, he wanted to add to his dashboard that included Microsoft racing wheel. The dashboard includes RPM lights, a gear indicator, five general buttons, a rotary encoder, and a pit limiter, rev limiter and low fuel indicators.

The build is powered a VB.NET app that connects the iRacing API to an Arduino. To get all those buttons and LEDs talking to the Arduino, [Fergo] used an IO expander that communicates over an I2C bus. It’s a surprisingly simple design that should scale well if [Fergo] ever decides to expand his cockpit. We’re not sure if it could handle controlling a 737, but it would be more than sufficient for a Cessna 172 or Mercury capsule.

Check out [Fergo] tearing around the track with his buttonbox dashboard after the break.

Continue reading “Simulated Dashboard For A Simulated Race”

Very Accurate Clock Can’t Be Read Accurately

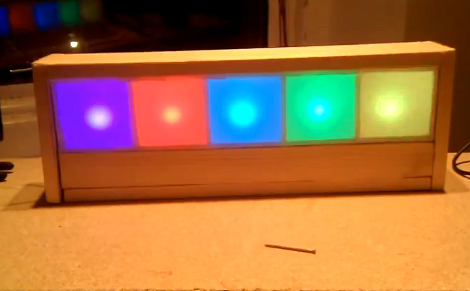
[Martijn] is showing off his new clock which he calls a Light Spectrum Clock. We like to look of it, using RGB LEDs in five squares that remind us of some of those LED coffee table builds. From left to right this shows the week, day, hour, minute, and second. Simple, right?

We had to smile a little bit when looking through his write up. He chose an Arduino nano as a controller, using a TLC5940 chip to drive the LEDs. But it is the inclusion of a DS1307 real-time clock that we find amusing. It will keep quite accurate time (not quite as well as the DS3232 but still respectable) but the fuzzy display technique makes telling the time accurately an impossibility. But like other color-based clocks, that’s part of the fun. The real reason for using an RTC chip is that they usually include battery-backed operation so that you can shut off the LEDs when you’re not around and the clock will continue to tick.

You can watch the seconds pass by as fading colors in the clip after the break.

Continue reading “Very Accurate Clock Can’t Be Read Accurately”

Stop Light Converted To Control Office Foot Traffic

traffic-light

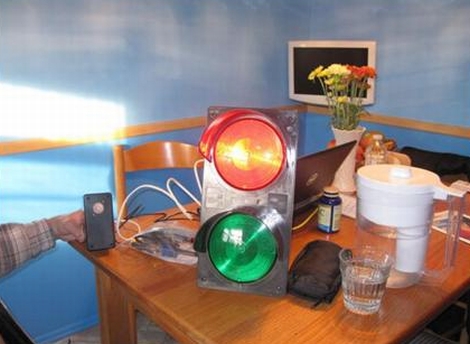
When [Paul Rea] started work with his current employer, he was intrigued by a traffic light that sat unused near the entrance of the “Engineering Loft” where he was stationed. He promised himself that he would get it working one day, but several years passed before he had the chance to take a closer look at it.

He took the light home with him over Thanksgiving weekend last year, and started to dig around inside to see how things were wired up. It turns out the light was a pretty simple contraption, though he discovered it ran on mains voltage, something [Paul] didn’t really want to fiddle with. He swapped out the traffic light’s bulbs for some low-voltage models, which he could easily power with a 12v wall wart.

[Paul] then added an Arduino and PIR sensor to the light fixture in order to detect when someone was leaving the Engineering Loft, warning those who are on their way in. He says that people don’t really pay attention to the light very much, though he is pretty happy with the results.

Continue reading to see a short video of the traffic light in action.

Continue reading “Stop Light Converted To Control Office Foot Traffic”

A Simple, Self-contained 7-segment Display

self-contained-7-seg

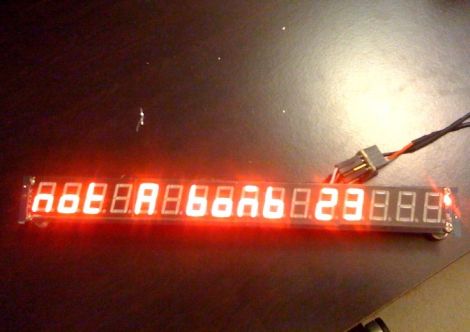
It’s no secret that seven-segment displays are an easy and useful way to relay data, so [Kelvyn Panici] decided to put together a minimalst, self-contained display for use around the house.

The display itself is a 16-digit model he picked up from DealExtreme for under $10. He wanted to find a microcontroller small enough to fit behind the display’s footprint, so he chose an ATtiny85 to control it. After mounting the mcu on a small piece of perfboard, he burned the Arduino bootloader and uploaded a small sketch to drive the display.

Things worked out quite well as you can see by the video below where he shows off a pre-perfboard prototype. [Kelvyn] currently does not have any immediate projects in the works that will utilize the display, though there are a plethora of possibilities. We think it would work great anywhere if it were fitted with a battery and some sort of wireless radio in order to make it completely self-contained.

Continue reading “A Simple, Self-contained 7-segment Display”

Controlling An LED Matrix With An Android Phone

Even though everyone with a smart phone has a small, powerful computer in their pocket, we haven’t seen many applications of this portable processing power that use the built-in camera. [Michael] decided to change this and built an LED matrix that displays the data coming from the phone’s camera.

For the build, [Michael] used two 32×32 LED panels from Adafruit along with an IOIO and an Arduino. To build the Android app, [Michael] used the Android OpenCV computer vision library that grabs an image from the Android camera and downsamples it to 64×32 pixels. This data is transferred over a serial connection from the phone to the IOIO and again from the IOIO to the Arduino. Even though each frame is 1024 bytes, [Michael] still gets around four frames per second on his LED matrix display.

After the break you can check out the results of [Michael]’s build. The video is a little choppy because of the frame rate issue, but it’s still an interesting build in the Android software development category.

Continue reading “Controlling An LED Matrix With An Android Phone”

FLORA: A Better Arduino LilyPad

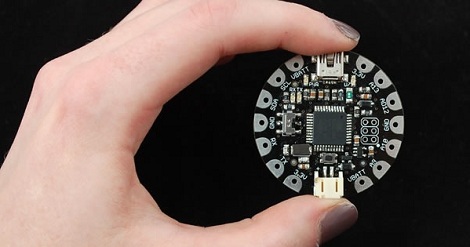
[Ladyada] has been working on FLORA, her wearable electronics platform, for a few months now. Even though it has just been announced the specs look much better than the previous queen of the hill, the Arduino LilyPad.

Going down the spec sheet for both the FLORA and the LilyPad, we see that FLORA has twice as much flash and SRAM as the LilyPad. The LilyPad has more options for I/O, but [Ladyada]’s FLORA has the benefit of not using an ISP header for programming; FLORA is completely USB-compatable. FLORA is also about a quarter-inch in diameter smaller than the LilyPad, something to take into account when you’re going for a wearable project.

On top of Bluetooth, GPS, accelerometer, compass and other modules planned for FLORA ( it doesn’t look like they’re available yet, though), FLORA has USB HID support so it can operate as a USB keyboard, mouse, MIDI device, or connect to a cell phone. If you’ve ever wanted a keytar cardigan, this is the board for you.

Check out [Ladyada]’s video demo of a LED-equipped fabric after the break.

Continue reading “FLORA: A Better Arduino LilyPad”