Air Conditioner Regulation Using A Hobby Servo

automatic_mechanical_ac_control

For anyone that works in a large office building, odds are you know the pains of dealing with a poorly regulated HVAC system. [Robovergne] and his co-workers recently moved to a new location, and found that the air conditioning control was less than effective, leaving the office as hot as a sauna or as cold as a meat locker.

While they manually triggered the A/C on and off every half hour for a while, that grew tiring, so [Robovergne] decided to take things into his own hands. He had never used an Arduino before, and figured that regulating the air would be a great first project. He mounted a small hobby servo onto the front of the A/C remote, and wired a DS18B21 temperature probe to the Arduino. A small pot is used to adjust the temperature setpoints, which are displayed on the attached LCD screen. Now, when the temperature starts to rise, the Arduino triggers the servo to turn the air conditioning on without human interaction.

[Robovergne] says that while his solution is ugly, it works quite well. It definitely gets the job done, we can’t argue with that!

Continue reading to see a video of his automatic A/C controller in action.

Continue reading “Air Conditioner Regulation Using A Hobby Servo”

Come See What’s Cooking In The Arduino Kitchen

arduino_labs

The crew that brought you the Arduino is always hard at work trying to bring the community closer together and to foster collaborative development. They recently rolled out a new feature on their site that is sure to be of interest to Arduino veterans and neophytes alike.

Arduino Labs is a platform which the team plans on using as an incubator of sorts, for projects that are underway, but not fully baked. Currently, they have highlighted two in-progress initiatives, including the Arduino Mega ADK, as well as a GSM/GPRS shield that the team has been developing in collaboration with Telefonica I+D.

As of right now, the site looks to be a one-way information outlet for the Arduino team to the community, but they stress that their aim is to create a more open development process within the Arduino project. While there is no official statement on the matter, we hope that the site will eventually allow members of the community to offer both their feedback and lend manpower to forthcoming projects.

[via Adafruit blog]

Adding Ambilight Clone System To Your Home Theater Just Got A Big Price Cut

Whenever we get a tip claiming a project is cheap and easy we raise a cynical eyebrow. But [Yonsje] isn’t telling us a story, his Amiblight clone really does boil down the complexity and slash the price.

For the uninitiated, this is a clone of the Philips Amilight system that has been an option with some of their TVs over the years. It puts RGB LEDs on the back of the frame, pointed at the wall. They are tuned to the edge colors of the display, linking the color of the ambient light in the room to the colors on the screen. We’ve seen a ton of clones over the years, just search our blog for “Ambilight”.

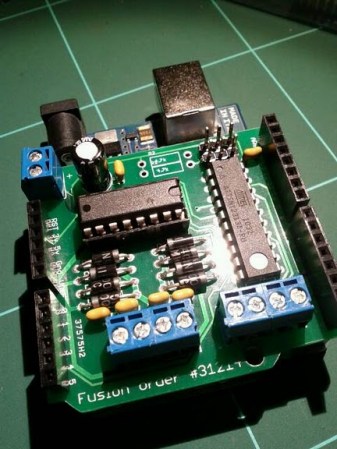
Like the others, this iteration depends on you playing back video from a computer. [Yonsje] is using an Arduino with his own shield to connect to the HTPC. NPN transistors in the shield drive the RGB LEDs. The real cost savings is in his lighting source. A Deal Extreme RGB LED bar costs just $11.30 including shipping, and can be cut into six different segments for even spacing around your television. Check it out in the clip after the break.

Continue reading “Adding Ambilight Clone System To Your Home Theater Just Got A Big Price Cut”

Google ADK Clones Pack A Few Extra Features, Hopefully Far Cheaper Than The Original

adk_board_clone

[charliex] from Null Space Labs wrote in to share a project that he and the rest of the gang have been working on over the last few weeks. The team has been remixing and building clones of the Google ADK demo board we saw earlier this year, in hopes of getting a huge batch prepped before Defcon 19.

Their version makes subtle changes to the original, such as extra header rows for Mega AVRs, higher quality RGB LEDs, and a nifty pirate-Android logo. They also added the ability for the board to send and receive IR signals allowing it to be used as a TV-B-Gone, as well as in more fruitful pursuits. The Arduino board used with the ADK has only undergone minor revisions, most of which were layout related.

[charliex] hasn’t mentioned a price for their improved ADK boards, but we’re guessing they will be substantially cheaper than the official Google version. In the meantime, check out their site for a boatload of pictures and videos of these boards undergoing various stages of construction.

MIDI Air Drums Let You Play Anywhere

[Maayan Migdal] wrote in to share a really cool drum kit he constructed that has one special twist – no drums at all. Using a simple MIDI device and an Arduino, his “Air Drums” look pretty sweet.

The hack makes use of a pair of garden rakes, which serve as his drum sticks. The rakes were cut down and modified to allow the addition of accelerometers and some USB cables. The left stick contains a single accelerometer for registering hi-hat hits, while the right stick is armed with a pair of the modules, which are used to trigger snare and crash symbol strikes. He modified a pair of sandals to fit better while drumming before adding a sensor to each shoe. The left sandal contains an accelerometer to register bass drum hits, while the right shoe uses a light sensor to simulate the use of a hi-hat pedal.

We think that the results are awesome, but feel free to check out the video below to see what we mean. If Guitar Hero wasn’t dead in the water on hiatus, we think this sort of setup would make a great replacement for the flimsy drum set that comes with the game.

Continue reading “MIDI Air Drums Let You Play Anywhere”

A Pill Reminder Box To Be Proud Of

Not satisfied with the traditional daily pill boxes, [Ryan] set out to build his own. According to his article, these particular pills had to be taken every three days, and he wanted a solution that required “zero effort.” Although one might question whether his solution actually took this amount of effort, the build came out very well.

The result is a box that reminds one to take a pill from one or two bottles using a blinking LED. When the pill bottle is picked up, consumption is assumed and the timer is reset. The main components consist of an Arduino, real time clock, and a battery backup.  Additionally, two picture frames are used to form the project enclosure along with some LEDs and other assorted hardware to finish everything.

This project combines some basic electronics hacking and programming with a very nice looking cover. The results are a very clean looking build with a good write up. For another example of a well finished project with great pictures, check out this N64 portable build.

Automated Water Distiller Gets An Overhaul

automated_water_distiller_stillduino_v2

One thing we love about the hacking community is the drive that most people have to revamp and rework their “finished” projects. A few weeks ago, we wrote about a water distilling rig that [Kyle] hacked together, which allowed him to automate his distillation process. He took his project back into the workshop and tweaked a few things, giving us the heads up when he was finished.

He got his hands on a new distillation unit and decided that he wanted to transfer over his automation setup. He cleaned things up by ditching most of the components from his first distiller, including the toy clock tower dial (which we happened to think was pretty fun). The same relays and Arduino were used in the second version of the still, but he reworked all of his code to make use of his new control interface.

The new model sports an LCD panel that allows the user to interact with the machine via a push button rotary encoder. Now he can easily navigate through a series of menus that enable him to set the distillation quantity and start time, leaving the distiller to do the hard work. The still also does a quick safety check each time it starts up, to ensure that things are in good working order before firing up the heating element.

[Kyle] says he will continue to tweak the distiller, though we think it looks great already.

Continue reading to see a quick video of his Stillduino v2 in action.

Continue reading “Automated Water Distiller Gets An Overhaul”