Beginner Concepts: Using A Low-pass Filter To Smooth PWM Output

Microcontrollers are digital devices at heart. They can do fancy things like convert analog signals into a digital value but going the other direction is a bit tougher. Pulse-Width Modulation is used to approximate an analog output but what you’re actually doing is turning the operating voltage on and off very quickly to achieve an average value somewhere in between. This is the method most commonly used to dim an LED. But generating a smooth voltage in this way takes just a few more parts.

[Scott Daniels] spent some time discussing the process of smoothing a PWM output by using a low pass filter. This is a compilation of digital and analog circuitry to produce a smoother signal than PWM can achieve on its own. As you can see above, the low pass filter is made up of one resistor and one capacitor. The theory is not hard to understand, and with [Scott’s] help you’ll become much more comfortable with choosing the component values for your own filters. His examples center around an Arduino using the analogWrite() function but the techniques can be applied universally.

An Instrument That Plays Along With You

muse

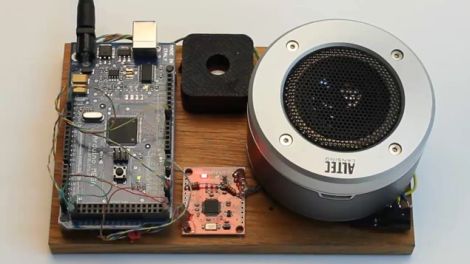
The crew over at Teague Labs was talking about musical instruments and how digital music creation seems to get bogged down under user interfaces littered with increasing numbers of buttons, knobs, and sliders. They decided to build a musical device that has its own musical inclinations and personality, while also allowing for two-way interaction with the user.

The resulting creation is Muze, a simple musical instrument with only a single user input. Muze has been programmed with a palette of notes that it can combine and remix into a nearly infinite number of musical combinations. Muze is perfectly happy composing on its own, and will create music that evolves over time, if left alone long enough.

As with all musicians, not every tune is a hit, so Muze can be gently nudged away from cacophonous melodies with a simple twist of a knob. Each of the device’s knobs represent a blend of functions, which are used to influence Muze when placed on the board. The interaction does not send Muze flying into a completely different direction, rather it tells Muze to shake things up a little bit, much like you would ask your guitarist to pick up the tempo during a jam session.

It’s a neat little instrument, and we can imagine it would be a big hit with kids and adults alike. Keep reading to see a video demonstration of Muze in action.

Continue reading “An Instrument That Plays Along With You”

Modifying A Cheap Robot Arm For Arduino Control

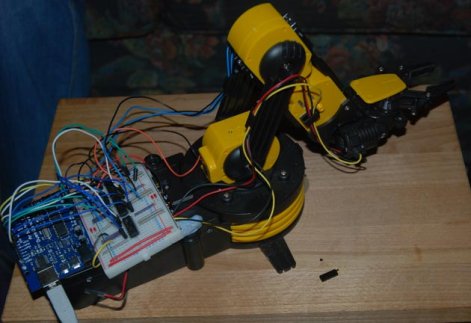
Many a hacker has put together one of those cheap $30 robot arm kits you can get in just about any store with a section labeled, “science”.  In an ongoing search for a cheap robot arm, [Larry] decided to modify one of them to be controlled with a PC through an Arduino. The article doubles as a really basic tutorial on dc motor control. On the site he gives a brief explanation of how to use H-bridges and a good explanation of how he wired them up for this purpose. He eventually goes on to add a processing interface to the project. The next step would be figuring out how to add some kind of position feedback, such as encoders. Though, if modifying an arm is not your style, [Larry] has another cool article on rolling your own robot arm cheaply with some foam board and hobby servos.

MIT’s ESuperbike Takes On The Isle Of Man

mit_ebike

While the Isle of Man typically plays host to an array of gas-powered superbikes screaming through villages and mountain passes at unbelievable speeds, the island’s TT Race is a bit different. Introduced in 2009 to offer a greener alternative to the traditional motorcycle race, organizers opened up the course to electric bikes of all kinds. In order to entice participants, they even put a £10k prize on the line for the first bike that completes the race with an average speed of 100 miles per hour or faster. While no one has claimed the prize just yet, that didn’t stop the MIT Electric Vehicle team from tossing their hat into the ring this year.

Their entry into the race is the brainchild of PhD student [Lennon Rodgers] and his team of undergrads. They first designed a rough model of the motorcycle they wanted to build in CAD, and through a professor at MIT sourced some custom-made batteries for their bike. Through a series of fortunate events, the team found themselves in front of BMW management, who donated an S1000RR racing bike to the project. After a good number of alterations, including the addition of an Arduino to control the bike, they were ready for race day.

While the team didn’t take the checkered flag, they did finish the race in 4th place. Their bike managed to complete the course with an average speed of 79 mph, which isn’t bad according to [Rodgers]. He says that for their first time out, he’s happy that they finished at all, which is not something every team can claim.

Thirty Year Old Pachinko Machine Meets An Arduino

When [Jim’s] thirty year old Pachinko machine started to freeze up and shorted out his computer’s graphics card he decided it was time to replace the old electronics with an Arduino. Originally the Pachinko machine ran off a 48 volt supply and control was achieved using about 20 relays, the random numbers were generated using some complex mechanical reels which we hope will find their way into a new project in the future.

All of this and the daunting amount of wire inside the machine have been replaced with an Arduino and an MP3 Shield for the sound effects, powered from a much safer 12 volts. The new machine runs just as you would expect a thirty year old machine to run, with all the grinding sounds and flickering lights. Check out the video after the break to see an overview of the project.

Continue reading “Thirty Year Old Pachinko Machine Meets An Arduino”

Puppy POV: Four-legged Persistence Of Vision Display

puppy_pov

We see lots of persistence of vision projects around here, but we can’t recall any that involve a POV display facilitated by a living, breathing animal (humans aside, if you want to picky). [Michael] has a Miniature Pinscher that just loves to run and run…and run…in circles. Since she generally runs very fast and in large curves, he thought she would make a great POV device.

He has a small fleece “jacket” for his dog, and on it, he mounted a Lilypad Arduino, the associated power supply, and five bright white LEDs. Naturally, conductive thread was used to wire up the circuit, and after a bit of trial and error, things came together nicely.

With the vest complete, [Michael] unleashed his dog at the park, letting her run to her heart’s content. All the while, her vest was writing out [Cory Doctorow’s] “Makers” while he snapped some pictures.

We can’t think of a more appropriate text to write with LEDs in the night, but in the spirit of the book, we were hoping to see a circuit diagram or the project’s code posted. If he shares it, perhaps we could convince [Cory Doctorow] to run about the park in a vest, writing out [Michael’s] code in bright white LEDs!

Flashing Arduinos With A Zipit

zipit_arduino_flashing

[Giacomo] finds that every once in awhile, he needs to flash a sketch to an Arduino while on the go. While he doesn’t always carry his laptop with him, he almost certainly has his Zipit Z2 on hand. He prefers to use the Zipit because it’s tiny, it uses Debian, has built-in WiFi, and can run for about 5 hours before requiring a recharge. The only shortcoming is that the device lacks a serial port.

Following instructions we featured last year he added a serial port to his device, then built a small converter cable that allows him to connect it to virtually any Arduino. He says it only takes a moment to get avrdude up and running on the Zipit via apt-get, and once that’s done, he is in business. He wrote a short script that saves him from entering the flash command over and over, so the process couldn’t be simpler.

He does mention that since the Zipit does not have a DTR line, Arduino resetting must be done manually. For the convenience of flashing sketches from the palm of our hand, we can deal with that.

Check out the video below for a quick demonstration of his setup.

Continue reading “Flashing Arduinos With A Zipit”