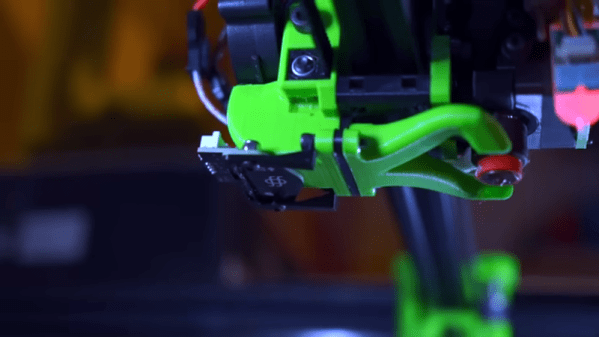
[Dennis] of [Made by Dennis] has been building a Voron 0 for fun and education, and since this apparently wasn’t enough of a challenge, decided to add a number of scratch-built improvements and modifications along the way. In his latest video on the journey, he rigorously calibrated the printer’s motion system, including translation distances, the perpendicularity of the axes, and the bed’s position. The goal was to get better than 100-micrometer precision over a 100 mm range, and reaching this required detours into computer vision, clock synchronization, and linear algebra.
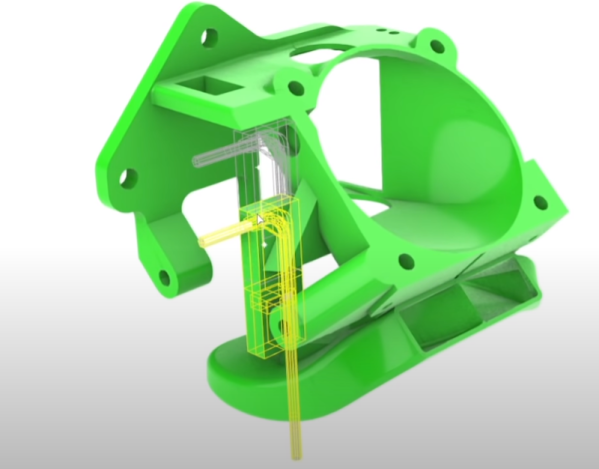
To correct for non-perpendicular or distorted axes, [Dennis] calculated a position correction matrix using a camera mounted to the toolhead and a ChArUco board on the print bed. Image recognition software can easily detect the corners of the ChArUco board tiles and identify their positions, and if the camera’s focal length is known, some simple trigonometry gives the camera’s position. By taking pictures at many different points, [Dennis] could calculate a correction matrix which maps the printhead’s reported position to its actual position.
Continue reading “Calibrating A Printer With Computer Vision And Precise Timing”