Add-Ons Go Electroluminescent

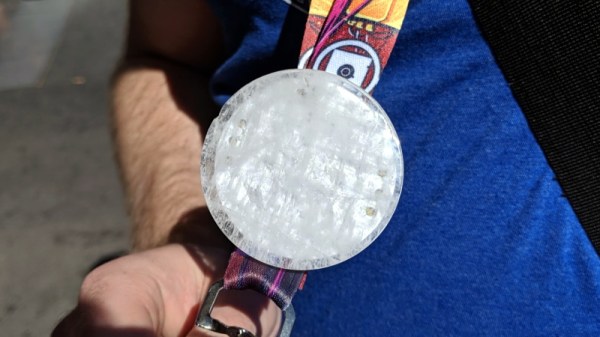
It’s that time of the year again, and once more we’re faced with the latest innovations in Badgelife, the movement to explore the artistic merits of electronics and manufacturing. This is an electroluminescent printed circuit board, and it’s some of the finest work we’ve seen. It’s also a Shitty Add-On that glows blue.

The process for applying an electroluminescent coating to printed circuit boards is, surprisingly, something we’ve covered before. Late last year, [Ben Krasnow] delved deep into a DIY EL display. The process is expensive, but all the products come from a company called Lumilor. The first step in this process is applying a thin conductive coating on a substrate with an airbrush. Since the entire idea of printed circuit boards is to have a layer of conductive material etched into any shape you want, the simple circuit board is the idea experimental platform for playing with EL displays. Traditionally, EL displays were made entirely with a silk screen process, like [Fran]’s ongoing attempt to recreate the Apollo DSKY display.

The electronics for this badge are simply a Microchip MIC4832 EL Driver, which converts the 3.something volts from the add-on header into 100 or so Volts AC at hundreds of Hz. This is a single-chip solution to driving EL displays, and the only other parts you need are an inductor, diode, and a few caps and resistors. An ATtiny85 can be used to blink the circuits, or, alternatively, you could copy [Ben]’s work and build a character EL display.

The process of applying an electroluminescent coating to a PCB does require a spray gun or airbrush, and the chemicals are a bit expensive. This, though, is pushing the boundaries of what can be done with artistic PCBs. It’s new applications of technology, simply as wearable electronics. It’s the best example of the possibilities of the medium and some of the best work that’s come out of the Badgelife scene.

The Science Of Reverse Mounted LEDs

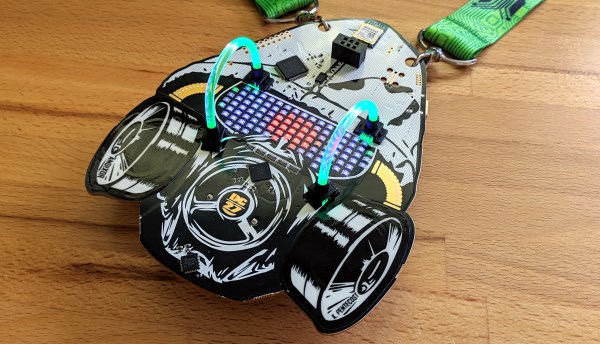
One of the most artistic applications of electrical engineering in recent memory is the burgeoning badgelife movement. This is an odd collective of people who are dedicating their time to rendering their own accomplishments in printed circuit boards. Of the entire badgelife collective, one of the most visible efforts are in Shitty Add-Ons, with a particular focus on reverse-mounted LEDs. Yes, you can install SMD LEDs upside down, and if you have your copper layers right, the light will shine through the badge.

One of the most prominent users of reverse mounted LEDs is [TwinkleTwinkie], and now finally we have a writeup on the science of reverse mounted LEDs. There’s a lot to unpack here, so buckle up and prepare to burn the tips of your fingers on a soldering iron.

For truly reverse-mounted PCBs, there are two options. The first, and most expensive, are ‘reverse gullwing’ LEDs. These LEDs are just like normal LEDs, except the SMD pads are reversed, allowing you to mount it so the light shines into the PCB. These LEDs are expensive, rare (only three companies make them), and they don’t really give off a lot of light. The other solution to reverse-mounting a LED is simply taking a standard 1206 SMD LED and manually soldering it upside-down. This is not pick and place friendly, although I’m sure you could find an LED manufacture that would put LEDs in reels upside-down if you want.

Side view LEDs

The takeaway for reverse mount LEDs is pick two: good, fast, or cheap. Reverse gullwing LEDs are expensive, but can be pick and placed and provide sufficient illumination. Hand-soldered LEDs installed upside down are cheap, slow, but also good.

But there is another option. Side view LEDs are a thing, and they can be pick and placed. You can get them in every color, and even UV. [Twinkle] has experimented with side-view LEDs in place of reverse mounted LEDs, and the results are promising. By putting the side view LED next to part of a PCB without copper or soldermask, there is some light bleed through the PCB. It’s somewhat uneven, but with a hot melt glue diffusor, you can get a somewhat decent bar of light being emitted through a PCB.

If you want to put blinky on a PCB, you have a lot of options. If you want to put blinky on a PCB without having any visible light source, these are your options. This is the state of the art in artistic PCBs, and we’re so glad [Twinkle] could share it with us.

Cyphercon Badge Has A Paper Tape Reader Built In

Cyphercon 4.0 came to life in Milwaukee, Wisconsin on Thursday and the conference badge is a brilliant and engaging design. At first glance it looks like a fairly mundane rectangular badge. But a closer look reveals simplistic elegance wrapping around some clever mechanical design and the awesome interactive mechanism of being able to read paper tape.

That’s right, this badge can read the series of holes punched in the long paper strips you normally associate with old iron of 50 years ago.

Continue reading “Cyphercon Badge Has A Paper Tape Reader Built In”

Introducing The Shitty Add-On V1.69bis Standard

The last few years have seen a rise of artistic PCBs. Whether these are one-off projects with a little graphic on the silkscreen or the art of manufacturing and supply chains, these fancy PCBs are here to stay. Nowhere is this more apparent than the loose confederation of Badgelife enthusiasts, a hardware collective dedicated to making expressive and impressive electronic baubles for various hacker conferences. Here, hundreds of different hardware badges are created every year. It’s electronic art, supported by a community.

Some of these badges aren’t technically badges, but rather small, blinky add-ons meant to connect to a main badge, and these add-ons are all backed by a community-derived standard. The Shitty Add-On Standard is how you put smaller PCBs onto bigger PCBs. It is supported by tens of thousands of badges, and all of the people who are spending their free time designing electronic conference badges are using this standard.

It’s been more than a year since the Shitty Add-On standard was created, and in that time the people behind the work have seen the shortcomings of the first edition of the standard. Mechanically, it’s not really that strong, and it would be neat if there were a few more pins to drive RGB LEDs. This has led to the creation of the latest revision of the Shitty Add-On Standard, V.1.69bis. Now, for the first time, this standard is ready for the world to see.

Continue reading “Introducing The Shitty Add-On V1.69bis Standard”

Jaromir Sukuba: The Supercon 2018 Badge Firmware

If you missed it, the Hackaday Supercon 2018 badge was a complete retro-minicomputer with a screen, keyboard, memory, speaker, and expansion ports that would make a TRS-80 blush. Only instead of taking up half of your desk, everyone at the conference had one around their neck, when they weren’t soldering to it, that is.

The killer feature of the badge was its accessibility and hackability — and a large part of that was due to the onboard BASIC interpreter. And that’s where Jaromir comes in. Once Voja Antonic had finalized the design of the badge hardware for our conference in Belgrade in the spring of 2018, as Jaromir puts it, “all we needed was a little bit of programming”. That would of course take three months. The badge was battle-tested in Belgrade, and various feature requests, speed ups, and bugfixes were implemented (during the con!) by Jaromir and others.

Firmware work proceeded over the summer. Ziggurat29 helped out greatly by finding ways to speed up the badge’s BASIC interpreter (that story is told on his UBASIC and the Need for Speed project page) and rolled into the code base by Jaromir. More bugs were fixed, keywords were added, and the three-month project grew to more like nine. The result: the badge was in great shape for the Supercon in the fall.

Jaromir’s talk about the badge is supremely short, so if you’re interested in hacking a retrocomputer into a PIC, or if you’ve got a badge and you still want to dig deeper into it, you should really give it a look. We don’t think that anyone fully exploited the CP/M machine emulator that lies inside — there’s tons of software written for that machine that is just begging to be run after all these years — but we’re pretty sure nearly everyone got at least into the basement in Zork. Dive in!

Continue reading “Jaromir Sukuba: The Supercon 2018 Badge Firmware”

Hands-on: Hacker Hotel 2019 Badge Packs ESP32, E-Ink, And A Shared Heritage

When you go to a hacker conference, you always hope there’s going to be a hardware badge. This is an interactive piece of custom electronics that gets you in the door while also delighting and entertaining during the con (and hopefully far beyond it).

Hot off the presses then is the Hacker Hotel badge, from the comfortable weekend hacker camp of that name in a Netherlands hotel. As we have already noted, this badge comes from the same team that created the SHA2017 hacker camp’s offering, and shares that badge’s display, ESP32 processor, battery, and firmware. The evolution of that firmware into the badge.team platform is an exciting development in its own right, but in the context of this badge it lends a very familiar feel to the interface for those attendees who were also at the 2017 event.

Continue reading “Hands-on: Hacker Hotel 2019 Badge Packs ESP32, E-Ink, And A Shared Heritage”

Badge.Team: Badges Get A Platform

Electronic conference badges are now an accepted part of the lifeblood of our community, with even the simplest of events now sporting a fully functional computer as an eye-catching PCB on a lanyard. Event schedules and applications are shipped on them, and the more sophisticated ones have app libraries and support development communities of their own.

The trouble is that so often those badges fail to live up to their promise, and one reason behind that stems from the enormity of the task facing a badge team when it comes to firmware for a modern badge. There is some fascinating news from the Netherlands  that might reduce some of those firmware woes though, badge.team is a freshly-launched project that provides a ready-made badge firmware with the promise of both stability and long-term support. If you’re making a badge, or even a one-off device using the ESP32, this is a project worth checking out.

Continue reading “Badge.Team: Badges Get A Platform”