New Depths For IMac Repair

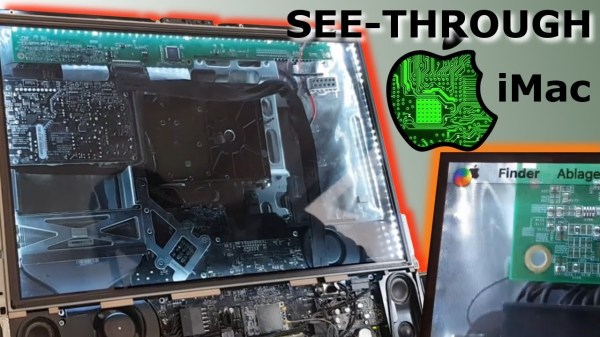
There’s not much economic sense in fixing a decade-old desktop computer, especially when it’s the fancy type with the screen integrated into the body of the computer, and the screen is the thing that’s broken. Luckily for [JnsBn] aka [BEAN] the computer in question was still functional with a second monitor, so he decided to implement a cheap repair to get the screen working again by making it see-through.

The only part of the screen that was broken was the backlight, which is separate from the display unit itself. In order to view at least something on the screen without an expensive replacement part, he decided to remove the backlight altogether but leave the display unit installed. With a strip of LEDs around the edge, the screen was visible again in addition to the inner depths of the computer. After a coat of white Plasti Dip on the inside of the computer, it made for an interesting effect and made the computer’s display useful again.

While none of us, including the creator, recommend coating the inside of an iMac with Plasti Dip due to the risk of fire and/or other catastrophic failure, there’s not much to lose otherwise. Just don’t shove this one into the wall. Continue reading “New Depths For IMac Repair”

Postage Scale

Fixing A Broken Postage Scale

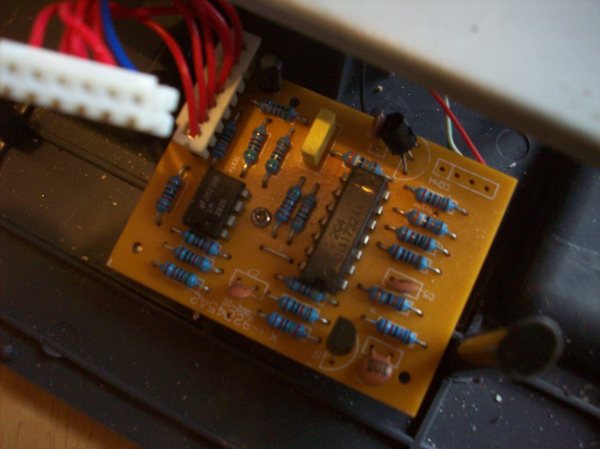
[Starhawk] had an old Pitney Bowes G799 postage scale that wasn’t working as it should. After years of faithfully measuring packages and cooking ingredients, the scale stopped working. At first it fell out of calibration. Then the power up sequence stopped working. The scale normally would turn on, light up the entire display, then change to dashes, and finally set itself to 0.0 lbs. In this case, it would get stuck at the dashes and never change to 0.0.

[Starhawk] ended up purchasing another duplicate scale from eBay, only to find that when it arrived it had the exact same power up problem. Using deductive reasoning, he decided that since the scale was broken during shipping the problem would likely be with a mechanical component. He turned out to be correct. The cheap momentary power button was at fault. When pressing the button, the contact would get stuck closed preventing the scale from zeroing out properly. [Starhawk] easily fixed his problem by replacing the switch.

Next [Starhawk] replaced the old scale’s LCD module with one from the new scale, since the old one looked to be on its way out. The scale still had a problem correctly measuring weight. [Starhawk] tried swapping the load cell from the new scale to the old one, but he found that the new load cell had some kind of problem that prevented the scale from zeroing out properly. The solution ended up being to use the newer “analog board” as [Starhawk] calls it.  The end result was the old scale with two newer circuit boards, an older load cell, and a new power switch. Next time it might be easier to just build his own scale.

Repairing Broken Injection Molded Parts With A 3D Printer

injection-molded-part-repair

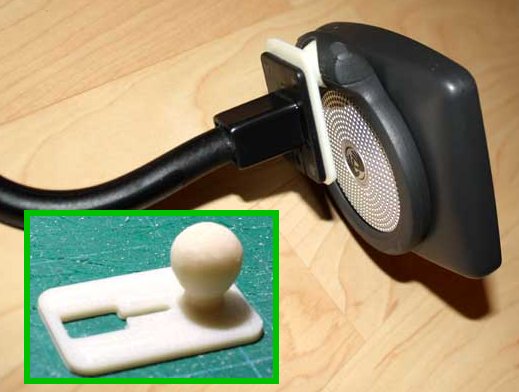
The value of a 3D printer is obvious for people who hack hardware as a hobby. But this repair project should drive home their usefulness for the commoner. [James Bruton] used a 3D printer to recreate a hopelessly broken injection molded plastic part. This is a suction cup mounting bracket for a Tom Tom GPS module. The sphere which makes it adjustable had broken off of the column holding it. For 100% of non-hacking consumers that’s the end of this item. We can’t see a fix that would restore the strength of the original part.

The replacement starts by measuring the broken part with precision calipers. [James] then grabbed a copy of 123D, which is free software. He starts by modeling the sphere, then builds up the support column and the base with a cut-out. It’s obvious he’s already very familiar with the software, but even the uninitiated should be able to get this done pretty quickly. After slicing the design for the 3D printer he finds the part will be ready in about 11 minutes. The first prototype is a bit too small (the ball requires close tolerances to work well). He spins up a second version which is a bit large and uneven. A few minutes of filing leaves him with a smooth sphere which replaces the original part beautifully!

You can see the entire design, print, and assembly process in the clip after the break.

Continue reading “Repairing Broken Injection Molded Parts With A 3D Printer”

Smashed Tablet In NES Case Lives Out Its Days As An Emulator

smashed-tablet-nes-emulator

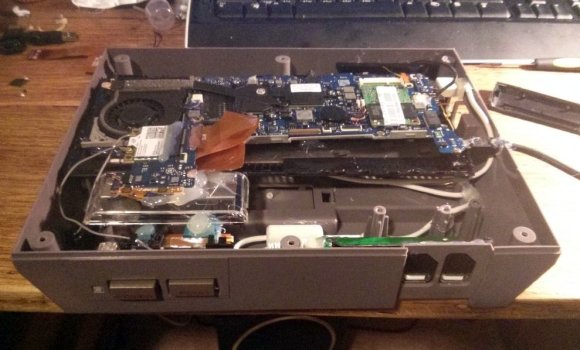
The creator of this project started off with a 7″ tablet he received from a coworker. The screen was horribly smashed from one corner spreading out through the entire surface. But the hardware inside still worked, including the HDMI out port. He ended up transplanting the tablet hardware for use as an emulator.

After a bit of sizing up it was determined that the tablet hardware would fit inside the case of a broken NES. The battery would have been a tough fit, but this thing is always going to need to be connected to a television so there’s no need to work without mains power. The back plate was cut down to size and used as a try for mounting the motherboard in the case. Before that step he wired up a USB hub and mounted it so that two ports could be accessed through the original controller port openings.

There’s no details on the software used, but the final image in the gallery shows a game of Starfox being played.

[Thanks Cody]

How To Used An Android Device With A Shattered Screen

This screen is not just cracked, it’s devastated. We can all agree that you’re not going to be carrying this around with you anymore, but it might still be useful in other endeavors. [Mr Westie] wanted to use it for the camera which is undamaged. The issue is how do you control an Android device with a broken screen?

He knew there are apps out there that let you control your device remotely. But these still depend on you being able to install and launch the program. He found he could get the image from the screen on his computer using a package called Screencast. It runs on your computer and doesn’t need to be installed on the phone, but it will require a rooted phone and the user must click to authorize root access. He got around that hangup by pushing keypress commands to the phone via ADB. The only problem left is if debugging mode is not enable.

Think Geeks Wants You To Have Broken Stuff

Think Geek has a growing pile of returns and damaged product that they’re trying to get rid of. The purveyors of technological oddities, like any other large retailer, sometimes have stuff that doesn’t work right, or has been damaged somewhere between factory and consumer. The broken bits find their way back to the distribution center and now they’re stuck with the task of doing something with it.

They can’t sell it, and we’re happy to say they don’t want to throw it out. So they’re considering giving it away to worth-while causes like Hackerspaces and schools. Looks like no real details have been hammered out as of yet. But if you belong to a Hackerspace or other group that can find a use for this stuff, click-through the link above and sign up to let them know you’re interested. The goldmine of reusable stuff is located in Columbus, Ohio and pick-ups might be available. Otherwise they’re going to need to find a way to cover the cost to ship boxes to those interested.

Don’t forget to document your projects and let us know what you use this stuff for.

[Thanks RenderMan]