Beautiful Touch-Sensitive Furniture

lamp

It’s taken over a year, but [tinkering techie] has finally completed his touch sensitive nightstand. At first glance, it looks like any normal piece of furniture. With the addition of an Arduino, some copper clad board, and a few LEDs, he’s turned it into a very elegant, electronic home furnishing.

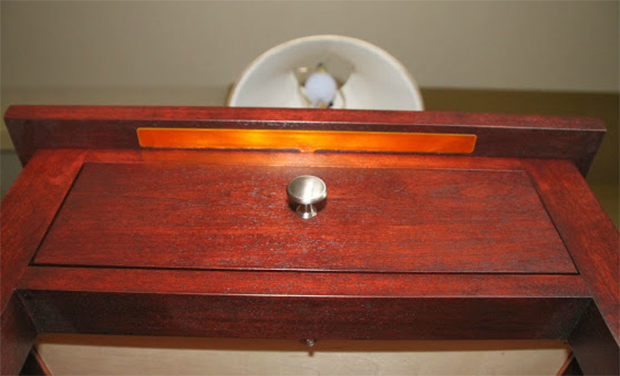
The nightstand is built out of a few very nice pieces of mahogany. Underneath the top of the nightstand, three Kapton-covered copper clad boards are inset along the front and side edges. These capacitive sensing boards are connected to an Arduino Fio that reads the capacitance of these sensors and turns on a small LED under the drawer or the mains powered lamp.

The electronics are powered by a small USB charger with a battery backup all hidden underneath the top of the nightstand. Inside the drawer, a magnetic reed switch turns on an RGB LED whenever the drawer is opened.

While the nightstand itself is a wonderful piece of woodworking, we need to tip our hat for a remarkably seamless integration of fine furniture and electronics. The electronic furniture modifications we usually see are Ikea cruft, but this wonderful homemade nightstand should last decades or centuries.

Video of [techie] going over his build below

Continue reading “Beautiful Touch-Sensitive Furniture”

Quick And Dirty Touch-sensitive Keyboard Project

quick-dirty-touch-sensitive-keyboard

You don’t have to have high-quality parts to play around with electronics and here’s a great example. [Vishal] used junk to play around with CapSense, the touch sensitive Arduino library. What he ended up with is this touch-based piano keyboard.

We’ve featured the CapSense library in the past, but even that example uses a very meticulously crafted test rig of foil tape, protoboard, and some resistors. If you still haven’t given it a try follow this example of using aluminum foil, electrical tape, and a cardboard box.

[Vishal] just sandwiched the end of jumper wire between two pieces of foil to make each ‘key’. We believe the other end of the wire is soldered to the bias resistors where they connect to a couple of pin headers. The headers were hot-glued in place through holes in the bottom of the box, making the entire rig simple to plug into the Arduino board driving it. After adding in a small speaker and flashing the code he’s finished. It certainly makes for a short afternoon project which you won’t feel bad about taking apart later since you didn’t sink a ton of time or resources into the build.

Mobile Chicken Coop Includes Wireless Sensors

mobile-chicken-coop-build

In and of itself this mobile chicken coop is a pretty nice build. There are some additional features lurking inside which you don’t find on most coops. [Neuromancer2701] built-in a set of sensors which can be accessed wirelessly. It makes it a snap to check up on the comfort of the hens without leaving the couch.

At the heart of the sensor system is an Arduino along with an Xbee module. The build isn’t quite finished yet, but so far three sensors have been implemented. A thermistor is used to read the temperature inside the coop. To make sure there’s enough water, two sheets of foil tape were applied to the water reservoir. The CapSense library measures the capacitance between these plates which correlates to the water lever (we’ve seen this type of water level sensor before). And finally, there’s a sensor that can tell if the door to the coop is open or shut.

He’s having trouble automating the door itself. This can be pretty tricky, especially if you go for a super complicated locking mechanism like this one.

Making A Game With Capacitive Touch

Hackaday has seen a ton of builds make use of the Arduino CapSense library of late, so it was only a matter of time before we posted a capacitive sensing game controller that is able to move sprites around a screen.

For this build, the controller is made out of small strips of Aluminum foil, wired straight to an Arduino with a few resistors. Once embedded inside a wonderful enclosure that brings about pangs of nostalgia it’s time tow write the game.

For the game portion of the build, Processing was brought into the mix to create a SpongeBob-themed ‘capture all the jellyfish in jellyfish fields’ game. By taping the contacts for the d-pad, the player can move SpongeBob around to catch jellyfish. If you’d like to give the game a go, you can play it in your browser on the project page.

This isn’t the first – or the last – CapSense build we’ll see on Hackaday, but it is the first one dedicated to making a DIY (albeit Nintendo inspired) video game controller. If six buttons aren’t enough, you’ll just have to wait for the PS3 version.


Knock Lock Balks Knock, Uses CapSense Without Shock

[Rob Hemsley] sent in an update to an RFID-based door lock. Previously, if you wanted to enter the MIT media lab, a RFID-enabled card was required to get in. Now, with [Rob]’s update, you only need to tap the door handle in a ‘secret’ pattern.

The earlier RFID-enabled build used about $80 in hardware, not a very economical solution. The new touch-based solution only uses an Arduino and servo, making the build much cheaper.

The touch sensitive lock uses the CapSense Arduino library. By turning the door handle into a touch sensor, [Rob] allowed a secret code to be saved in the EEPROM. Repeating this sequence when the door is locked sends power to the servo, unlocking the door.

A very cool build that’s also a little more secure than the traditional, audible knock lock. Check out the video after the break.

Continue reading “Knock Lock Balks Knock, Uses CapSense Without Shock”

[RobB’s] House Has No Light Switches

So [RobB] wanted to take out all the light switches in his house. His plan was to replace them with a system that could be operated from his smart phone. But his wife insisted that there still must be some way to control the lighting directly — we have to agree with her on that one. The solution was to develop a system that switches the lights via a touch sensor or by Bluetooth.

The touch part of the project is pretty easy. He coated the back of a blank outlet plate with tin foil and hooked it to a microcontroller with a couple of resistors. He’s using an ATtiny85, which can be programmed using Arduino sketches, so the software side is made easy by the CapSense Library. The chip also uses the software serial library to communicate with a Bluetooth module. You can see the result of both in the demo video after the break.

Of course you need to throw a relay in there to switch mains, and find a way to power the uC and Bluetooth module. [RobB] went with a tiny plug-in USB power converter and managed to fit everything in a single-gang switch.

Continue reading “[RobB’s] House Has No Light Switches”

Piano Box Is A Digital Synthesizer Made Of Paper

We love the look of this papercraft piano which [Catarina] built along with some friends at NYC Resistor, a hackerspace in the big apple. It starts off as a cubic black box with a white top. But just lift that top as [Catarina] does in the video after the break and three of the sides fall flat to reveal a pair of speakers and the single-octave keyboard.

The key’s don’t move when you press them. Instead, she decided to use the CapSense Arduino library to implement touch sensitive keys. Each key is made up of a plane of copper foil tape, with a strip of tape running back to the center of the box where it is interfaced with an Arduino Mega hidden there. The Tone library produces the waveforms which are played by the speakers, and a set of LEDs on the upright side of the box illuminate the keyboard diagram as you press each key. You can see that there are short white bars on that display which correspond to the black keys on the keyboard.

If you take a look at the code, you’ll see the libraries really make the code for the project simple.

Continue reading “Piano Box Is A Digital Synthesizer Made Of Paper”