The Raspberry Pi CM4 Begets A Form Factor

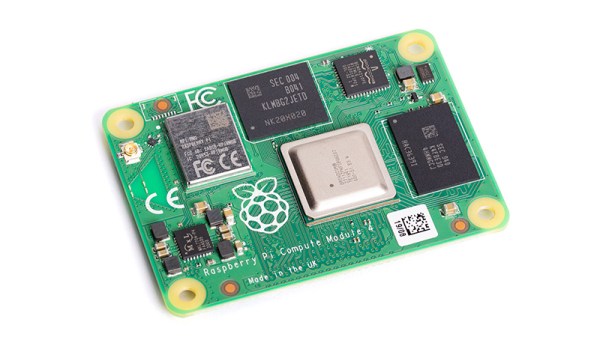
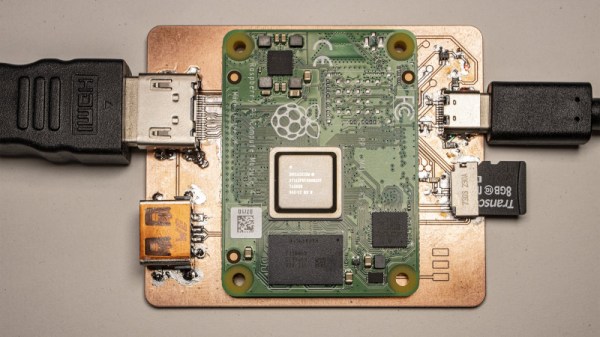
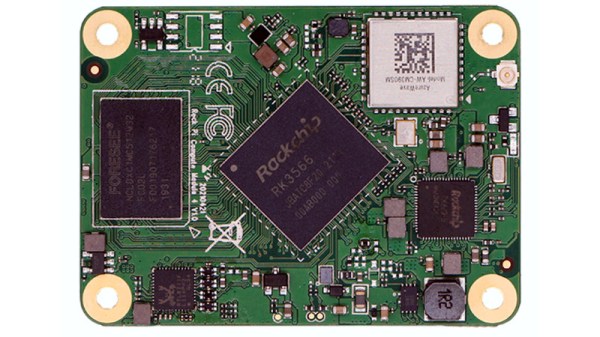
It has become the norm for single-board computers to emerge bearing more than a passing resemblance to the Raspberry Pi, as the board from Cambridge sets the hardware standard for its many competitors. This trend has taken an interesting new turn, as a new board has emerged that doesn’t sport the familiar 40-pin connector of the Pi Model B, but the more compact from factor of the Compute Module 4. The Radxa CM3 sports a Rockchip RK3566 quad core Cortex-A55 running at 2.0 GHz, and is to be made available in a variety of memory specifications topping out at 8 GB. It is hardware compatible with the Pi CM4, and should be usable with carrier boards made for that module.

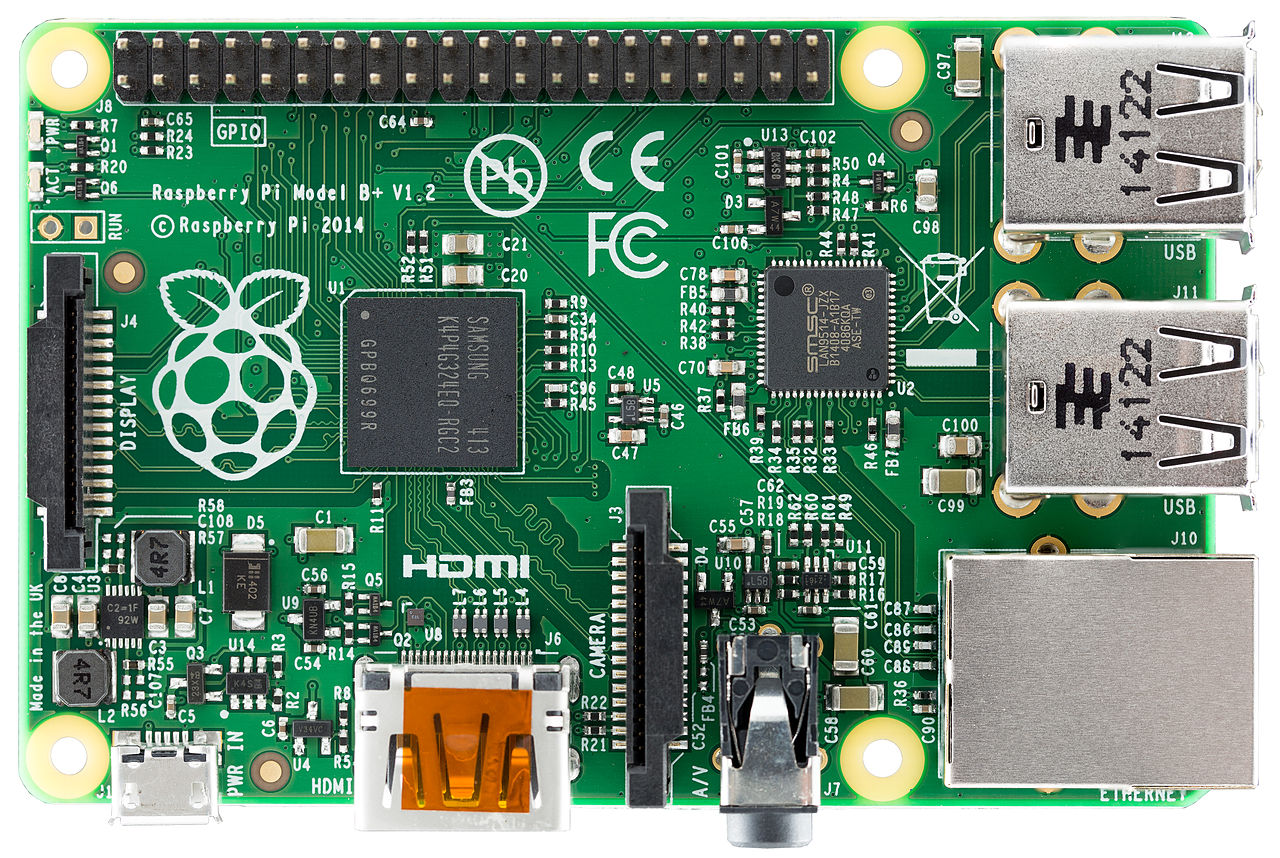
We’ve looked at the CM4 as the exciting face of the Raspberry Pi because the traditional boards have largely settled into the same-but-faster progression of models since the original B+ in 2014. The compute module offers an accessible way to spin your own take on Raspberry Pi hardware, and it seems that this new board will only serve to broaden those opportunities. Radxa are the company behind the Rock Pi series of more conventional Raspberry Pi clones, so there seems every chance that it will reach the market as promised.

Will it make sense to buy one of these as opposed to the Pi CM4? On paper it may have some hardware features to tempt developers, but like all Pi clones it will have to bridge the software gap to be a real contender. The Raspberry Pi has never been the fastest board on the market at any given time, but it has gained its position because it comes with a well-supported and properly updated operating system. For this board and others like it that will be a tough standard to match.

Curious as to what the first Raspberry Pi form factor clone was? We think it’s the SolidRun Carrier-one from 2013.

Via CNX Software.

The Compute Module Comes Of Age: Say Hello To The Real Cutting Edge Of Raspberry Pi

If we wanted to point to an epoch-making moment for our community, we’d take you back to February 29th, 2012. It was that day on which a small outfit in Cambridge put on the market the first batch of their new product. That outfit was what would become the Raspberry Pi Foundation, and the product was a run of 10,000 Chinese made versions of their very first single board computer, the Raspberry Pi Model B. With its BCM2835 SoC and 512 megabytes of memory it might not have been the first board that could run a Linux distribution from an SD card, but it was certainly the first that did so for pocket money prices. On that morning back in 2012 the unforseen demand for the new board brought down the websites of both the electronics distributors putting it on sale, and a now-legendary product was born. We’re now on version 4 of the Model B with specs upgraded in almost every sense, and something closer to the original can still be bought in the form of its svelte stablemate, the Pi Zero.

How Do You Evolve Without Casualties?

The original Pi Model B+ from 2014.
The original Pi Model B+ from 2014. The form factor has had a few minor changes, but hardware-wise the Pi 4 follows this pretty closely. Lucasbosch, CC BY-SA 3.0.

The problem with having spawned such a successful product line is this: with so many competitors and copies snapping at your heels, how do you improve upon it? It’s fair to say that sometimes its competitors have produced more capable hardware than the Pi of the moment, but they do so without the board from Cambridge’s ace in the hole: its uniquely well-supported Linux distribution, Raspberry Pi OS. It’s that combination of a powerful board and an operating system with the minimum of shocks and surprises that still makes the Pi the one to go for after all these years.

Continue reading “The Compute Module Comes Of Age: Say Hello To The Real Cutting Edge Of Raspberry Pi”

An AMD GPU plugged into an ATX PSU and Raspberry PI CM4

Raspberry Pi With Some Serious Graphical Muscle

[Jeff Geerling] routinely tinkers around with Raspberry Pi compute module, which unlike the regular RPi 4, includes a PCI-e lane. With some luck, he was able to obtain an AMD Radeon RX 6700 XT GPU card and decided to try and plug it into the Raspberry Pi 4 Compute Module.

While you likely wouldn’t be running games with such as setup, there are many kinds of unique and interesting compute-based workloads that can be offloaded onto a GPU. In a situation similar to putting a V8 on a lawnmower, the Raspberry Pi 4 pulls around 5-10 watts and the GPU can pull 230 watts. Unfortunately, the PCI-e slot on the IO board wasn’t designed with a power-hungry chip in mind, so [Jeff] brought in a full-blown ATX power supply to power the GPU. To avoid problems with differing ground planes, an adapter was fashioned for the Raspberry Pi to be powered from the PSU as well. Plugging in the card yielded promising results initially. In particular, Linux detected the card and correctly mapped the BARs (Base Address Register), which had been a problem in the past for him with other devices. A BAR allows a PCI device to map its memory into the CPU’s memory space and keep track of the base address of that mapped memory range.

AMD kindly provides Linux drivers for the kernel. [Jeff] walks through cross-compiling the kernel and has a nice docker container that quickly reproduces the built environment. There was a bug that prevented compilation with AMD drivers included, so he wasn’t able to get a fully built kernel. Since the video, he has been slowly wading through the issue in a fascinating thread on GitHub. Everything from running out of memory space for the Pi to PSP memory training for the GPU itself has been encountered.

The ever-expanding capabilities of the plucky little compute module are a wonderful thing to us here at Hackaday, as we saw it get NVMe boot earlier this year. We’re looking forward to the progress [Jeff] makes with GPUs. Video after the break.

Continue reading “Raspberry Pi With Some Serious Graphical Muscle”

magicBlueSmoke-piStick-featured

How Do You Make A Raspberry Pi On A Stick?

We agree with [magic-blue-smoke] that one of the only things more fun than a standard Raspberry Pi 4 is the Compute Module form factor. If they are not destined to be embedded in a system, these need a breakout board to be useful. Each can be customized with a myriad board shapes and ports, and that’s where the real fun starts. We’ve already seen projects that include custom carrier boards in everything from a 3D Printer to a NAS and one that shows we can build a single-sided board at home complete with high-speed ports.

[magic blue smoke] used this ability to customize the breakout board as an opportunity to create a hackable media player “stick” with the Raspberry Pi built-in. We love that this Raspberry Pi CM4 TV Stick eliminates all the adapters and cables usually required to connect a Pi’s fiddly micro HDMI ports to a display and has heat sinks and an IR receiver to boot. Like a consumer media player HDMI stick, all you need to add is power. Continue reading “How Do You Make A Raspberry Pi On A Stick?”

Compute Module 4 NAS With Custom Carrier Board

At this point, we’ve seen more Raspberry Pi Network Attached Storage (NAS) builds than we can possibly count. The platform was never a particularly ideal choice for this task due to the fact it could only connect to drives over USB, but it was cheap and easy to work with, so folks made the best of it. But that all changed once the Compute Module 4 introduced PCIe support to the Raspberry Pi ecosystem.

If this impressive NAS built by [mebs] represents the shape of things to come, we’re more than a little excited. On the outside, with its 3D printed case and integrated OLED display to show system status, it might look like plenty of builds that came before it. But pop the top of this cyberpunk-styled server, and you realize just how much work went into it.

At the heart of this NAS is a purpose-built carrier board that [mebs] designed based on the KiCad files the Raspberry Pi Foundation released for their official CM4 IO Board. While not much larger than the CM4 itself, the NAS board breaks out the board’s PCIe, Ethernet, HDMI, and USB. There’s also a header for I2C, used primarily for the OLED display but naturally expandable to additional sensors or devices, and nine GPIO pins for good measure.

Of course, that alone doesn’t make a NAS. Into that PCIe port goes a four channel SATA controller card, which in turn is connected to the hard disk drives that are nestled into their respective nodes of the printed case. A central fan blows over the electronics at the core, and thanks to clever design and a few cardboard seals, pulls air over the drives by way of intake vents printed into the sides.

As impressive as this build is, not everyone will need this level of performance. If you don’t mind being limited to USB speeds, you can 3D print a NAS enclosure for the standard Raspberry Pi. Or you could always repurpose an old PC case if you’d like something a bit more substantial.

NVMe Boot Finally Comes To The Pi Compute Module 4

Since the introduction of the Raspberry Pi Compute Module 4, power users have wanted to use NVMe drives with the diminutive ARM board. While it was always possible to get one plugged in through an adapter on the IO Board, it was a bit too awkward for serious use. But as [Jeff Geerling] recently discussed on his blog, we’re not only starting to see CM4 carrier boards with full-size M.2 slots onboard, but the Raspberry Pi Foundation has unveiled beta support for booting from these speedy storage devices.

The MirkoPC board that [Jeff] looks at is certainly impressive on its own. Even if you don’t feel like jumping through the hoops necessary to actually boot to NVMe, the fact that you can simply plug in a standard drive and use it for mass storage is a big advantage. But the board also breaks out pretty much any I/O you could possibly want from the CM4, and even includes some of its own niceties like an RTC module and I2S DAC with a high-quality headphone amplifier.

Once the NVMe drive is safely nestled into position and you’ve updated to the beta bootloader, you can say goodbye to SD cards. But don’t get too excited just yet. Somewhat surprisingly, [Jeff] finds that booting from the NVMe drive is no faster than the SD card. That said, actually loading programs and other day-to-day tasks are far snappier once the system gets up and running. Perhaps the boot time can be improved with future tweaks, but honestly, the ~7 seconds it currently takes to start up the CM4 hardly seems excessive.

NVMe drives are exciting pieces of tech, and it’s good to see more single-board computers support it. While it might not help your CM4 boot any faster, it definitely offers a nice kick in performance across the board and expands what the system is capable of. Continue reading “NVMe Boot Finally Comes To The Pi Compute Module 4”

Easy Carrier Board For The Compute Module 4 Shows You Can Do It, Too

The Raspberry Pi Compute Module 4 has got many excited, with a raft of new features bringing exciting possibilities. However, for those used to the standard Raspberry Pi line, switching over to the Compute Module form factor can be daunting. To show just how easy it is to get started, [timonsku] set about producing a quick and dirty carrier board for the module at home.

The Twitter thread goes into further detail on the design of the board. The carrier features HDMI, USB-A and USB-C ports, as well as a microSD slot. It’s all put together on a single-sided copper PCB that [timonsku] routed at home. The board was built as an exercise to show that high-speed signals and many-pin connectors can be dealt with by the home gamer, with [timonsku] sharing tips on how to get the job done with cheap, accessible tools.

The board may look rough around the edges, but that’s the point. [timonsku] doesn’t recommend producing PCBs at home when multi-layer designs can be had cheaply from overseas. Instead, it serves to show how little is really required to design a carrier board that works. Even four-layer boards can be had for under $10 apiece now, so there’s never been a better time to up your game and get designing.

For those eager to learn more about the CM4, we’ve got a full breakdown to get you up to speed!