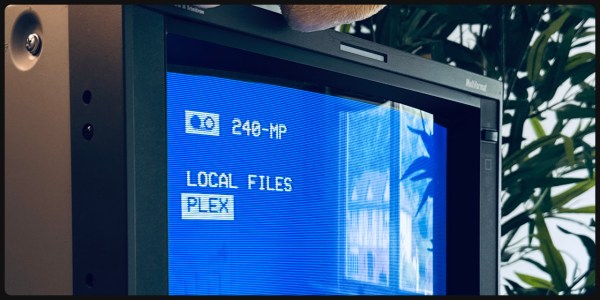
If you have a TV and a Pi, you have the workings of a media center, and you’re not exactly short on options for software. But options are good, so here’s one more by [Anthony Caccese] — a player called 240-MP that explicitly targets CRTs with its retro stylings, released under the GPLv3 license.
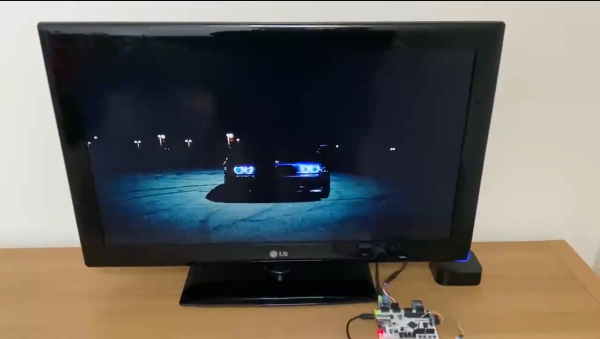
Don’t let the name fool you, though. While the blue-and-white styling is very evocative of 90s VCRs, the output isn’t limited to 240p. If you’re running it into a vintage CRT over composite, as [Anthony] does, sure, it’ll do that. If you want to use HDMI on a modern TV, however, that’s an option too, in 4K if that’s your jam. Higher resolution video will need a beefier Pi, of course, but MPV can handle the files, and ultimately this is a wrapper for MPV. You still get the vintage styling, which can do green-and-black as easily as white-and-blue, as well as whatever custom color scheme you want to define. It might not look quite as good if it’s not on a display tube, but we could see this as a good fit for a plasma TV, too.
As you can see in the demo video embedded below, the player is equally happy listing and playing local files — including playlists — or streaming via a PLEX server. Other add-ons, for example to launch emulators, may be forthcoming. Of course, if you’re not willing to wait you could always code them yourself.
Given the roots of this project in old VHS interfaces, we’re somewhat surprised there doesn’t seem to be an option for control via physical tokens. We’ve already seen projects that try and replicate that portion of the VCR magic, though. If it’s not the tapes you miss from back in the day, you can also simulate cable TV.
Continue reading “Pi Media Player With VCR Vibe Is Perfect For CRTs”