Fulcrum Foils Finger Fatigue

It turns out that typing all day just might be bad for your hands and fingers. Repetitive Strain Injury, RSI, was a real problem for [David Schiller], particularly when coding. So, naturally, he started designing his own keyboard. And bless him, he’s shared the whole project on GitHub.

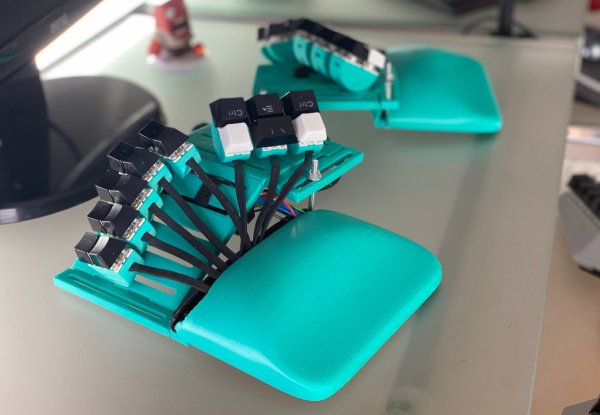
The solution is Fulcrum, a chording keyboard with keys that can be pressed with minimal movement. And one more clever trick is a thumb joystick, mounted in the thumb’s opposable orientation. It’s a 5-way switch, making for a bunch of combinations. The base model is a 20-key arrangement, and he’s also designed a larger, 40-key option.

The build is pretty simple, if you have access to a 3D printer. Print the STLs, add key switches, and wire it all up to a microcontroller. Use the supplied code, and all that’s left is to learn all the chord combos. And why stop with combos for single characters, when there are plenty of common words and plenty of key combinations. If you decide to build your own take on the Fulcrum, be sure to let us know about it!

Morphing Keyboard Gets You Dialed In Just Right

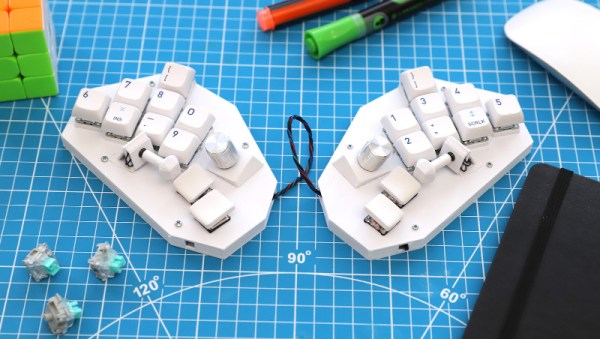
So you’re tired of rectangular, brick wall-staggered keyboards and want to go split and/or ergo. But how? Which style? What do? Here’s what you do: you build one of these here LHM Morph boards and customize the crap out of it, because that’s what it’s for.

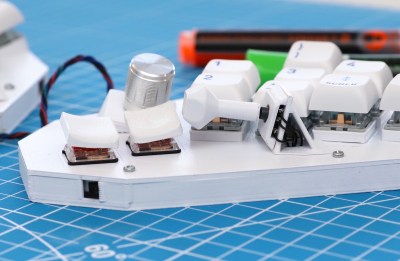
So what is this thing, anyway? Is it a even a keyboard? Well, as long as you can press switches and send key commands to a computer, it certainly smells like a keyboard to us. Now that we’ve gotten that out of the way, what’s going on here is that [LifeHackerMax] has built a highly-customizable version of the LHM, their 26-key split. The LHM Morph can be fine-tuned to nearly any degree imaginable, including the tenting angle. The keys are grouped in modules that can slide back and forth to suit your varying finger lengths. As they are half-round, these modules can also be tilted and rotated until they’re just right.

But the super cool thing about the LHM Morph is the way it goes together — like LEGO. It’s completely modular, and you don’t even have to go split if you’re not ready for that. But all the pieces connect via rods made of copper wire. If you’d like to make one for yourself, the 3D files are up on Thingiverse, and the firmware is on GitHub. Be sure to check out the video after the break.

Does this keyboard remind you of anything? [Peter Lyons]’ Squeezebox, perhaps?

Continue reading “Morphing Keyboard Gets You Dialed In Just Right”

Sunrise Keyboard Looks The Part

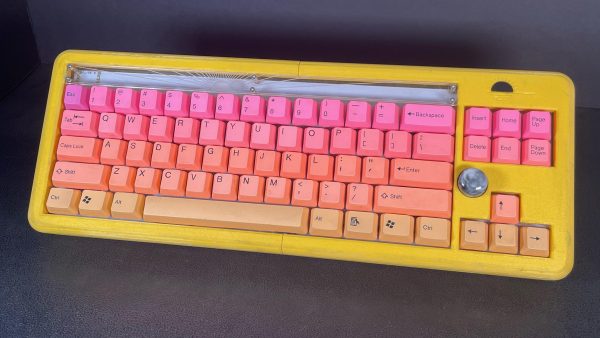
If you’ve been to a bar sometime since the 1930s, you’ve probably spied someone drinking a Tequila Sunrise. It’s a drink that mimics the beautiful colors of the dawn. In much the same way, so does this Sunriser keyboard build from [crashl1445].

Built for a high-school engineering project, the build looks resplendent with its yellow case, paired with yellow, orange and pink keycaps to produce the wonderful sunrise aesthetic. The build relies on an Elite-C v4 microcontroller, an off-the-shelf device specifically designed for building custom keyboards. As you might guess from the name, it features a USB-C port, serving as a modernized alternative to the Arduino Pro Micro for custom keyboard builders. KTT Rose switches are used as per [crashl1445’s] own preference, and there’s even a rotary encoder which acts as a volume knob, installed right by the arrow keys. The case is printed in several parts on a Prusa Mk3+, as the keyboard wouldn’t fit entirely on the build plate as a single piece.

The best thing about building your own keyboard is that you can design it entirely to suit your own preferences and aesthetic; we think [crashl1445] did a great job in this regard. If you’re cooking up your own sweet keyboard build, don’t hesitate to let us know!

Transparent Framedeck Is Clearly Capable

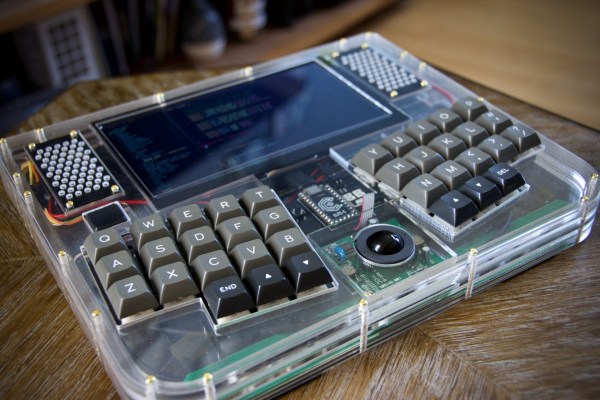
When the universe tells you to build a cyberdeck, then build a cyberdeck you must. The lucky [Richard Sutherland] got an email from user-serviceable laptop purveyors Framework about the availability of their main board for use as a single-board computer. They agreed to send him a laptop and some extra modules as long as he promised to build something awesome with it. There was just one fabulous caveat: whatever design he came up with had to be released to the public.

[Richard] took this capable board with four USB ports and built an all-in-one that pays homage to the slab-style computers like the TRS-80 Model 100, which [Richard] really wanted as a kid. It looks lovely in layered acrylic and brass, and even though we pretty much always think that see-through is the best design choice you can make, transparency really works here. Tucked into those layers is a custom 36-key split running on an Elite-C microcontroller with Gazzew Boba U4 Silent-but-tactile switches, and a trackball in between. Be sure to take the build tour and check out all the process pictures.

Acrylic looks great and seems great on paper, but what about actual use? [Richard] put rubbery SKUF feet on the front, and a pair of repositionable feet on the back. Not only will it stay in place on the table, but he’ll be able to see the screen better and type at an angle greater than zero.

As cool as it would be to have Framedeck in the apocalypse, it will be hard to hide and could get looted. You might want to build something a bit more concealed.

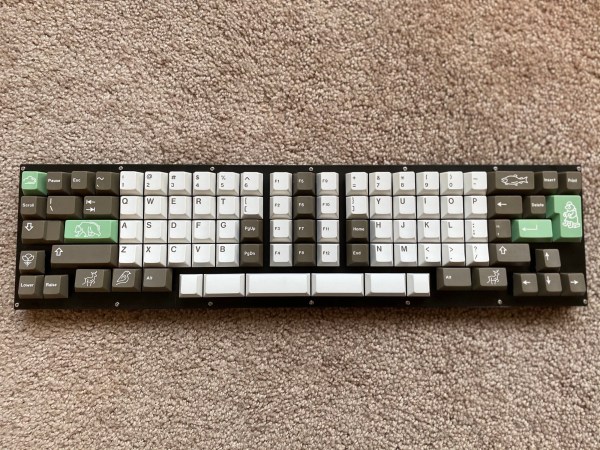
Finally, an ortho split keyboard with two Enter keys.

All Aboard! The Railroad Keyboard Is Now Serving Open Sourceville

Sometimes you don’t know what you want until you see it, and that goes for keyboard designs as much as it does the dessert cart. The Railroad is [DiplomacyPunIn10Did]’s first keyboard design, believe it or not. And, well, we like what we see. Good thing it’s open-source, eh?

While we personally don’t normally go for straight-up ortholinear keyboards, this one looks split enough to be comfortable. We love that there is both an ISO Enter and a regular-sized Return, although we might put another Enter on the left side if it were our keyboard. That’s the beauty of this whole open-source keyboard thing, though. I could assign any number of those animal-capped keys to Enter. Another plus is that The Railroad uses semi-normal keycap sets, with none of this 1.25u nonsense of certain split keyboards.

All the files and the BOM are available on GitHub under a Creative Commons license. This represents JLCPCB’s max length, by the way. [DiplomacyPunIn10Did] wanted to add a num pad, but it would have made it too long. Since the pictures are so big, we put our hands up to the screen to test it out. Those innermost 1u thumb keys look like they’re placed just far enough in toward the space bars that they wouldn’t cause strain, but it’s hard to know for sure without trying a real one. (Darn you, global shortages and shipping delays!)

Yep, there are all kinds of ways to make a keyboard your own. We’ve even seen an all-wood keyboard that uses Scrabble tiles for keycaps.

Illustrated Kristina with an IBM Model M keyboard floating between her hands.

Keebin’ With Kristina: The One With The Grabbity Gloves

I keep saying I need to stay away from auction sites, but then I wouldn’t have as much fodder for Hackaday, would I? As I write this, I’m waiting on a Dell AT101W, which will be my first keeb with Alps switches. Well, hopefully it has Alps SKCM salmon or black switches — according to Deskthority, it might have rubber domes. If it doesn’t keyboard, I will probably salvage the switches and build something more ergonomic. Either way, I’m thinking we need a post about Alps switches, because some people think they’re even better than Cherry MX switches.

Continue reading “Keebin’ With Kristina: The One With The Grabbity Gloves”

3D-Printed Macro Pad Ditches The PCB With Slick Wiring Guides

Reddit user [duzitbetter] showed off their design for a 3D-printed programmable macro keyboard that offers a different take on what can be thought of as a sort of 3D-printed PCB. The design is called the Bloko 9 and uses the Raspberry Pi PICO and some Cherry MX-style switches, which are popular in DIY keyboards.

The enclosure and keycaps are all 3D printed, and what’s interesting is the way that the enclosure both holds the components in place as well as providing a kind of wire guide for all the electrical connections. The result is such that bare copper wire can be routed and soldered between leads in a layout that closely resembles the way a PCB would be routed. The pictures say it all, so take a look.

Bloko 9 is available as a paid model, and while going PCB-free thanks to 3D printing is a technique others have played with, it is very well demonstrated here and shows there is still plenty of room to innovate on the concept. DIY keyboard and macro pad design is also fertile ground for hackers; we have even seen that it’s possible to 3D print one right down to the switches themselves.