3 Ways To DIY Custom CNC Dust Covers

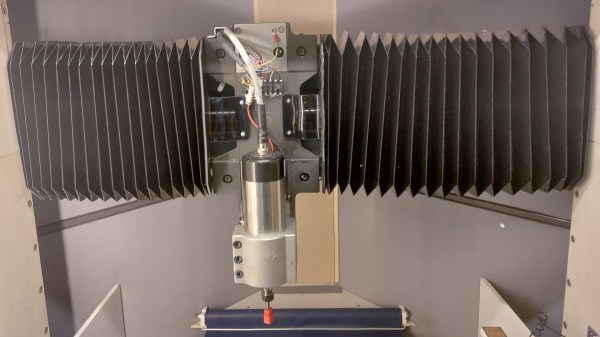
Home shop machinists know dust shields are important for keeping swarf out of expensive linear rails and ball screws. [Petteri Aimonen] demonstrates three inexpensive ways to DIY some bellows-style dust covers. Such things can of course be purchased, but they’re priced at a premium and not always available in the size one needs.

A bellows-style dust cover ideally maximizes extension length while minimizing side wall distortion. It should hold its shape without external support.

The first method is to fold a suitable flat plastic or paper sheet into a bellows pattern. This method is all about the fold pattern, and thankfully, there’s no need to reinvent the wheel. [Petteri] used a fellow enthusiast’s bellows folding pattern generator which is, believe it or not, itself inspired by a remarkably comprehensive US Patent Number 6,054,194.

The downside to this method is the thickness of the bellows when it is fully collapsed. The corners always contain the most material, because it is there that the material is folded upon itself, and this limits how close to the end of travel the CNC carriage can move with the bellows attached.

The second method is to cut a large number of C-shaped sections from fabric and sew them together to make bellows. This method collapses down well and holds its shape well, but the cutting and sewing it requires can be a barrier.

The final method — and the one [Petteri] found most useful — was to hack some IKEA window blinds. IKEA Schottis pleated blinds are inexpensive, with a slick finish on one side and polyester fabric.  The polyester is perfect for gluing. By cutting the material at a 45-degree angle into three sections and gluing them into a U-shape, one can create a serviceable bellows-style cover for a minimum of work.

Any of the explored methods can do the job, but [Petteri] has formulas to determine the maximum extensions and folded thicknesses of each method just in case one would like to see for themselves before choosing. And if a bellows-style cover isn’t your cup of tea, check out this method for turning a plastic strip into a spring-like tube that does the same job.

Reliving A Bitmapped Past With A Veritable Hoard Of Bitmap Fonts

The fonts seen with old computer systems such as those from Apple and Commodore, as well as Microsoft Windows 3.1 and older, form an integral part of our interaction with these systems. These days such bitmap fonts are a rarity, with scalable vector-based fonts having taken their place on modern-day systems. This unfortunately also means that these fonts are at major risk of being lost to the sands of time. This is where [Rob Hagemans] seeks to maintain an archive of such bitmap fonts, ranging from Acorn to MSX to Windows.

Many of these fonts are extracted from character ROMs, with a preview of some of these fonts available via the Monobit viewer. The fonts themselves are made available in YAFF format, which is a text-based format that can be converted back to a binary format using the Monobit tool. If you ever wanted to use one of these old bitmap fonts in a project, this would seem to offer a treasure trove of options. The hoard of bitmap fonts might be the perfect fit for your next graphic LCD project.

(Via [SuperIlu] on Mastodon)

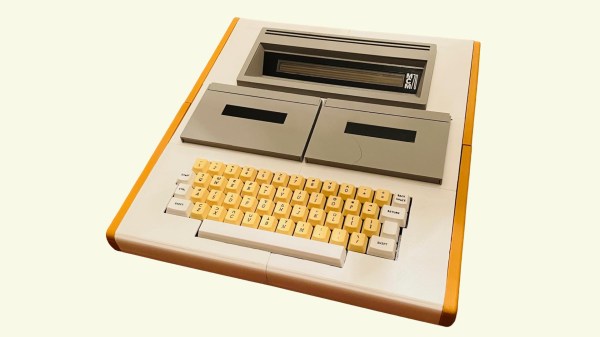
A visually accurate replica of the MCM/70 computer, an all in one system with a keyboard, dual cassette drives and a small one line display

MCM/70 Replica Embodies Proud Canadian Heritage

When a vintage computer is all but unobtanium, software emulation is often all that remains. Unless you are [Michael Gardi], who saw an opportunity to reproduce Canada’s home-grown MCM/70 microcomputer using a combination of software emulation and modern hardware.

Short of building a brand new MCM/70 from the original schematics, this faithful facsimile of the MCM/70 does everything it can to pay homage to the original machine. The foundations of this project can be attributed to the York University Computer Museum (YUCoM) MCM/70E emulator, highly regarded for its “historical accuracy”. The MCM/70 used dual cassette tapes for storage and a funky 32-character dot matrix plasma display, which is all reproduced in software (other versions dropped one of the cassette drives for a modem, bleeding edge innovation for 1974 microcomputing).

From here, [Michael] set off to assemble the various physical components of the original computer. The chassis itself was built from scratch using a mixture of 3D printing and traditional woodwork. The high-voltage plasma display was recreated using four HCMS-2972 dot matrix modules, which minor compromises. The original computer used display memory as extra storage when executing instructions, which created a sporadic blinkenlights effect on the original display. This new display unfortunately won’t reproduce this ‘thinking’ pattern, but it’s a small sacrifice.

Similarly, the original keyboard was going to be challenging to replicate with 100% accuracy, so a brand-new recreation of an Ohio Scientific computer keyboard was used instead. The layouts are extremely similar, and anyone except your most committed Canadian retro computing enthusiasts probably wouldn’t notice the difference. Being a modern recreation of a vintage keyboard, this was relatively easy to source. A set of custom-made keycaps with APL legends really helped sell the replica.

And while working dual cassette drives would have brought this project home, it’s commendable that [Michael] has created ‘working’ cassette drives using 3D printed cassettes and some magnetic magic using hall effect sensors to identify the loaded cassette. The emulator incorporates three virtual cassette tapes which made this solution possible.

If this all sounds familiar, it might be because this project was based on a superb Hackaday writeup of the MCM/70. A truly innovative computer for its time, the story behind Micro Computer Machines (not to be confused with the toy cars) is a fascinating tale, and the write-up is worth a read if you haven’t seen it already.

Continue reading “MCM/70 Replica Embodies Proud Canadian Heritage”

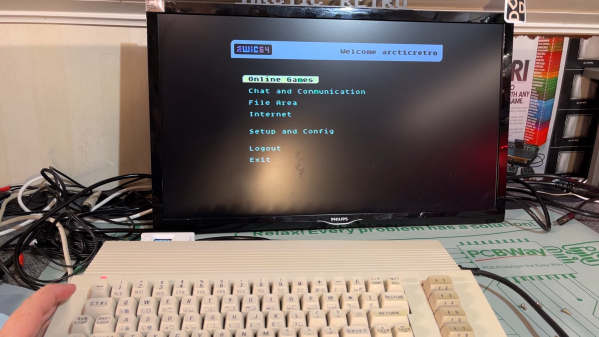
A Commodore 64 accessing an online service

The WiC64 Brings Classic Commodores Online, Google Maps Included

A computing platform is never really dead unless people stop developing new software for it. By that measure, the Commodore 64 is alive and well: new games, demos, and utilities are still being released on a regular basis. Getting those new programs onto an old computer was always a bit of a hassle though, requiring either an SD card adapter for the Commodore or a direct cable connection from an internet-connected PC. Luckily, there’s now a simpler way to get your latest software updates thanks to a WiFi adapter called WiC64.  This adapter plugs into the expansion port of a classic Commodore and lets you download programs directly into memory. [Tommy Ovesen] over at [Arctic Retro] bought one and explored its many features.

The basic design of the WiC64 is straightforward: an ESP32 mounted on an adapter board that connects its data bus to that of the Commodore 64, 128 or VIC-20. A simple program, which you still need to transfer the old way, lets you configure the device and connect to a WiFi network. Once that’s done, an interactive BBS-style program is launched that allows you to access a range of online services. The WiC64 developers provide these, but since the system is fully open-source there’s nothing stopping you from running your own servers as well.

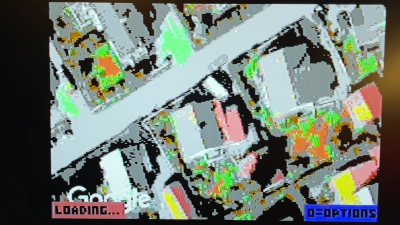
A street on Google Maps, rendered on a Commodore 64 Services currently available include an RSS reader, several multiplayer online games, and even a radio station that plays non-stop SID tunes. There’s also a direct link to CSDB, an online database of Commodore 64 programs and demos which you can now simply download and run directly on your C64 – in effect, a modern app store for a classic computer.

One feature that really seems to defy the C64’s hardware limitations is a fully functional version of Google Maps. Even with the Commodore’s limited resolution and color depth, it does a pretty decent job of showing maps, satellite photos, and even Street View images.

Using the WiC64 requires no hardware modifications to the Commodore 64, but a custom ROM is available that enables a few convenient features such as LOADing programs directly from a web address. There have been several attempts at getting classic Commodores online, but none so far that managed to get complex apps like Google Maps running. We have seen YouTube videos being played on a Commodore PET though.

Continue reading “The WiC64 Brings Classic Commodores Online, Google Maps Included”

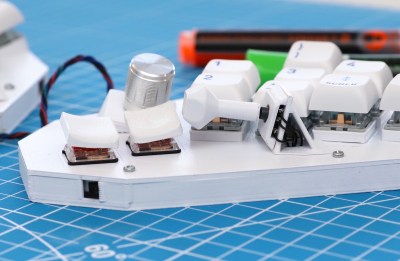
Fulcrum Foils Finger Fatigue

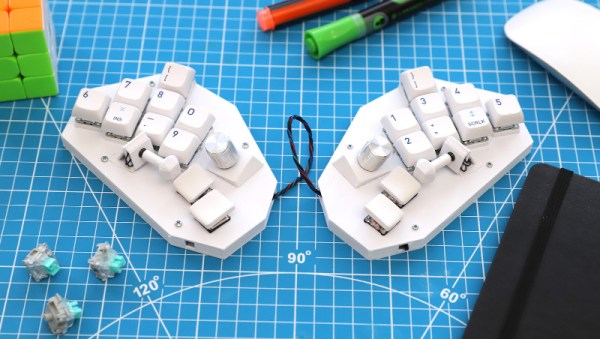
It turns out that typing all day just might be bad for your hands and fingers. Repetitive Strain Injury, RSI, was a real problem for [David Schiller], particularly when coding. So, naturally, he started designing his own keyboard. And bless him, he’s shared the whole project on GitHub.

The solution is Fulcrum, a chording keyboard with keys that can be pressed with minimal movement. And one more clever trick is a thumb joystick, mounted in the thumb’s opposable orientation. It’s a 5-way switch, making for a bunch of combinations. The base model is a 20-key arrangement, and he’s also designed a larger, 40-key option.

The build is pretty simple, if you have access to a 3D printer. Print the STLs, add key switches, and wire it all up to a microcontroller. Use the supplied code, and all that’s left is to learn all the chord combos. And why stop with combos for single characters, when there are plenty of common words and plenty of key combinations. If you decide to build your own take on the Fulcrum, be sure to let us know about it!

Copyright Data, But Do It Right

Copyright law is a triple-edged sword. Historically, it has been used to make sure that authors and rock musicians get their due, but it’s also been extended to the breaking point by firms like Disney. Strangely, a concept that protected creative arts got pressed into duty in the 1980s to protect the writing down of computer instructions, ironically a comparatively few bytes of BIOS code. But as long as we’re going down this strange road where assembly language is creative art, copyright law could also be used to protect the openness of software as well. And doing so has given tremendous legal backbone to the open and free software movements.

So let’s muddy the waters further. Looking at cases like the CDDB fiasco, or the most recent sale of ADSB Exchange, what I see is a community of people providing data to an open resource, in the belief that they are building something for the greater good. And then someone comes along, closes up the database, and sells it. What prevents this from happening in the open-software world? Copyright law. What is the equivalent of copyright for datasets? Strangely enough, that same copyright law.

Data, being facts, can’t be copyrighted. But datasets are purposeful collections of data. And just like computer programs, datasets can be licensed with a restrictive copyright or a permissive copyleft. Indeed, they must, because the same presumption of restrictive copyright is the default.

I scoured all over the ADSB Exchange website to find any notice of the copyright / copyleft status of their dataset taken as a whole, and couldn’t find any. My read is that this means that the dataset is the exclusive property of its owner. The folks who were contributing to ADSB Exchange were, as far as I can tell, contributing to a dataset that they couldn’t modify or redistribute. To be a free and open dataset, to be shared freely, copied, and remixed, it would need a copyleft license like Creative Commons or the Open Data Commons license.

So I’ll admit that I’m surprised to have not seen permissive licenses used around community-based open data projects, especially projects like ADSB Exchange, where all of the software that drives it is open source. Is this just because we don’t know enough about them? Maybe it’s time for that to change, because copyright on datasets is the law of the land, no matter how absurd it may sound on the face, and the closed version is the default. If you want your data contributions to be free, make sure that the project has a free data license.

Experimenting With 20 Meters Of Outlet Adapters

You may have seen some of the EEVblog dumpster dive videos, where [Dave Jones] occasionally finds perfectly good equipment that’s been tossed out. But this time, rather than a large screen monitor, desktop computer, or a photocopier, he features a stash of 283 electrical outlet double adapters that he found last year. He decided to perform a test in the parking lot, connecting all 283 adapters in series.

Using a pair of power meters and a 2 kW electric heater as a test load, [Dave] and his son [Sagan] measure the loss through this wild setup. It works out to about about 300 W, or roughly 1 W per adapter. He did a follow-up experiment using a FLIR thermal camera, and confirmed that the power loss is reasonably uniform, and that no single rogue adapter consuming all the lost power. After a back of the envelope calculation, we estimate this chain of adapters is about 20 meters long, making this whole thing entirely pointless but interesting nonetheless. Stick around until the end of the video for a teardown — they’re not as cheaply made as you might think.

[Dave]’s crazy experiment aside, we do wonder why someone had so many adapters to throw away in the first place. What would you have done with 283 adapters — left them in the dumpster or rescued them?

Continue reading “Experimenting With 20 Meters Of Outlet Adapters”