It’s hard to pin down exactly what a cyberdeck is, as we’ve seen through the huge variety of designs submitted to our 2022 Cyberdeck Contest. The most basic requirement is that it is a type of portable computer, typically with a futuristic, cyberpunk-style design, but beyond that, anything goes. The original concept was introduced in William Gibson’s novel Neuromancer, where it refers to portable devices used to connect to cyberspace. The design of the ‘decks is not described in detail, but we do know that Case, the protagonist, uses a Hosaka computer which is supposedly “next year’s most expensive model”.
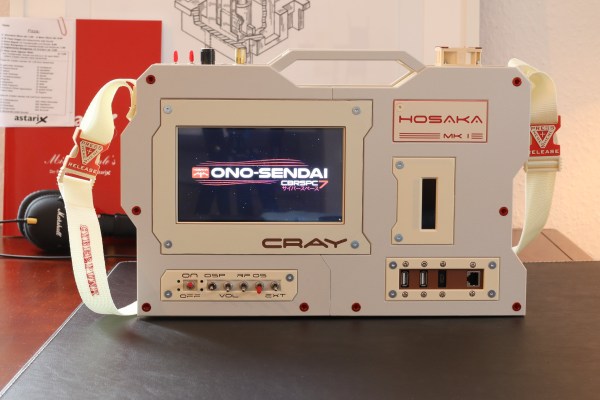
Inspired by Gibson’s novel, [Chris] designed and built the Hosaka MK I “Sprawl Edition” as he imagined it would have looked in the Sprawl universe. The result is an impressive piece of retro-futuristic hardware with lots of chunky tumbler switches, exposed metal screws, and even a shoulder strap. Processing power is supplied by a Raspberry Pi, with input and output happening through a 7″ touchscreen. There’s also an ESP32, which controls a set of RGB LEDs on the back as well as an FM radio module.
The Hosaka’s functionality can even be extended by adding modules to the side, which will snap into place thanks to a set of neodymium magnets integrated into the housing. The whole case is 3D printed, and a full set of .stl files is available for download, although [Chris] warns that the larger parts might be too big for some 3D printers: the whole thing barely fits inside his Prusa MK3s.
We’ve seen several cyberdeck creators that aimed to recreate Gibson’s vision: the XMT-19 Cutlass is one example, as is the massive NX-Yamato. If you’ve designed your own, be sure to submit it to this year’s contest.
Well, I didn’t mean to take the whole summer off from Keebin’, it just kind of happened that way. You’d think it would have been #13 that tripped me up, but we ain’t even there yet — this is only the twelfth edition. I kept thinking I should write one and it just wasn’t happening, until I got a tip from [s.ol bekic] about their stunning hexagonal keycaps and the journey toward making an open-source 12-key macropad featuring same.
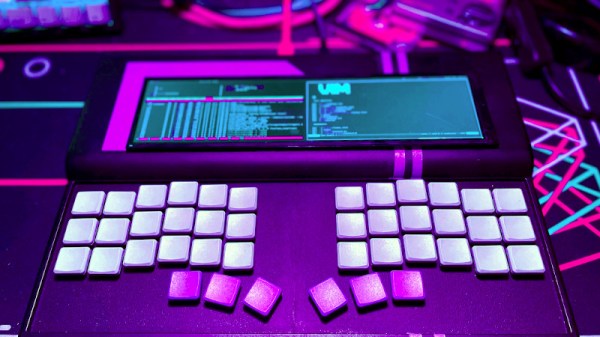
But let’s back up a bit. Originally, [s.ol] designed a totally sick hybrid MIDI-and-typing keyboard from scratch, which you can see in this short video. It glows, it splits in half, and it snaps back together again quite satisfyingly. And you probably noticed the hexagonal keycaps that look like they might be printed or milled, or perhaps even printed and then milled.
In actuality, [s.ol] threw all the processes at this keycap project — milling, molding and casting, and 3D printing. None of them worked well enough to get much past the prototype stage, but in the end, [s.ol] joined forces with fkcaps.com to create and offer an injection-molded version that I’d really, really like to rock my fingertips around in. Good thing I can pick some up for cheap.
Of course, the real process was all the learning [s.ol] did along the way — both in the early days of making the hybrid keyboard, and after teaming up with fkcaps to make the keycaps and the accompanying macropad into real products. And that was after all the design work it took to get this newfangled honeycomb configuration right.
In case you’re wondering, these are meant for only Kailh chocs, but no matter the switch, the spacing is really important because of all the possible points of friction introduced by the design. Be sure to check out the keycap docs page, macropad docs page, and this gallery of keycaps and macropads.
The trend for cyberdecks has brought us many takes on the home-made portable computers, but it’s fair to say that some of them can be rather unwieldy. This is not an accusation you can point at [Smeef] with the Mini-Deck though, because its Raspberry Pi Zero, Adafruit miniature display, and tiny keyboard make the whole unit able to fit in the palm of a hand. We’re not sure we’ve seen one so compact!
The most obvious feature is the keyboard, it’s a DreamGear MiniKey miniature USB keyboard. It doesn’t have all the useful buttons a PC board has, so there’s also a separate set of buttons to cover those. Then there’s an analog stick connected to an Arduino Pro Micro that takes the functionality of a mouse, and an Adafruit Mini PiTFT 1.3″ Display. While a fully-functional display for the Pi, we do wonder if this tiny screen might actually be a bit too tiny to be practical. Power for the unit comes via an 18650 battery, which also functions as a pin for a folding mechanism.
The result is something that looks, feels, and works like a cyberdeck, but all in miniature. It might be a stretch to write a Hackaday piece on a machine like it, but we’re guessing that merely having built something like this is cool enough in itself. Certainly it’s considerably smaller than previous contenders for the smallest build.
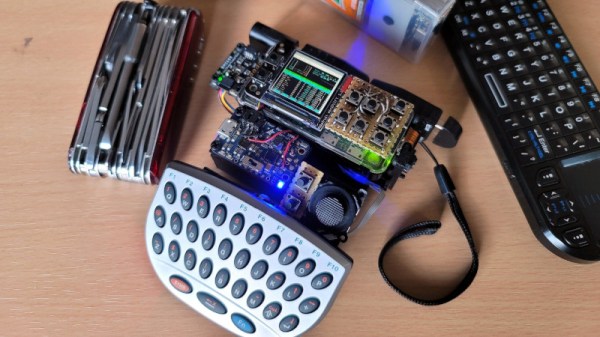
With AI systems getting smarter every day, one might wonder if they might someday evolve into a sentient Skynet-like system and try to take over the world. We’re not sure how close we are to such a situation, but we do know that if the robot apocalypse were to happen, we would want to stay close to [LordOfAllThings], who would likely be carrying the Black Beast. This scary-sounding machine is in essence a Raspberry Pi-based portable computer built inside an outdoor carrying case, with a wide range of unusual peripherals that make it the digital equivalent of a Swiss army knife. In other words, it’s a cyberdeck built for end times — and whatever comes after.
For example, an array of ESP32-based modules plus an SDR module allow you to intercept and analyze hostile robots’ communications, whether they’re using Bluetooth, WiFi, LoRaWAN, or anything in the 433 or 868 MHz ranges. An FM transmitter comes in handy for reaching out to fellow citizens who are trapped with nothing more than an analog radio receiver, while a suite of environmental sensors (including a Geiger counter) should help determine if Skynet has released any harmful substances to flush out those last few pesky humans. (Ed. note: No marigolds in the promised land and all that.)
If you manage to find a wired Ethernet connection somewhere, a built-in five-port gigabit router lets you set up a local network, obviously with a custom network analyzer to detect any unwanted intrusions. A storage compartment contains every kind of cable you could need, as well as useful gadgets like flashlights and, indeed, an actual Swiss army knife.
Laptop screens have come a long way ever since the first LCD-equipped portables hit the market back in the 1980s. But even today’s high-resolution, full-color screens are not ideal for use in direct sunlight: limited contrast and annoying reflections can make reading awkward and working nearly impossible. Electronic-paper displays don’t suffer from those problems, but their low update speed and lack of color limit their use for general computing.
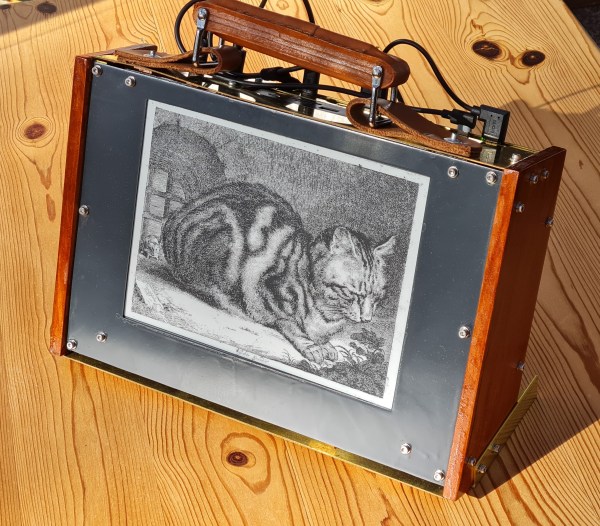
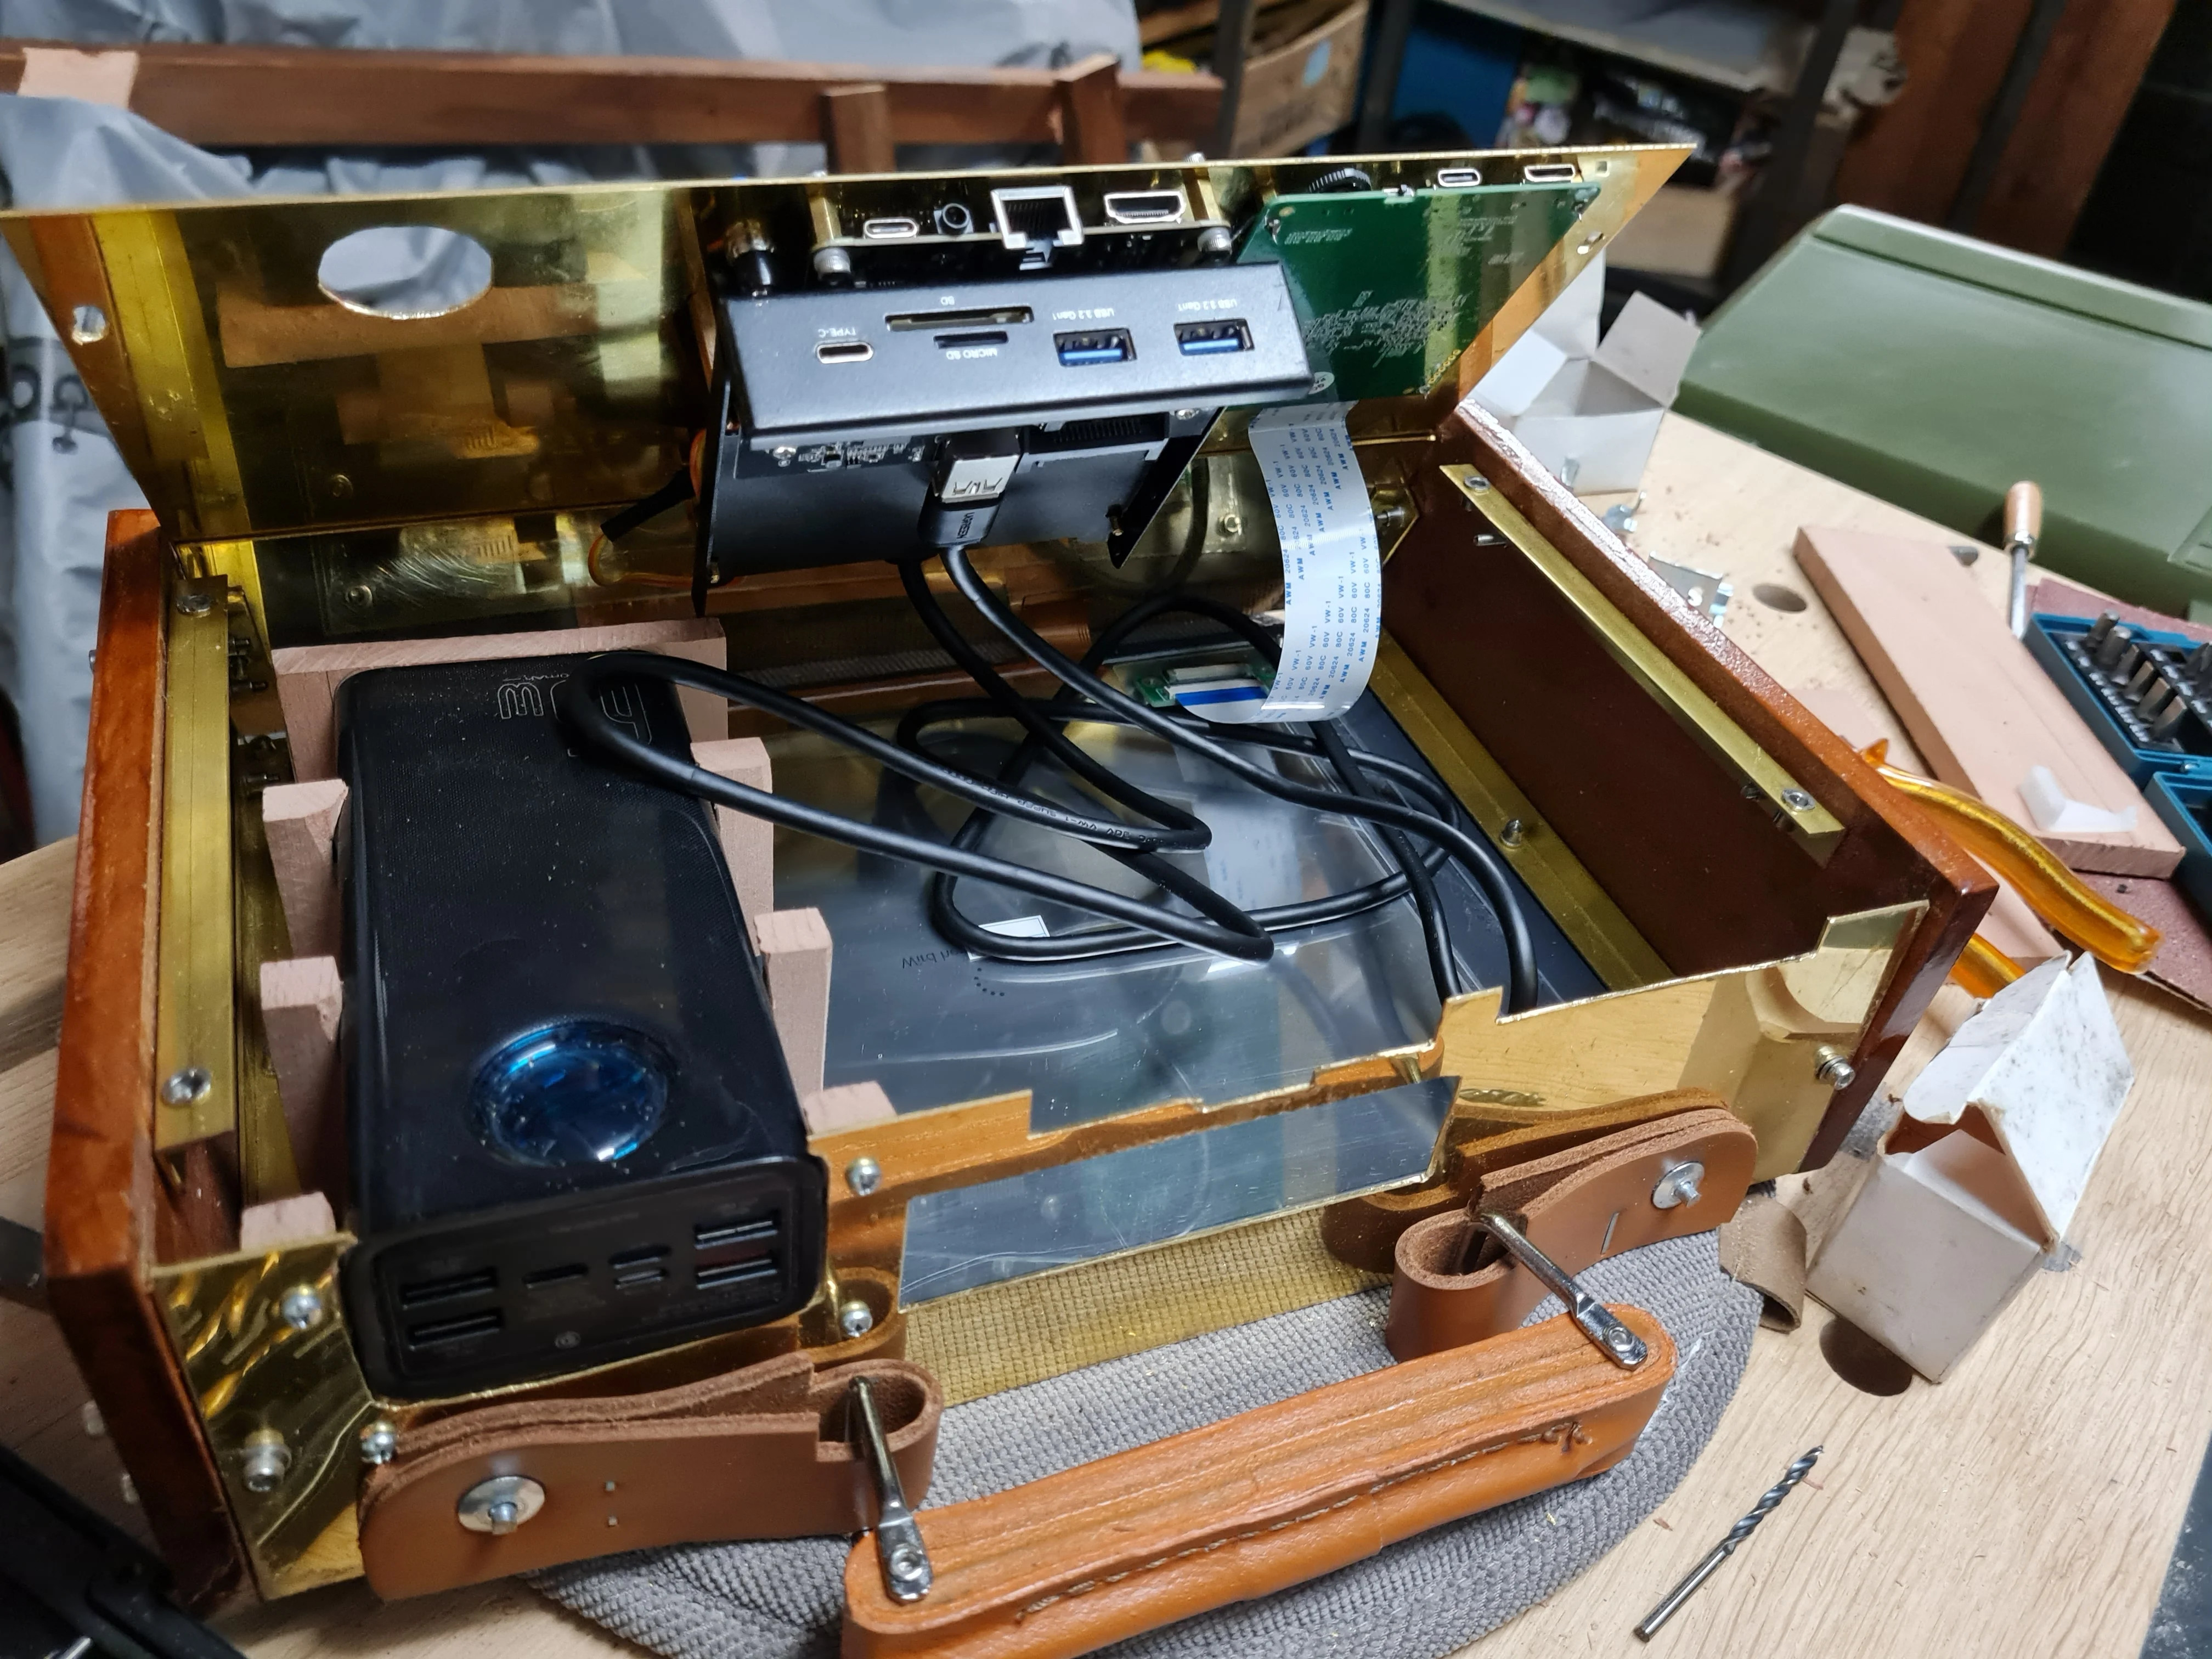
For some people however, the limitations of e-ink are not a deal-breaker. One of them is [Alleycat], who built a portable computer specifically for use in direct sunlight and equipped it with a 10.3″, 1872×1404 resolution e-ink display. It’s powered by a LattePanda Alpha 800s that runs Windows 10, and is mainly used for text-based tasks.
The LattePanda and the display are mounted inside a beautiful hand-made wooden case with a brass cover and leather straps, which makes it look like a kind of steampunk attaché case. A beefy power bank makes it a truly mobile machine, even though it doesn’t come with a built-in keyboard: [Alleycat] is too much of an ErgoDox fan to include anything inferior with the Steampunk Cyberdeck.
With an update rate of 15 Hz the display is nowhere near as fast as a modern TFT screen, but it looks entirely usable when [Alleycat] demonstrates scrolling in a web browser and even the classic DOS game Alley Cat. In fact, it reminds us of those first-generation LCD screens that were fitted on 286-class laptops back in the day, although with a vastly higher resolution.
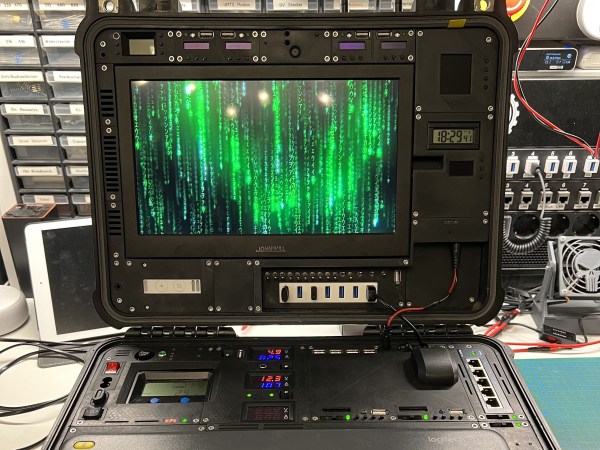
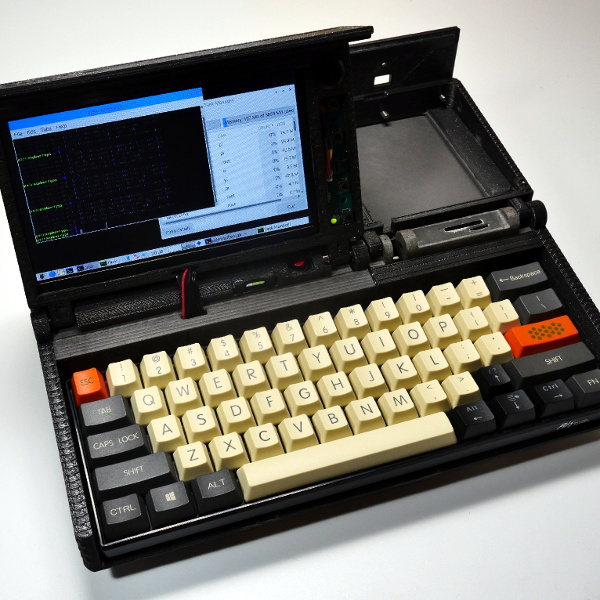
We’re used to laptop computers featuring flip-up screens; this article is being written on one and it’s probable you’re reading it on another one. But there’s another laptop form factor that has gained legions of fans ever since the days of the TRS-80 Model 100, the flat slab with no hinge and both keyboard and display on its upper surface. It’s surfaced most recently in the DevTerm, which inspired [0x17] to have a go at building his own. Instead of starting from scratch though, he’s chosen to use the shell of an Amstrad NC100 from the 1990s.
This series of Amstrad portables followed the company’s tried and tested course of repackaging decade-old technology for the consumer market, and were Z80-based machines that shared much with the company’s PCW series of desktop wordprocessors. The character LCD, mainboard, and keyboard were replaced with a modern LCD, a Raspberry PI, and a custom ergonomic layout keyboard with all associated modules and cables.
The result is undeniably a neat flat form factor laptop computer, and one we could see ourselves using. There may be some questions relating to the repurposing of a retrocomputer when the same result could have been achieved with a bit of CAD work and a 3D printer, but perhaps the machine should speak for itself on that.
In honor of our recently announced 2022 Cyberdeck Contest, we decided to do things a little differently for this week’s Hack Chat. Rather than pick just one host, we looked back through the archive and selected some of the most impressive builds we’ve seen and asked their creators if they’d like to take part in a freewheeling discussion about their creations and the nascent community surrounding these bespoke computing devices.
Despite conflicting time zones and at least one international vacation, we were able to put together an impressive panel to helm this special Cyberdeck Brainstorming Hack Chat:
So what did this accomplished group of cyberdeck builders have to talk about? Well, quite a bit. During a lively conversation, these creators not only swapped stories and details about their own builds, but answered questions from those looking for inspiration and guidance.
bootdsc’s radio-packed VirtuScope
The discussion immediately kicked off with what’s perhaps the most obvious question: why build a cyberdeck if we already have laptops and smartphones — mobile computing form factors which [Io Tenino] admits are likely as close to perfect as we can get with current technology. Most of the builders agreed that a big part of the appeal is artistic, as the design and construction of their personal deck allowed them to show off their creativity.
But what of productivity? Can these custom machines do more than look good on a shelf? There seemed to be consensus that it was difficult to compete with a standard laptop in terms of general purpose computing, but that a cyberdeck tailored to a specific use case could be a powerful tool.
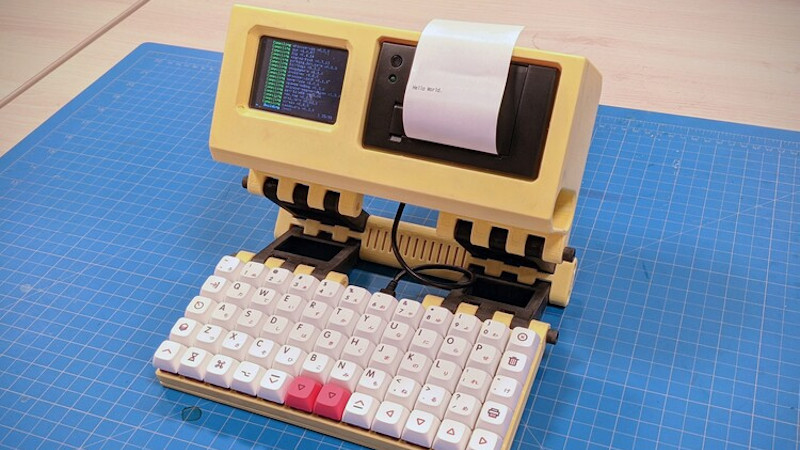
For example, [bootdsc] built a high-power WiFi adapter as well as an RTL-SDR receiver and up-converter into the VirtuScope, while [Io Tenino] says the Joopyter’s integrated printer is occasionally used to run off a grocery list. [H3lix] also mentioned that the trend towards ever-thinner laptops has meant removing ports and expansion options which used to be taken for granted, a potentially frustrating situation for hardware hackers that a cyberdeck can alleviate.
Naturally, the Chat also covered more technical aspects of cyberdeck design. There was quite a bit of discussion about powering these custom machines, and whether or not internal batteries were even a necessary design consideration. In keeping with the survivalist theme, [cyzoonic] included 18650 cells and an integrated charger, while [Io Tenino] is content to use a standard USB battery bank. Ultimately, like most aspects of an individual’s cyberdeck, the answer largely depended on what the user personally wished to accomplish.
[Io Tenino]’s Joopyter comes from a decade that never existed.As you might expect with [Back7] in attendance, there were also several questions about the logistics of using a Pelican case as the enclosure for your build. Different techniques were discussed for mounting hardware within the case without compromising its integrity, such as gluing your fasteners to the inside of the case, or 3D printing an internal framework.
Others wondered if the protection provided by these cases was really necessary given the relatively easy life most of these machines will lead, especially given their considerable cost. Although to that end, we also saw some suggestions for alternative cases which provide a similar look and feel at a more hacker-friendly price point.
Though they are certainly popular, Pelican cases are just one option when planning your own build. Many chose to 3D print their own enclosures, and there’s even the argument to be made that the rise of desktop 3D printing has helped make cyberdeck construction more practical than it has been in the past. Others prefer to use the chassis of an old computer or other piece of consumer electronics as a backbone for their deck, which fits well with the cyberpunk piecemeal aesthetic. That said, the Chat seemed in agreement that care needed to be taken so as not to destroy a rare or valuable piece of vintage hardware in the process.
This Hack Chat was a great chance to get some behind the scenes info about these fantastic builds, but even if you didn’t have a specific question, it was an inspiring discussion to say the least. We’re willing to bet that the design for some of the cyberdecks that get entered into the contest will have been shaped, at least in part, due to this unique exchange of niche ideas and information. Special thanks to [bootdsc], [Back7], [H3lix], [a8ksh4], [Io Tenino], and [cyzoonic] for taking the time to share this glimpse into their fascinating community with us.
The Hack Chat is a weekly online chat session hosted by leading experts from all corners of the hardware hacking universe. It’s a great way for hackers connect in a fun and informal way, but if you can’t make it live, these overview posts as well as the transcripts posted to Hackaday.io make sure you don’t miss out.