Building A Discrete 14-Bit String DAC

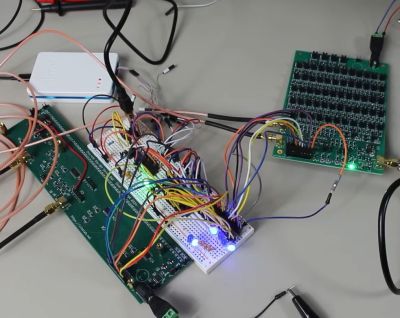
The discrete 14-bit DAC under test. (Credit: Sine Lab, YouTube)

How easy is it to build your own Digital to Analog Converter (DAC)? Although you can readily purchase a wide variety of DACs these days, building your own can be very instructive, as the [Sine Lab] on YouTube explores in a recent video with the construction of a discrete 14-bit DAC. First there are the different architectures you can pick for a DAC, which range from R-2R (resistor ladder) to delta-sigma versions, each having its own level of complexity and providing different response times, accuracy and other characteristics.

The architecture that the [Sine Lab] picked was a String DAC with interpolator. The String type DAC has the advantage of having inherently monotonic output voltage and better switching-induced glitch performance than the R-2R DAC. At its core it still uses resistors and switches (transistors), with the latter summing up the input digital value. This makes adding more bits to the DAC as easy as adding more of these same resistors and switches, the only question is how many. In the case of a String DAC that’d be 2N, which implies that you want to use multiple strings, as in the above graphic.

Scaling this up to 16-bit would thus entail 65,536 resistors/switches in the naive approach, or with 2 8-bit strings 513 switches, 512 resistors and 2 buffers. In the actual design in the video both MOSFETs and 74HCT4051 multiplexers were used, which also necessitated creating two buses per string to help with the input decoding. This is the part where things get serious in the video, but the reasoning for each change and addition is explained clearly as the full 6-bit DAC with interpolator is being designed and built.

One big issue with discrete DACs comes when you have to find matching MOSFETs and similar, which is where LSI DACs are generally significantly more precise. Even so, this discrete design came pretty close to a commercial offering, which is pretty impressive.

Continue reading “Building A Discrete 14-Bit String DAC”

High-Resolution MIDI Controller

For an older standard, MIDI has remarkable staying power in the music industry. It remains the de facto digital interface between computers and instruments thanks to its open nature, but its age does show a little bit. Sending control change (CC) messages, for example, was originally designed to fit within seven bits, which doesn’t give particularly fine resolution compared to more capable modern computers. To work around that, a fourteen-bit message is possible, doubling the resolution, and this MIDI interface uses this larger amount of data to send these high-resolution CC messages.

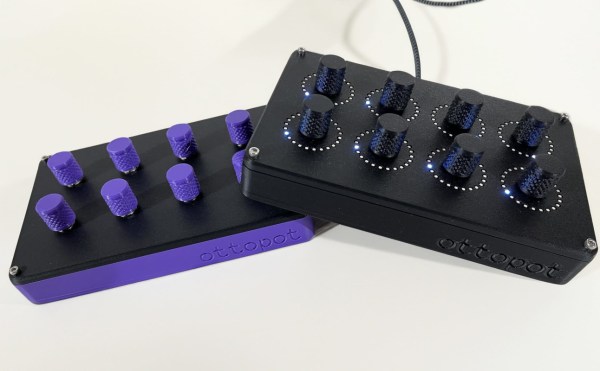
The 14-bit messages are actually fairly well documented but are a bit obscure, with very limited hardware support. To that end, [Gero] set about building this control interface to solve that problem. It’s made up of only eight knobs, each of which is mapped one-to-one to a parameter on the computer, allowing the interface to feel more like an analog device where the knob corresponds directly to a change in an aspect of the sound. The platform is built around a Teensy 4.0 and some multiplexers to handle all of the knobs, with the open source software available for anyone to use to modify their actions. [Gero] was aiming for high fidelity for all aspects of this controller, not just the improved digital resolution, and made a number of other improvements to it as well like re-greasing the potentiometer knobs and a custom 3D printed enclosure.

All of the software is available for use, as well as the files to print the case. [Gero] is also working on a PCB to make the construction of the device a little more streamlined, but for now, it requires a bit of soldering off-the-shelf parts together. The MIDI standard is open as well, which allows for a lot of innovation in the creation of musical instruments from unique hardware. This project builds a MIDI synthesizer with parts from a Sega Genesis.

ESP32, We Have Ways To Make You Talk

One of our favorite scenes from the [James Bond] franchise is the classic exchange between [Goldfinger] and [Bond]. [Connery] (the One True Bond) says, “You expect me to talk?” And the reply is, “No Mr. Bond, I expect you to die!” When it comes to the ESP32, though, apparently [XTronical] expects it to talk. He posted a library to simplify playing WAV files on the ESP32. There is also a video worth watching, below.

Actually, you might want to back up to his previous post where he connects a speaker via one of the digital to analog converters on the board. In that post, he just pushes out a few simple waveforms, but the hardware is the same setup he uses for playing the WAV files.

Continue reading “ESP32, We Have Ways To Make You Talk”

Digital To Analog To Digital To Analog To Digital Conversion

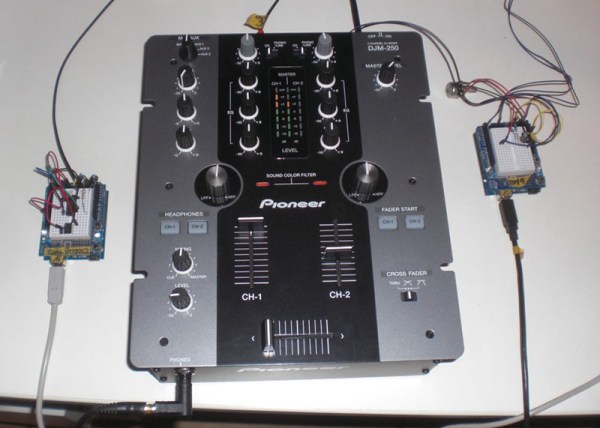
[Andy] had the idea of turning a mixing desk into a MIDI controller. At first glance, this idea seems extremely practical – mixers are a great way to get a lot of dials and faders in a cheap, compact, and robust enclosure. Exactly how you turn a mixer into a MIDI device is what’s important. This build might not be the most efficient, but it does have the best name ever: digital to analog to digital to analog to digital conversion.

The process starts by generating a sine wave on an Arduino with some direct digital synthesis. A 480 Hz square wave is generated on an ATTiny85. Both of these signals are then fed into a 74LS08 AND gate. According to the schematic [Andy] posted, these signals are going into two different gates, with the other input of the gate pulled high. The output of the gate is then sent through a pair of resistors and combined to the ‘audio out’ signal. [Andy] says this is ‘spine-crawling’ for people who do this professionally. If anyone knows what this part of the circuit actually does, please leave a note in the comments.

The signal from the AND gates is then fed into the mixer and sent out to the analog input of another Arduino. This Arduino converts the audio coming out of the mixer to frequencies using a Fast Hartley Transform. With a binary representation of what’s happening inside the mixer, [Andy] has something that can be converted into MIDI.

[Andy] put up a demo of this circuit working. He’s connected the MIDI out to Abelton and can modify MIDI parameters using an audio mixer. Video of that below if you’re still trying to wrap your head around this one.

Continue reading “Digital To Analog To Digital To Analog To Digital Conversion”