Stealth Peephole Camera Watches Your Front Door

In this week’s links post we mentioned an over-powered DSLR peephole that purportedly cost $4000. So when we saw this tip regarding a relatively inexpensive digital peephole, we thought some of you might be a bit more interested.

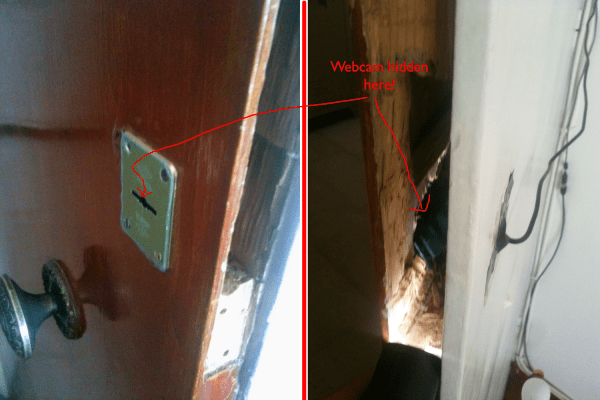
The hardware is quite simple; a decent webcam, a Raspberry Pi, and a powered USB hub. The camera gets stripped down to its PCB and hidden inside the door itself. Even if you see this from the inside it’s just a suspicious-looking wire which wouldn’t make most people think a camera was in use.

On the software side of things, [Alex] set up his Raspberry Pi as a 24/7 webcam server to stream the video online. Unlike using a cheap wireless CCTV camera, his video signals are secure. He then runs Motion, a free software motion detector to allow the camera to trigger events when someone comes sneaking by. It can be setup to send you a text, call you, play an alarm, take a picture, record a video… the list goes on. His blog has a full DIY guide if you want to replicate this system. We just hope you have a stronger door!

We covered a similar project back in 2011, but it had made use of real server instead of an inexpensive Raspberry Pi.

[Thanks Alex!]

DIY Heatsinking PCBs

pcb heatsink

We have covered many do it yourself PCBs before, but this video guide adds an easy way to sink heat from high power devices, which we think you might find handy.

It is a very simple process that [CNLohr] uses to keep his small RGB LED projects from overheating. It starts by using a readily available silicone thermal sheet as the substrate by applying it to copper foil. He then applies a toner-transfer circuit pattern to the copper by running the pair through a modified laminator a few times. He makes note that you have to apply the plastic backing side of the silicone sheet to the copper foil to prevent the laminator from chewing it up.

After the typical ferric chloride etching process is complete, he then uses 220 grit sandpaper to remove the toner pattern. Often steel wool is used, but because of the sensitive nature of the silicone, sandpaper works better to avoid peeling up traces.

We have featured [CNLohr] before, as he does some top-notch tutorials in his workshop — which makes for both a fascinating and distracting backdrop for the videos. This one is a bit long (~20 minutes), but is very thorough and goes through the entire process from start to finish. Check it out after the break.

Continue reading “DIY Heatsinking PCBs”