[Martin] seems to have a knack for locating lightly damaged second-hand audio gear. Over the years he’s collected various types of gear and made various repairs. His most recent project involved fixing two broken tweeter speakers.
He first he needed to test the tweeters. He had to remove them from the speaker cabinet in order to gain easier access to them. The multimeter showed them as an open-circuit, indicating that they had likely been burned. This is an issue he’s seen in the past with this brand of speaker. When too much power is pumped through the speaker, the tiny magnet wire inside over heats and burns out similar to a fuse.
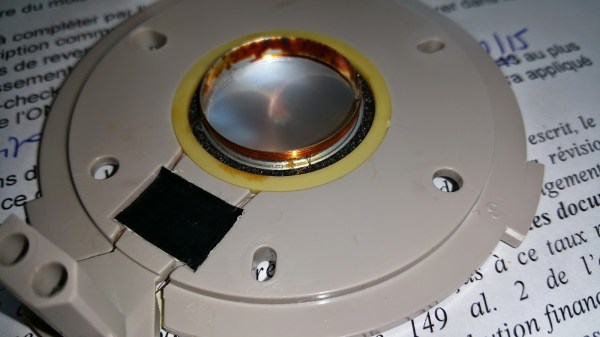
The voice coil itself was bathing in an oily fluid. The idea is to help keep the coil cool so it doesn’t burn out. With that in mind, the thin wire would have likely burned somewhere outside of the cooling fluid. It turned out that it had become damaged just barely outside of the coil. [Martin] used a sharp blade to sever the connection to the coil. He then made a simple repair by soldering the magnet wire back in place using a very thin iron. We’ve seen similar work before with headphone cables.
He repeated this process on the second tweeter and put everything back together. It worked good as new. This may have ultimately been a very simple fix, but considering the amount of money [Martin] saved on these speakers, it was well worth the minimal effort.


