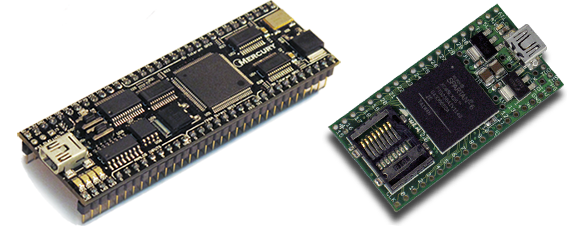
MyHDL Python Programming Option For FPGA

MyHDL is a Python module that brings FPGA programming into the Python environment. [Christopher Felton] tipped us off about a simple tutorial he just finished that gives an overview of how the module is used.

You may remember hearing about PyCPU a couple days ago which can run very simple Python code on a FPGA. There was a healthy discussion in the comments section comparing PyCPU and MyHDL. Although they may seem similar at first, the two are quite different. PyCPU creates a processor on the FPGA chip which can execute a small range of Python code. MyHDL actually implements Hardware Description Language in the Python environment. Once you’re used HDL to model your hardware choices in a Python script, it is converted to VHDL then fed to the toolchain and pushed to the chip like normal.

This is not an absolute beginner’s experience. But if you’re well-versed in Python it makes the jump to HDL a lot easier because you’ll be working with syntax that is already familiar to you.

Programming FPGAs With Python

If you’ve ever wanted to jump into the world of FPGAs but don’t want to learn yet another language, you can now program an FPGA with Python. PyCPU converts very, very simple Python code into either VHDL or Verilog. From this, a hardware description can be uploaded to an FPGA.

The portion of the Python language supported by PyCPU is extremely minimal, with only ints being the only built-in data type supported. Of course ifs and whiles are still included along with all the assignments and operators. A new addition is a way to get digital IO access with Python, and obvious requirement if you’re going to be programming Silicon.

PyCPU surely won’t replace VHDL or Verilog anytime soon, but if you’re looking to get into FPGAs and the ‘telling a chip what to be’ paradigm it offers, it’s certainly a tool worth looking into.

Hats off to [hardsoftlucid] for sending this in. Our wonderful (we mean that, really) noticed a few mistakes when this was first posted. Those mistakes have been corrected.

Putting Every Chiptune Ever In An FPGA

Finally one device combines the power of the Commodore 64 SID, Atari ST YM2149, and Amiga MOD audio into one awesome box. It’s called the RetroCade Synth, and there’s a Kickstarter that is perfect for starting your chiptune composing journey.

[Jack]’s RetroCade synth is connects directly to the Papilio One 500k FPGA. All the classic chiptune ICs can be emulated in this FPGA including the Commodore 64 SID chip, and an Amiga MOD player. Being a follow-up to [Jack]’s previous FPGA YM2149 project, he also threw that chip into the project for good measure. While the RetroCade doesn’t ship with every old chiptune IC – there isn’t support for NES, Atari, GameBoy, or SN76489-based chiptunes yet – that is something [Jack] will add once the Kickstarter is completed.

After the break you can see [Jack] jamming out on his RetroCade project playing a YM2149, SID, and Amiga MOD sounds simultaneously. For $100, it’s comparable to the venerable MIDIbox SID, but also allows anyone to play whatever genre of chiptunes they desire.

Continue reading “Putting Every Chiptune Ever In An FPGA”

Hackaday Links: May 21, 2012

Turning anything into a touch sensor

Makey Makey is a small board with a USB plug and bunch of contact points for alligator clips. Plug the Makey into your computer and attach just about anything to the contacts, and you can make anything into a video game controller, a keyboard, a piano, or pretty much anything you can imagine. If [Sprite_tm] copied it, you know it has to be cool.

RepRaps will finally cost a million dollars

The Pentagon is throwing money at 3D printers. It’s “only” $60 Million the DoD is putting into 3d printer research, but hopefully our most brilliant researchers will help refine some of the ‘unsolved problems’ – like metal and circuit printing – the 3D printer community is facing.

Getting started with FPGAs

[Tim] found a neat little $40 FPGA board aimed right at the hobby hacker. The good news: It’s compatible with Arduino shields, and it’s very cheap. The bad news: it only has 1280 logic cells, so you probably won’t be emulating CPUs on this thing. If anyone has a teardown / project with this board, send it in.

Improving a Bluetooth dongle with a bit of wire

Unsurprisingly, the extremely cheap Bluetooth dongle [Mike] bought on eBay didn’t have great reception or range. No problem, because you can just replace the internal antenna with a piece of wire cut to length. Now bluetooth devices are recognized instantly, and there are no Bluetooth ‘dead spots’ around [Mike]’s computer.

Come to France, make stuff

The Toulouse Hackerspace is having a little shindig this coming weekend (May 25-27) featuring a conference, workshop, concerts and performances. If you’re in the area, drop on by,

Hackaday Links: April 29, 2012

More old computers on FPGAs!

[Andy] loves his Memotech MTX computer. It’s an oldie with a Z80 running at 4MHz; the perfect target for an FPGA port. The ReMemotech has everything the old one has – cassette interface and all – and can run up to six times faster than the original.

Also found in 10-forward

If you’re going to build a jukebox, why not go all out? Here’s a touch screen jukeboxwith an LCARS skin. Yep, the same interface found on Star Trek: The Next Generation.

New desktop wallpaper for you

[McMonster] found a great pair of blog posts (1, 2) showing what ancient ICs look like without their casing. Since these were CERDIP packages (two ceramic plates glued together) they were exceptionally easy to take apart leaving the entire chip intact. Pages are in Polish, but there’s a Google Translate button on the sidebar

Cheap and easy Arduino wi-fi

Quick quiz: what’s the easiest way to get data onto an Arduino wirelessly? XBees? GSM modules? Nope, just get a wireless router and an Ethernet shield. The Ethernet module only cost [Doss] $20, and we’re sure Hackaday readers have a spare wireless router around somewhere.

Chiptunes! Chiptunes I say!

[mdmoose29] has been working on making a custom SNES cartridge for a dubstep artist (tell us more, [moose]…). In his search for programming tools, he found theSNES Game Maker. We tried it out for a bit and it’s still a very unrefined beta. Still, making SNES programming easier is awesome.

You people are awesome. Here’s six things for a links post.

[Valentin] made a night vision monocular from an old VHS camcorder, a small spy camera, and a handful of infrared LEDs. Here’s a video of [Valentin]‘s build in action.

Building An Arduino Chiptunes Project Inside An FPGA

From time to time we find ourselves in the mood for some Chiptunes. You know, the music that accompanied all of the best 8-bit console games? These days there are a lot of projects that use the audio chips of yore to recreate the sounds, but you’re always faced with the issue of sourcing those parts. [Jack Gassett] took some inspiration from one of those projects, but solved the rare hardware dilemma by building his own Chiptunes MIDI device in an FPGA.

He saw one of our features on an Arduino controlled YM2149 programmable sound generator. He realized that you can already find FPGA libraries out there that mimic this sound generation hardware, and he’s already done extensive work with an Arduino soft processor. Why not combine the two?

He’s using a Papilio FPGA with a wing that includes a MIDI connector and audio-out jack. As you can hear in the clip after the break this sounds just like the real thing. And he’s got plans to roll as many different types of sound generating chips into the mix as possible. You know, one FPGA synth to rule them all.

Continue reading “Building An Arduino Chiptunes Project Inside An FPGA”

Conway’s Game Of Life In HD

We’re going to have to take [Mike’s] word for it that he built Conway’s Game of Life with high-definition video output. That’s because this screenshot is his only proof and it looks a bit fuzzy to us. But we are interested in the project which used an FPGA to generate a 1080p VGA output of the classic programming challenge.

One of the biggest benefits of using an FPGA for this application is the hardware’s parallel processing ability. For every frame of the game, the area around each living cell must be analyzed to produce the next evolutionary step. Most of the time this means processing all of the pixels in the playing area, which is the case here. [Mike] is using VHDL to program a Papilio Plus which has a Spartan 6 chip on it. He separated his code into the different components when writing about it. This makes it easy to find the chunks relating to the game if that’s what you’re interested in. If you just want to see how he implemented the VGA interface that’s well documented as well.

If you’re not familiar, Conway’s Game of Life has simple rules regarding when a cell will live, die, or be reborn. As [Mike] points out, every programmer should give it a shot at some point. We’ve seen many iterations from the very large to the very small.