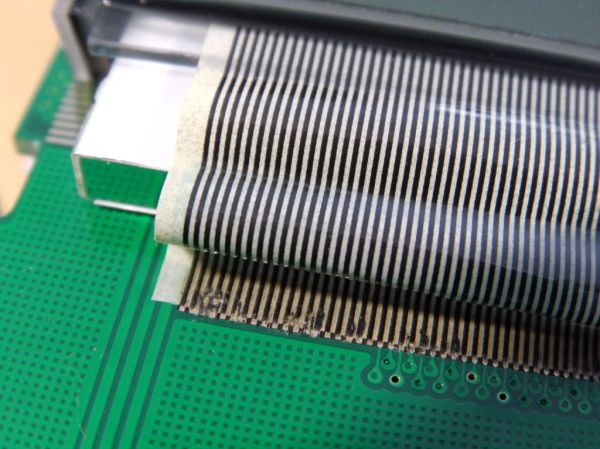
It’s not uncommon in cheaper devices to find a ribbon cable soldered directly to the circuit board like the one pictured above. Using a connector would have been a much more resilient approach, but adding parts adds cost. If you take a close look you’ll see things aren’t looking so great anymore. [Chaotic and Random] pulled this board out of his VW Camper Van. Rather than buy an expensive replacement part, he shows us how to repair a soldered ribbon wire connection.
This repair is rather invasive and he suggests trying some hot-air rework (possibly using a heat gun) to fix up any misbehaving connections. But if that has failed it’s time for the knife. The first step is to cut the ribbon so that the LCD can be removed from the board. From there he peels the remaining scrap off ribbon of the pads. This makes us cringe as it could lift traces from the PCB, but he was gentle enough to avoid it. Now comes the time to start reassembling. After thoroughly cleaning the pads the ribbon is cut straight and resoldered. The trick is to flow the solder without melting the ribbon. He uses tin foil to cover the tip and cools it on a moist sponge just before reflowing solder.
It sounds like more art than science. But when the only alternative is to spend hundreds on a new part it may be worth a try.

