A Raspberry Pi In A Game Boy Advance SP

It’s not the biggest use of a Raspberry Pi, but running emulators for old game systems is by far the most visible use of the Pi. In fact, putting Pis inside old game systems has led to a resurgence of case modding not seen since the heyday of the Mini-ITX craze of the early ‘aughts.

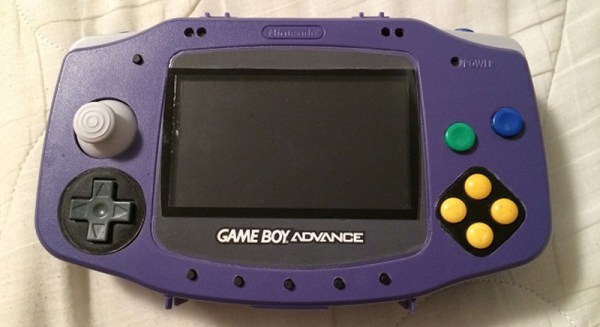
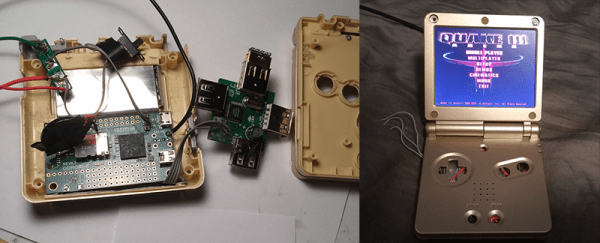
You’d think every possible Pi casemod had been done by now, but [frostedfires] is still raising the bar with a Pi casemod that stuffs a clone of everyone’s favorite credit card sized computer into a Game Boy Advance SP.

[frostedfires] isn’t using a real Raspi from The Foundataion. Instead, he found the Odroid W, a raspi compatible board that’s about half the size of a model B. It still has everything needed to complete the build – analog video out, a reasonable Linux system, and enough processing power to run Quake III. Right now, [frostedfires] has the screen working – that was taken from a car backup camera. Other than that, the only portion of the build left to go is a few buttons.

This is officially the smallest derivative casemod we’ve ever seen. the previous record holder was the still tiny Game Boy Pocket build from last summer. That build required heavy modifications to the Model B board, though, so if you’re aiming for a smaller build, the Odroid is the way to go.

Thanks to the Bacman forums for yet another great build.

Pokemon Artificial Intellegence

Pokemon Artificial Intelligence Is Smarter Than You

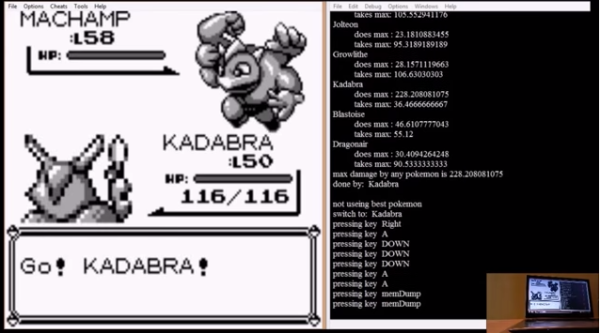
Who out there hasn’t angrily thrown a game controller across the room after continually getting killed by some stupid game-controlled villain? That is such a bummer! You probably wished there was some way to ‘just get past that point’. To take a step in that direction, [Ben] created an Artificial Intelligence program that will win at Pokemon Blue for Game Boy Advance.

The game is run in a Game Boy Advance emulator known as Visual Boy Tracer, which itself is a modified version of the most common GBA emulator, Visual Boy Advance. What sets Visual Boy Advance apart from the rest is that it has a memory dump feature which allows the user to send both the RAM and the ROM out of the emulator. The RAM holds all values currently needed by the emulator, this includes everything from text arrow flash times to details about currently battling Pokemon to the players position in the currently loaded map. The memory dump feature is key to allow the AI to understand what is happening in the game.

Continue reading “Pokemon Artificial Intelligence Is Smarter Than You”

A Brick-sized Game Boy Advance SP

gameboy

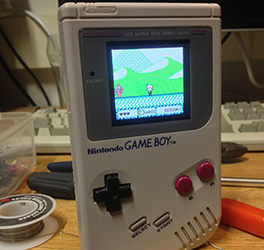
For a few years now, [Michael] has wanted to put the guts of a Game Boy Advance – the small clamshell version with a backlit LCD – into the classic and comfortable DMG-01 ‘brick’ Game Boy. He’s finally finished with his project, and we’ve got to say it’s looking pretty good.

The build began by excising the backlit LCD from an old clamshell Game Boy Advance and hot gluing it to the screen bezel of an old DMG-01. The cartridge slot from the original ‘brick’ Game Boy remained, but this design decision did require a fair bit of soldering and a length of ribbon cable.

Since [Michael] is using the original cartridge slot found in the original Game Boy, he can’t play any games in the smaller Game Boy Advance cartridge format. Still, it should be possible to build an adapter to fit those smaller cartridges inside the larger Game Boy, and he can always play Tetris and Little Sound DJ, so nothing of value is lost.

Building A Tiny Arcade Cabinet From A Game Boy Advance

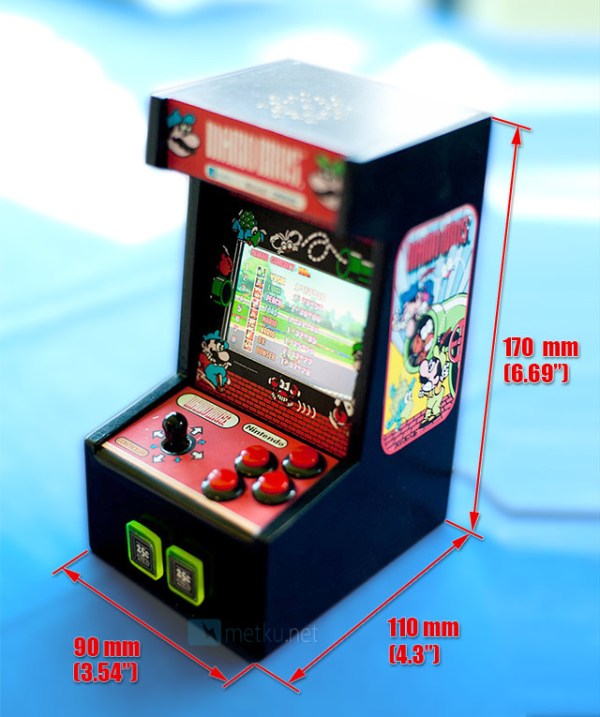
[Jani ‘Japala’ Pönkkö] found a way to make his old Game Boy Advance exciting again. He poured a ton of time and craftsmanship into building a miniature arcade cabinet. He did such a good job it’s easy to think this is a commercial product. But when you open the back of the case to switch games one look at what’s crammed inside let’s you know this is custom work.

What’s most surprising to us is that he didn’t draw out a full set of plans before beginning. He simply measured the circuit board and LCD screen from the Game Boy and went with his gut for everything else. The case itself is crafted from baltic birch plywood, which was primed and painted before applying the decals. There is also a screen bezel made of acrylic with its own decal like you’d find on coin-op machines. These were made using printable sticker paper. The electronic part of the build involves no more than extending contacts from the circuit board to buttons mounted on the case. But he did also replace the stock speaker for one that produces better audio.

Turning A DS Into A Game Boy Advance

The venerable Game Boy is dead – and has been for a long time – after being replaced by the DS, DSi, DSi XL, and the 3DS. That doesn’t mean there’s nothing of value to the old Game Boy catalog; Pokemon Red/Blue is still as much fun as it was 15 years ago, and the game play of Advance Wars is still superb.

[Maarten] over at Bureau voor Gamers decided to put a modern twist on our old friend by taking a first-gen DS and converting it to a proper single screen Game Boy (Dutch, Google translation).

The donor machine was a broken first gen DS with a broken top screen. [Maarten] removed the top screen, did a tiny bit of Bondoing, moved the speaker, and gave his new toy a bright orange paint job.

Now [Maarten] has a modern version of the best portable system ever created, packed full of more powerful hardware and a much more capacious battery. Sure, it’s not a build that requires rewiring everything, but it’s still an awesome build for GBA aficionados.

Adding A MIDI Input To A Game Boy

[Sprite_tm] is back again, and his work never fails to impress. His latest project is a Game Boy Advance MIDI synth that takes MIDI data from a keyboard or sequencer and maps that to Game Boy sound channels.

Because he seems to never do anything the normal way, [Sprite_tm] decided to run the Game Boy without a cartridge. We’ve seen this before; the GBA boots into the synth software over the link cable with multibooting.

Continue reading “Adding A MIDI Input To A Game Boy”

Arduino Based Multiboot Cable For Game Boy Advance

[Steve] wanted to do some ARM development and set his sights on the Game Boy Advance as a development package. In order to get his code onto the device he build an Arduino-based communications cable. It is necessary to have a microcontroller involved because the GBA uses a peculiar 16-bit serial communications protocol. This cable is an adaptation from the 8051-based cable developed by [Matt Evans] several years ago. [Steve’s] got it working by porting the 8051 assembler over for the Arduino, but we’d recommend adding a level converter to his hardware setup to step down from the Arduino’s 5v logic to the 3.3v logic the GBA expects.

He didn’t make up a wiring diagram, but in the code comments [Steve’s] laid out the connections as follows:

Arduino 8 to GBA SO
Arduino 9 to GBA SI
Arduino 10 to GBA SD
Arduino 11 to GBA SC

That’s it, follow the README in his source code package and you’re on your way to some ARM development.