Raspberry Pi Weather Station Features Wireless Sensor Nodes

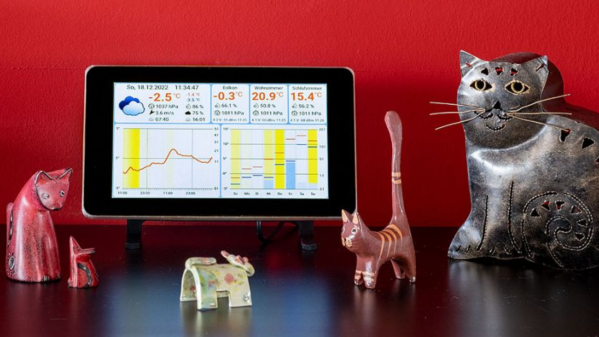
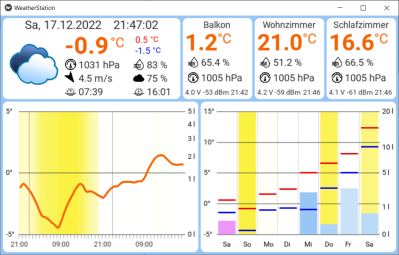
Online weather services are great for providing generic area forecasts, but they don’t provide hyperlocal data specific to your location. [Harald Kreuzer] needed both and built a Raspberry Pi Weather Station that provides weather forecasts for the next 7 days as well as readings from local sensors. The project is completely open source and based on a Raspberry Pi base station which connects to ESP32 based sensor nodes and online services to nicely present the data on a 7″ touch screen display.

The architecture is quite straightforward. The ESP32 based sensor nodes publish their readings to an MQTT broker running on the Raspberry Pi. The Pi subscribes to these sensor node topics to pick up the relevant sensor data. This makes it easy to add additional sensor nodes in future. Weather forecast data is collected by connecting to the OpenWeatherMap API. All of the collected information is then displayed through an app built using the Kivy: open source Python app development framework. Continue reading “Raspberry Pi Weather Station Features Wireless Sensor Nodes”

It’s Pi All The Way Down With This Pi-Powered Pi-Picking Robot

While most of us live in a world where the once ubiquitous Raspberry Pi is now as rare as hens’ teeth, there’s a magical place where they’ve got so many Pis that they needed to build a robotic dispenser to pick Pi orders. And to add insult to injury, they even built this magical machine using a Raspberry Pi. The horror.

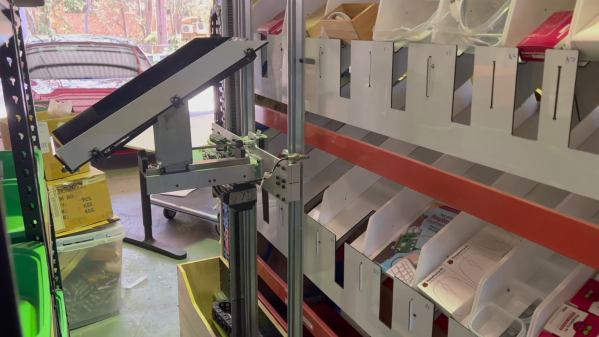
This magical place? Australia, of course. There’s no date posted on the Pi Australia article linked above, but it does mention that there’s a Pi 4 Model B running the show, so that makes it at least recent-ish. Stock is stored in an array of tilted bins that a shuttle mechanism accesses via an X-Y gantry. The shuttle docks in front of a bin and uses a stepper-controlled finger to flip a box over the lip holding them in its bin. Once in the shuttle, the order is transported to an array of output bins, where a servo operates a flap to unceremoniously dump the product out for packing and shipping. There’s a video of a full cycle below, but a word of warning — the stepper motors on the X-Y gantry really scream, so you might want to lower the volume.

The article goes into more detail on not only the construction of “Bishop” — named after the heroic synthetic organism from Aliens — but also the challenges faced during construction. It turns out that even when you try to use gravity to simplify a system like this, things can go awry very easily. There’s also a fair bit of detail on the software, which surprisingly centers around LinuxCNC. And there are plans to take this further, with another bot to do the packing, sealing, and labeling of the order. If they need all that automation down there, we guess we found all the missing Pis.

Continue reading “It’s Pi All The Way Down With This Pi-Powered Pi-Picking Robot”

Coffee Stirrers Act As Lens For This Digital Straw Camera

What happens when you mix over 23,000 coffee stirrers and a Raspberry Pi camera together? Probably nothing except for a mess, unless you very specifically pack the plastic straws and orient the camera just right. In that case, you get this very cool lenless digital straw camera that takes artfully ghostly images.

Image of Yoda photographed through many straws

Actually, lensless is a bit of a reach for [Adrian Hanft]’s creation. While the camera he’s using to grab the image has a lens, the objective, for lack of a better term, is just a tightly packed bundle of straws. We’ve seen this approach to photography before, but there the camera used film placed at the back of the straw bundles to capture the pixelated image.

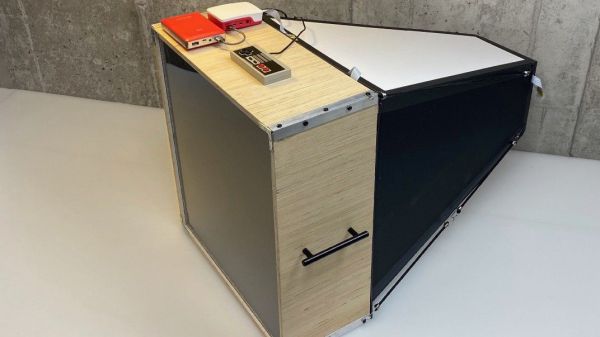
Here, a ground glass screen stands in for the film; a long lightproof box behind that provide a place to mount a camera to capture the images. Cleverly, [Adrian] built the camera mount from Lego, allowing cameras and lenses to be quickly swapped out. A Nintendo gamepad controller talks to custom software running on a Raspberry Pi and allows the photographer to control exposure and scroll through pictures using a smartphone as a display. There’s a short build video below, for those who can’t get enough of straw-packing techniques.

As with the film version of this camera, we just love the look of the photographs that come from this — the texture of the straw honeycomb and the defocused subject make for a striking effect.

Continue reading “Coffee Stirrers Act As Lens For This Digital Straw Camera”

DIY Video Microscopy

Owning a Microscope is great fun as a hobby in general, but for hackers, it is a particularly useful instrument for assembly and inspection, now that we are building hardware with “grain of sand” sized components in our basements and garages. [voidnill] was given an Eduval 4 microscope by a well-meaning friend during a holiday trip. This model is pretty old, but it’s a Carl Zeiss after all, made in Jena in the erstwhile GDR. Since an optical microscope was of limited use for him, [voidnill] set about digitizing it.

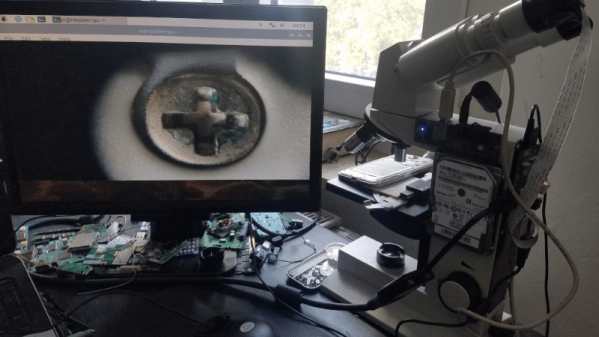
He settled on the Raspberry-Pi route. The Pi and a hard disk were attached directly to the frame of the microscope, and a VGA display connected via a converter. Finally, the Pi camera was jury-rigged to one of the eyepieces using some foam. It’s a quick and dirty hack, and not the best solution, but it works well for [voidnill] since he wanted to keep the original microscope intact.

The standard Pi camera has a wide angle lens. It is designed to capture a large image and converge it on to the small sensor area. Converting it to macro mode is possible, but requires a hack. The lens is removed and ‘flipped over’, and fixed at a distance away from the sensor – usually with the help of an extension tube. This allows the lens to image a very small area and focus it on the (relatively) large sensor. This hack is used in the “OpenFlexure” microscope project, which you can read about in the post we wrote earlier this year or at this updated link. If you want even higher magnification and image quality, OpenFlexure provides a design to mate the camera sensor directly to an RMS threaded microscope objective. Since earlier this year, this open source microscope project has made a lot of progress, and many folks around the world have successfully built their own versions. It offers a lot of customisation options such as basic or high-resolution optics and manual or motorised stages, which makes it a great project to try out.

If the OpenFlexure project proves to be an intimidating build, you can try something easier. Head over to the PublicLab where [partsandcrafts] shows you how to “Build a Basic Microscope with Raspberry Pi”. It borrows from other open source projects but keeps things simpler making it much easier to build.

In the video embed below, [voidnill] gives a brief overview (in German) of his quick hack. If you’ve got some microscope hacks, or have built one of your own, let us know in the comments section.

Continue reading “DIY Video Microscopy”

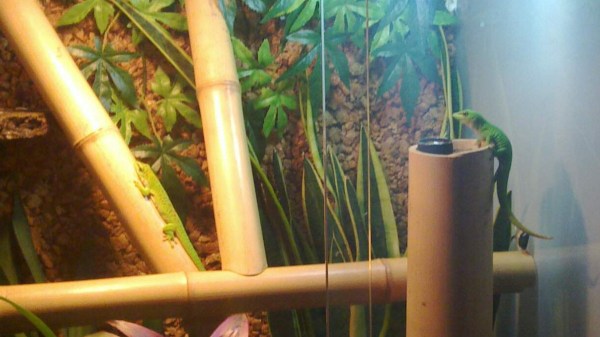
Python Keeps A Gecko Happy: Terrarium Automation With Raspberry Pi

For better or worse, pets often serve as inspiration and test subjects for hardware hacks: smarten up that hamster wheel, tweet the squirrel hunting adventures from a dog’s point of view, or automate and remote control a reptile enclosure. [TheYOSH], a gecko breeder from the Netherlands, chose the latter and wrote TerrariumPi for the Raspberry Pi to control and monitor his exotic companion’s home through a convenient web interface.

The right ecosystem is crucial to the health and happiness of any animal that isn’t native to its involuntarily chosen surroundings. Simulating temperature, humidity and lighting of its natural habitat should therefore be the number one priority for any pet owner. The more that simulation process is reliably automated, the less anyone needs to worry.

TerrariumPi supports all the common temperature/humidity sensors and relay boards you will find for the Raspberry Pi out of the box, and can utilize heating and cooling, watering and spraying, as well as lighting based on fixed time intervals or sensor feedback. It even supports location based sunrise and sunset simulation — your critter might just think it never left Madagascar, New Caledonia or Brazil. All the configuration and monitoring happens in the browser, as demonstrated in [TheYOSH]’s live system with public read access (in Dutch).

It only seems natural that Python was the language of choice for a reptile-related system. On the other hand, it doesn’t have to be strictly used for reptiles or even terrariums; TerrariumPi will take care of aquariums and any other type of vivarium equally well. After all, we have seen the Raspberry Pi handling greenhouses and automating mushroom cultivation before.

Hackaday Prize Entry: LiFePO4wered/Pi+

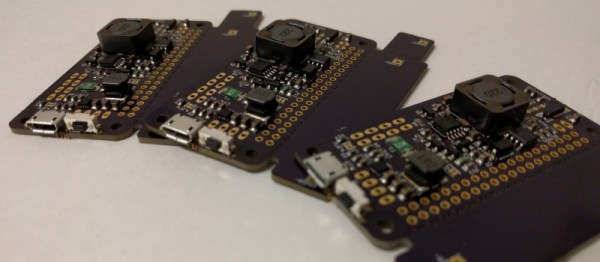
For some of you the title might seem familiar, as [Patrick Van Oosterwijck] LiFePO4wered/Pi project is a quite successful Hackaday.io project. Now he’s designing from scratch the plus version to fill in some gaps and solve some of the challenges that affected the initial project. So what exactly is LiFePO4wered/Pi+ and what can it do?

In a nutshell, it’s a smart UPS for the Raspberry Pi. The standard version allows a Model A+ and Pi Zero to run on battery for over 2 hours, and the B+, B2 and B3 to run for at least an hour (it maybe less, depending on the system load, of course). It implements two-way communications between the power system and the Raspberry Pi (running the open-source daemon) over the I2C bus. This allows for continuous measurement of the battery voltage and load voltage, with user programmable thresholds for boot, clean shutdown and hard power down. There’s a touch pad that provides clean boot/shutdown capability even in a headless setup, a wake timer allowing the Raspberry Pi to be off for low duty cycle applications and an auto-boot feature to maximize uptime by making the Raspberry Pi run whenever there is sufficient battery power.

That’s the standard version, which we covered last year… what else could the plus version have?

Well, to start, it brings more current to run complete systems with LCD screen and hard drives, the previous version was limited when it came to current. It will provide the option for a wider range of input power sources, such as solar panels, which is pretty nice. The on/off button and the power led will no longer be soldered on the main board so they can ‘relocated’ elsewhere, for example, when making a custom enclosure. Detection of input power to trigger automatic boot and shutdown will be added and last, but not least, a real-time clock with absolute time wake up.

So there it is, the new LiFePO4wered/Pi+ version, with all bells and whistles for the Raspberry Pi enthusiast.

Hackaday Prize Entry: A Raspberry Pi Project

There’s no piece of technology that has been more useful, more influential on the next generation of sysadmins and engineers, and more polarizing than the Raspberry Pi. For $35 (or just $5), you get a complete single board computer, capable of running Linux, and powerful enough to do useful work. For the 2016 Hackaday Prize, [Arsenijs] has created the perfect Raspberry Pi project. It’s everything you expect a Pi-powered project to be, and more.

While the Raspberry Pi, and the community surrounding the Raspberry Pi, get a lot of flak for the relatively simple approach to most projects which are effectively just casemods, critics of these projects forget the historical context of tiny personal computers. Back in the early ‘aughts, when Mini ITX motherboards were just being released, websites popped up that would feature Mini ITX casemods and nothing else. While computers stuffed into an NES, an old radio, or the AMD logo are rather banal projects today, I assure you they were just as pedestrian 15 years ago as well. Still, the creators of these Mini ITX case mods became the hardware hackers of today. It all started with simple builds, a Dremel, and some Bondo.

[Arsenijs] takes his Raspberry Pi project a bit further than a simple casemod, drawing influence from a Raspberry Pi smartphone, a Raspberry Pi security system, a Portable Raspberry Pi, and a Raspberry Pi wrist computer. These are all excellent projects in their own right, but [Arsenijs] is putting his own special twist on the project: he’s using a Raspberry Pi, and a few Raspberry Pi accessories.

While this project is first and foremost a Raspberry Pi project, [Arsenijs] isn’t limiting himself to the platform with the Broadcom chip. The team behind this Raspberry Pi project was busy porting the project to Odroid when the Banana Pi came out. This changed everything, a refactor was required, and then the Orange Pi was announced. Keeping up with technology is hard, and is a big factor in why this Raspberry Pi project hasn’t delivered yet. You can say a lot of things about the Raspberry Pi foundation, but at least their boards make a good attempt at forward compatibility.

Already [Arsenijs]’ Raspberry Pi project is one of the more popular projects on Hackaday.io, and is in the running for being one of the most popular projects in this year’s Hackaday Prize. Whether that popularity will translate into a minor win for this year’s Hackaday Prize remains to be seen, but it seems for [Arsenijs] that doesn’t matter; he’s already on the bleeding edge of Raspberry Pi projects.
The HackadayPrize2016 is Sponsored by: