A Truly Professional Raspi Analog Input

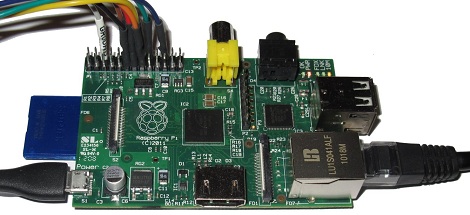
Much to the chagrin of hardware tinkerers, the Raspberry Pi doesn’t have analog inputs on its GPIO pins. Sure, you can blink a LED with just a few console commands, but reading sensors with a bone-stock Raspi requires a little additional hardware. [Brian Dorey] just released a board that allows for 8 analog inputs on the Raspberry Pi with a 16-bit resolution that is much higher than any Arduino-based build.

[Brian]’s build is based on an earlier, similar iteration of a Raspi analog board we saw last July. Like the previous version, the new professionally made PCBs use a pair of Microchip MCP3428 analog to digital converter. These ADCs are able to sample four channels at a resolution of 16 bits; a vast improvement over the 8-bit ADCs included on every Arduino.

The boards communicate with the Raspberry Pi over an I2C serial bus using a neat stackable header. In theory, it should be possible to use several of these boards and measure dozens of analog channels, but we’ll leave a demonstration of that up to [Brian].

Problems Powering Raspberry Pi From GPIO Header

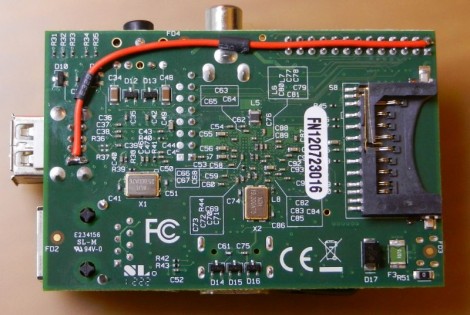
[Zaion] grabbed an ATX power supply to source the 5V the Raspberry Pi needs to run. The common problem when it comes to RPi supplies is a shortfall in how much current a USB wall adapter can source. The ATX shouldn’t have this problem, but none-the-less he found that the USB ports were only reading about 5V. Strange. He grabbed the soldering iron and fixed the issue with a piece of jumper wire (English translation found in the second half of his post).

The problem was discovered when trying to get a WiFi dongle to work on one of the RPi’s USB ports. It simply wouldn’t show up, and after going down the blind alley of assuming it was a driver problem he started to investigate the hardware. After discovering the below-nominal voltage [Zaion] measured the resistance between the 5V pin on the GPIO header and the one on the USB port. It reads 3-4 Ohms and he concluded that the trace is too thin. We took a quick look at the schematic for the board and see no reason for the voltage drop. His jumper wire fixed the issue but it leaves us wondering, is this an isolated case, or a design flaw? Tell us what you think in the comments section.

Control Raspi GPIO Pins In The Browser

Now instead of wrangling Python or PHP to do your bidding, [Eric] came up with a way to control the GPIO pins on his Raspberry Pi in a browser.

[Eric] calls his project WebIOPi, and it’s the perfect tool if you’d just like to blink a LED or control a relay over the internet. Simply by pointing his browser to the IP of his Raspi, [Eric] can turn GPIO pins on and off, directly from his desktop browser.

All the code for WebIOPi is available on [Eric]’s Google code page. The UI of [Eric]’s project is fully customizable, so it’s entirely possible to control your garage door from a smart phone simply by loading up a web page hosted on your Raspi and pressing a button.

Right now WebIOPi is only able to turn GPIO pins on and off. That will change as [Eric] implements UART, SPI, and I2C in his project, making it possible to do a lot of cool stuff without having to write much – if any – code.

Using The GPIO Pins On A Raspberry Pi

In addition to being a serviceable single board computer, the Raspberry Pi also has a header full of GPIO pins at your beck and call. [Tedbot] sent in a great tutorial on using these pins with Python, Bash, and C.

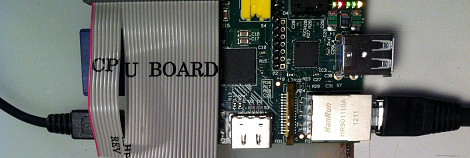
The GPIO pins on the Raspi are arranged in a 2×13 header. Until Sparkfun manages to manufacture a decent Raspi protoboard, the easiest way to break these pins out is with an old IDE ribbon cable. After plugging the other end into a breadboard, [Tedbot] had an easily accessible set of Raspi pins.

To control these pins, [Tedbot] found two libraries: the first is WiringPi that implements a C-style, Arduino-like programming environment on the Raspi. The second is the RPi.GPIO Python package. Since the Raspi runs Linux, and everything in Unix is a file, [Tedbot] used a shell script to blink a LED.

One word of warning if you’re building a board to extend the capabilities of the Raspi: these pins aren’t 5 V tolerant, so you’ll need to throw in a buffer or level converter when building a Raspi circuit.

Edit: Adafruit is releasing a Pi Plate prototyping board in a few weeks. Neat, huh?

Controlling Raspberry Pi Expansion Pins With A Web Interface

For the lucky few who have a Raspberry Pi board in their hands, you can now use the GPIO pins as a web interface (German, google translation). [Chris] is turning this magical board is turning a small device that can play 1080p video into something that can blink LEDs via the web.

The build started with an example of driving GPIO pins under Linux. [Chris] cobbled together a bit of PHP and Javascript on the Raspberry pi. Whenever he goes to the website hosted on the Pi, he’s greeted with the status and direction of a couple of expansion IO pins.

On a semi-related note, [Tony] is building a GPIO MIDI interface for his Pi. Yes, he could just get a USB to MIDI adapter and call it a day, but this is a far more professional looking solution to all the MIDI goodness the RasPi will deliver. If you’ve got any info on other RasPi breakout boards you’ve seen, send them in on the tip line.

RF Control From Just About Any Device

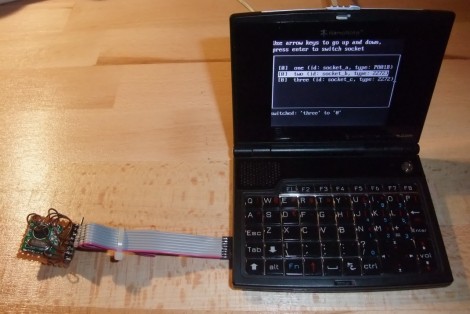
[Mirko] is working on a library that will allow you to add RF control to just about any device. The only requirement is that the device be capable of running a Linux kernel, and that it have a few GPIO pins available. One example is fairly straight forward, a Netgear router. Many, if not most routers run a Linux kernel natively and most have solder points on the board for unused IO pins so patching into the hardware is very straight forward. Less obvious and much more impressive is the hack seen in the image above. [Mirko] built an SD card adapter cable and uses the contacts in the card reader to bit bang four-wire SPI to communicate with that RF module.

Bug Labs Releases BUGvonHippel Universal Module

vonhippel

Bug Labs makes hardware modules that can be combined to create your own custom gadgets. They’ve just released what we consider the most useful module: BUGvonHippel. Unlike the previous single purpose modules, the BUGvoHippel is a universal interface. The bus features USB, power/ground, DAC/ADC, I2C, GPIO, SPI, serial, and more. BUG applications are written in Java using a custom IDE.

The $79 module is named after MIT professor Eric von Hippel, who wrote Democratizing Innovation. You can find an interview with him below.

Continue reading “Bug Labs Releases BUGvonHippel Universal Module”