Inconspicuous Guitar Hack Adds A Lot Of Control To Max/MSP

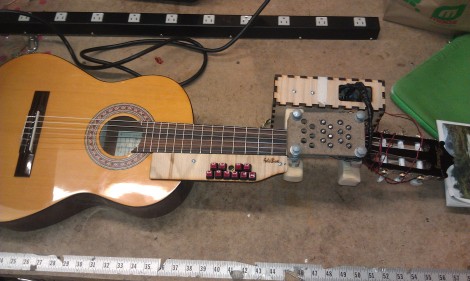
[Sam] is working on his Interactive Technology Degree and he made some alterations to this guitar as a class project. It doesn’t look much different, but closer inspection will reveal a handful of extra buttons, and a camera module. He actually added a Wii remote to the guitar which is used to control Max/MSP.

His pinky is pointing at one of the buttons. That one is red and triggers the Bluetooth sync function for the Wii remote. The other four buttons are wired to the up, down, A, and B buttons. In the video after the break [Sam] talks about the Max/MSP front-end which is used to connect the remote to the computer. Once communications are established the accelerometer sensor data is continuously streamed to the software, and the other four buttons are used for controlling the patches.

The camera module that is mounted in the guitar can be used to stream video but it appears to have no effect on the sound. In fact, the live video feed can be mixed with a waveform generation. Sound characteristics like volume affect the cross-fade between the two video signals. [Sam] talks about this feature, but when the playing demo starts about 6:10 into the clip we don’t seen any of the live video on the projection screen.

Continue reading “Inconspicuous Guitar Hack Adds A Lot Of Control To Max/MSP”

Dexterity Enhancing Guitar

[Justin Lange’s] dad loves playing guitar, but an accident left him with nerve damage that makes it pretty much impossible these days. He just doesn’t have the dexterity needed to form the cords using his left hand. But his son’s hacking skills are helping him get back into it. [Justin] built a button-based add-on that forms the cords for him.

The build has two parts. A frame mounts over the finger board with slots for eighteen solenoids which push the strings down between the frets. These are controlled by the replacement finger board which is mounted below the neck. It has a double-row of buttons that let the player select the desired chord. One button chooses the key, with a second button acting as a modifier to switch to a seventh cord, or minor cord.

The project, which [Justin] has named folkBox, relies on a microcontroller. We spy an Arduino Mega in one of the build photographs but it will be interesting to see if the final project moves to a standalone chip. He’s set a goal for a more robust version of the build some time this summer.

[via Make]

Half Keyboard, Half Guitar, Totally Radical, The Tabstrummer!

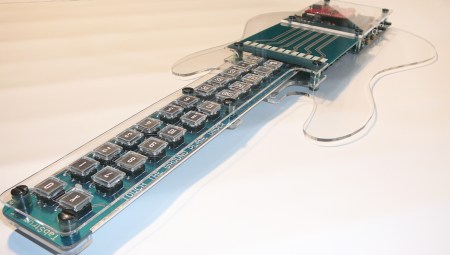
While tablature-based music probably annoys “properly” trained musicians to no end, it has given many musicians and musical-hobbyists their first introduction to the world of guitar. The [Tabstrummer] takes this to a whole new level, allowing chords to be programmed into this instrument and played back. Once pre-programmed chord is set, the “conductor-strings” are strummed to allow the chord to play.

This device is based around an Atmel microcontroller and features a MIDI output as well as an audio-out jack. Besides the interesting electrical hardware, the housing seems to be quite well-built featuring what appears to be an acrylic or polycarbonate body. Although not quite the same thing, possibly some influence was gained from the [Keytar]. It’s heyday may be past, but not forgotten.

Check out the video below for a Christmas-themed jam played on the [Tabstrummer] or check out their video page for several more songs. This “hack” is being considered as a commercial product, so the inventors would love to hear your feedback! Continue reading “Half Keyboard, Half Guitar, Totally Radical, The Tabstrummer!”

Fully Fretted Guitar MIDI Controller

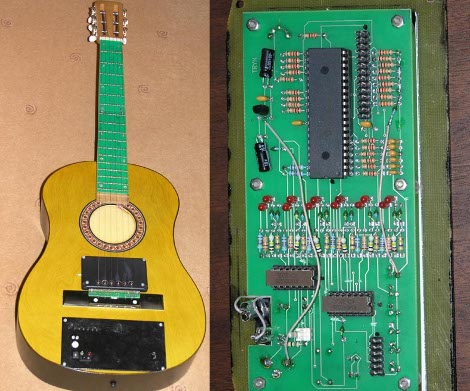
[Andy] came across this guitar midi controller project from way back and decided to send us a tip about it. The English version, translated from the original Russian, is easy to follow and documents the build process from first prototypes to the version you see above. It can connect via a standard MIDI cable and then be used to control anything you want. The only thing missing is the ability to transmit velocity data, but that’s certainly not a deal breaker.

The device has two sensory parts. The first is a set of pickups that can be seen underneath the strings near the bridge. These work like standard magnetic pickups but instead of extrapolating fret data from the pitch picked up on the string, there is a second sensor mechanism for every fret of each string. Since the strings are made of metal, it’s possible to detect which fret is depressed based on continuity sensing. Of course this means you need a conductor between every fret, and that’s why the fingerboard has been replaced with one made of printed circuit boards. All of this data is gathered, then sent to the MIDI device via a PIC 16F74 microcontroller.

If this leaves you wanting for more guitar hacks, don’t miss this one that adds addressable LEDs in between each fret.

[Dino’s] JFET Guitar Preamp With Piezo Pickup

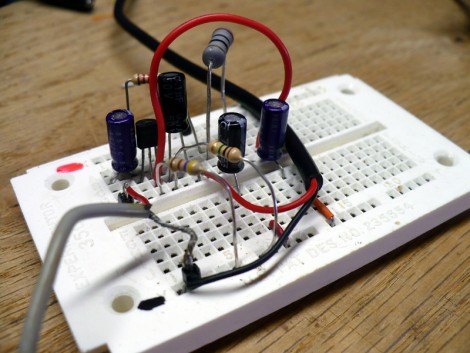
This week, with a little help from a Roomba, [Dino] built a guitar pickup and preamp that sounds marvelous. A pickup takes vibrations from the guitar and turns them into an electrical signal which can then be amplified and broadcast. He grabbed a long-dead Roomba which has slowly but surely been donating its organs for his weekly projects. After plucking out a piezo element he grabbed a bag of Junction gate Field-Effect Transistors (JFET) and built a preamp circuit around one of them.

JFETs operate in much the same way as MOSFETs (which we took a look at last week). [Dino’s] design adds a few resistors and capacitors to tune the gain and decouple the circuit from the input and power rails. He epoxied the piezo element inside the guitar and connected leads between it and a jack mounted in the body. As always, he does an excellent job of explaining the concepts behind the design and outlining the build techniques that he used. We’ve embedded his video after the break.

Continue reading “[Dino’s] JFET Guitar Preamp With Piezo Pickup”

Guitar Pickup Winding Workstation

After a bit of inspiration, [Pete] decided to build a solid body electric guitar for himself. Instead of assembling a conglomeration of off-the-shelf parts, he plans on building just about everything from scratch. This includes the guitar pickups, so he built himself a pickup winder that has measures RPM, ETA until done, and auto stop for when the pickup is complete.

Electric guitar pickups are simple devices – just a magnet for each string wrapped in thousands of turns of wire about as thin as a human hair. [Pete] began his build with a cheap sewing machine and added a tachometer and pickup mount. As an added bonus, [Pete] threw in an ohmmeter to measure the coil resistance and a Gauss meter to measure the magnetic flux and polarity of the pole pieces. It’s a very nice build that’s designed to be as functional as commercial pickup winders.

[Pete] was originally inspired to build a pickup winder by the Les Paul Google doodle, and he plans on continuing Les Paul’s tradition of guitar innovation by building his own solid body guitar. The wood has been cut already, and we can’t wait to see the final product.

Check out a video of [Pete]’s coil winder in action after the break.

Continue reading “Guitar Pickup Winding Workstation”

Hackaday Links: July 24, 2011

Plasma speakers

Apparently if you run AC and DC currents through a welding torch flame you can use the resulting plasma as a loudspeaker. [Thanks Cody]

Power metering

The Google Power Meter API is no longer in development but that didn’t stop [Pyrofer] from finishing his metering hardware. It uses a reflectance sensor to read the meter instead of using clamp-based current sensing.

Music videos from inside the instrument

Filming from inside of a guitar creates the camera effect seen above which looks like the waveform you’d see on an oscilloscope. [Thanks Philleb]

Hidden messages in audio files

GhostCoder lets you encrypt and hide audio files within other audio files. The thought is, you can piggyback your own data into Torrents that are circling the interwebs.

2×4 Chair

If you’re skilled with a Skill saw you can make a chair out of one 2 by 4. You can see the pattern you’ll have to cut out from the board in the image above, wow!