Thumbnail that say The Hacklet

The Hacklet #7 – MIDI

7

This week’s Hacklet is all about Hackaday.io projects which use MIDI, or Musical Instrument Digital Interface for the uninitiated. MIDI was designed from the ground up as an open communications standard for musical instruments. Nearly every major instrument company participated in the design of the standard. MIDI was first demonstrated in January of 1983, with the communications standard document following in August. Hackers, makers, and musicians immediately ran with it, using MIDI to do things the designers never dreamed of.
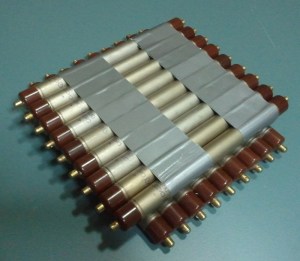
SAMSUNG[Robert’s] 9×9 Pixel Muon Detector/Hodoscope  is a great example of this. [Robert] is using 18 Geiger Muller Tubes to detect cosmic particles, specifically muons. The tubes are stacked in two rows which allows him to use coincidence detection. Rather than just plot some graphs or calculate impact probabilities, [Robert] hacked a Korg Nanokey 2 MIDI controller to output MIDI over USB messages corresponding to the detected muons. Check out his video to see a sample of the music of the universe!
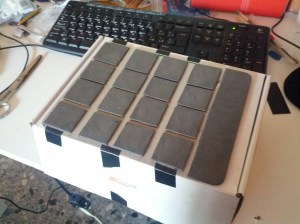
 

diyMPCNext up is [Michele’s] DIY MPC style MIDI controller. [Michele] needed a simple low-cost drum controller that wouldn’t wake his neighbors. He loved Akai MPC controllers, so he rolled his own. [Michele] investigated force sensitive resistors but found they were very expensive. At a cost of $8 USD each, his resistors alone would be nearly the cost of a low-end MPC!  [Michele] created his own sensitive pads using a sandwich of copper tape and 3M Velostat conductive sheets. An HCF4067 routes all the analog lines to a single pin of Teensy 3.0, which then converts the analog resistor outputs to MIDI messages.
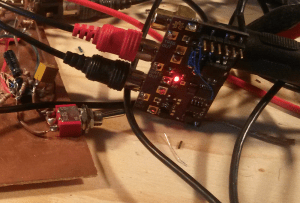
pic-midi-1vo[Johan] loves his analog synths, and wanted them to be able to talk MIDI too. He built MIDI2VC, a circuit which converts MIDI to 1V/Octave (similar to  CV/Gate). 1V/Octave is an analog control system used in some early synthesizers, as well as many modern analog creations. Pitches are assigned voltages, and as the name implies, each octave is 1 volt. A4 on the keyboard is represented by 4 volts, while A5 is 5 volts. [Johan] used a Microchip PIC16LF1823 to receive and convert the MIDI signals. The PIC outputs I2C data to an MCP4725 DAC which drives the analog side of the house.

eldanceLong before DMX512 came on the scene, hackers were controlling lights via MIDI. [Artis] continues this with El Dance, a wireless system for controlling electroluminescent wire worn by dancers. Similar in function to  [Akiba’s] EL wire system, [Artis] took a lower cost route and used the venerable NRF24L01 radio module. He added an antenna which gives the modules a range of about 30 meters. The computer running the dance routine’s music sees the transmitter side of the link as a MIDI instrument. Standard note on and off commands activate the EL wire strings.
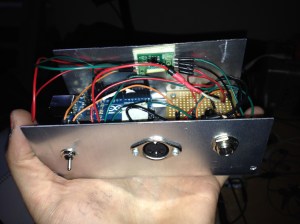
midi-vibeOur final hack comes from [Jen] who built a MIDI Vibrator Inductor Synth. [Jen] performs in an experimental music band called My Wife, with instruments as varied as violins and sewing machines. [Jen] must be a fan of Van Halen’s Poundcake as she’s using a similar technique, with a MIDI twist. An Arduino converts MIDI notes to analog values, which are sent to a motor controller board. The motor controller uses PWM to drive a vibrator motor at the frequency of the note being played. Like all DC motors, the vibrator puts out a ton of electromagnetic noise, which is easily picked up by [Jen’s] electric bass.

That’s it for this week’s Hacklet! Tune in next week for more projects from Hackday.io!


Thumbnail that say The Hacklet

The Hacklet #6 – Lasers

Hacklet 6

This week’s Hacklet is all about lasers, which have been shining a monochromatic light for hackers since 1960. The first working laser was demonstrated by [Theodore Maiman], who was a hacker / maker himself, having learned circuits in his father’s home electronics lab. It’s no surprise that lasers have been hugely popular in the hacker community ever since.

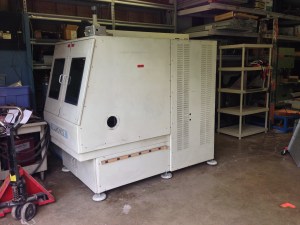
laserwelder[Maiman’s] first laser was pumped with flash tubes, which is similar to the YAG laser in [macona’s] project to restore a laser welder. He’s gotten his hands on a 1985 model 400W Lumonics laser welder. This welder was originally bought by Tektronix to weld titanium CRT flanges. Time moved on, and the welder was sold to [macona’s] company, who used it until the Anorad control system died. There was an effort to bring it up to date with new servos and an OpenCNC control system, but the job was never finished. This laser sat for 12 years before [macona] bought it, and now he’s bringing it back to life with LinuxCNC. The project is off to a blazing start, as he already has the laser outputting about 200 Watts.

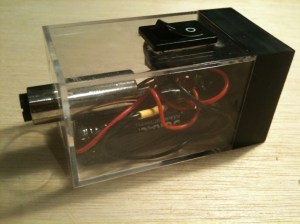
d0c96d91On the slightly lower power side of things we have [ThunderSqueak’s] 5mW visible red (650nm) laser. [ThunderSqueak] needed an alignment laser with decent focusing optics for her other projects. She mounted a module in a plastic case and added a switch. A quick build, but it’s paying dividends on some of her bigger projects – like her Low Cost CO2 Laser Build, which we featured on the blog back in May.


la-cutter

[phil] used buildlog 2.x as the inspiration for his Simple DIY laser cutter. The laser power comes from a low cost K40 laser tube and head. His frame is aluminum extrusion covered with Dibond, an aluminum composite material used in outdoor signs. Locomotion comes from NEMA 17 stepper motors. Many of [phil’s] parts are machined from HDPE plastic, though it looks like they could be 3D printed as well. We bet this one will be a real workhorse when it’s done.


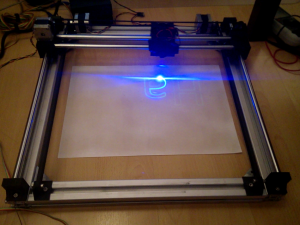
la-cutter2[ebrithil] is working on a combo laser engraver/PCB etcher which will use a solid state laser module. His layout is the standard gantry system seen on many other mills and 3D printers. Dual steppers on the Y axis increase avoid the need for a central belt. His Z axis was donated by an old DVD drive. It has enough power to lift a pen, and should be plenty accurate for focusing duty. He’s already run a couple of great tests with a low power violet laser and glow in the dark material.

openexposer[Mario] is creating an incredibly versitile laser tool in his OpenExposer, which can do everything from stereolithography 3D printing to making music as a laser harp. The genius here is [Mario’s] reuse of laser printer parts. Every laser printer uses the same basic setup: a laser, a scanning mirror, and optics to stretch the beam out to a full page width. [Mario] is already getting some great prints from OpenExposer. This project is one to watch in The Hackaday Prize.

ramenspec[fl@C@] is digging into the physics side of things with his DIY 3D Printable RaspberryPi Raman Spectrometer. Raman Spectrometers are usually incredibly expensive pieces of requirement which can tell us which elements make up a given material sample. [fl@C@’s] laser is a 532nm 150mW laser, which bounces through a dizzying array of mirrors and lenses. The resulting data is crunched by a Raspberry Pi to give a full spectrographic analysis. [fl@C@’s] entered his project in The Hackaday Prize, and we featured his bio back in June.

That’s it for this week’s Hacklet, until next week, don’t just sit around wondering why aren’t lasers doing cool stuff. Make it happen, and post it up on Hackaday.io!


Hacklet #5 – Hackerspaces And DIY Laptops

sector67

Did you know that Hackaday.io has a hackerspace index? That’s right, you can enter your local hackerspace’s info, pictures, videos, and social media links. Members and crew can link their hackaday.io profiles and drop comments about their latest projects.

The map up at the top of the hackerspace index’s page is interactive too – zoom in on your country and local area to see any spaces nearby. It’s like one-stop shopping for awesome. Well, except that this awesome is free.

It really is great to see all the pictures of spaces large and small. Some of the most stunning shots are from c-base, in Berlin, Germany. Founded in 1995, the c-base crew have created an incredible space. Take a look at the workstation in the photo. Is it Steampunk? Matrix-punk? Heck no, that’s 100% c-base.

c-base


Do It Yourself Laptops

You don’t have to be Bunnie Huang to build your own laptop. All it takes is some time, ingenuity,and a good hot glue gun.

opentech-laptop

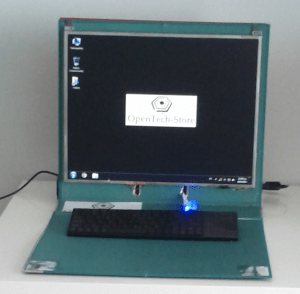
Our first laptop is actually inspired by Bunnie’s Novena. The OpenTech-Laptop uses two binders as it’s shell, but inside hides some decent computing power. [OpenTech] used a miniITX motherboard with an ATOM N2800 CPU. The screen came from an old laptop (long live matte 4:3 screens!) [OpenTech] even hand wired a Low Voltage Differential Signaling (LVDS) cable so the motherboard can push those pixels. A wireless keyboard, hard drive, and speakers round out the build. [OpenTech] is still looking for a portable power solution.Why not follow Bunnie’s lead and grab some R/C Plane LiPo batteries, [OpenTech]?

minibsd

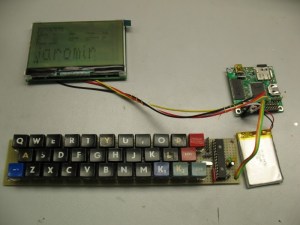
Next up is a MiniBSD laptop computer created by [Jaromir]. MiniBSD is based on RetroBSD, a PIC32 based BSD single board computer. Rather than use a premade platform like the Fubarino, [Jaromir] laid out his own board with everything he wanted – a microSD socket, SDRAM, real-time clock, and all the trimmings. He then added a graphical LCD, a LiPo battery, and a sweet retro keyboard from an old Czech computer company called Tesla. [Jaromir’s] next task is a 3D printed case. The only problem is the case is 2cm wider than his current printer’s bed!

http://hackaday.io/project/1559-Laptop-pi

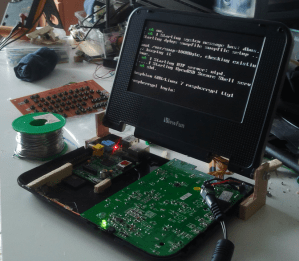
You didn’t think we’d leave the Raspberry Pi out, now did you? Laptop-pi is [Bram’s] project to convert an old DVD player (remember those?) into a Pi Laptop. Not only did [Bram] build a QWERTY keyboard from scratch on perfboard, he also hacked together an on-screen keyboard so he can type with just a D-pad. He’s currently fighting with a dodgy audio amp, but we’re sure that’s just a temporary setback. We think Laptop-pi will be a killer portable for retro gaming!


That’s it for this week’s Hacklet, stay tuned for next week when we bring you more of what’s happening at Hackaday.io!

Thumbnail that say The Hacklet

Hacklet #4 — PCB Tools And Wristwatches

4

The Hackaday Prize is heating up! When we set up the prize, we expected to see some incredible entries, and you guys haven’t let us down. Projects like SatNOGS, which aims to create a global network of satellite ground stations, or OpenMV, a low-cost Python powered vision module, are seriously blowing us away.

We’re starting to give away some prizes through community voting and there’s still plenty of time for you to enter. Check out The Hackaday Prize page for the full details.

Low Cost Printed Circuit Board Tools

Pick and Place

We’ve seen mills, lathes, CNC machines and 3D printers, but if there is any device that gets a hardware hacker’s attention, it’s a pick and place machine. In the PCB industry these machines pick up thousands of parts every hour, perfectly placing them on printed circuit boards. The downside is they’re incredibly expensive. The cheapest Chinese machines without vision start in the $4000 USD price range.

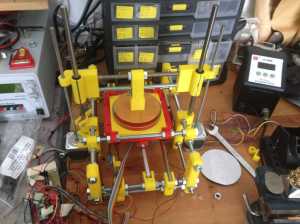
[Neil] aims to break down those price barriers with a $300 Pick and Place Machine that doubles as a 3D printer. He’s using delta 3D printer hardware to do it, and he’s throwing in everything! OpenCV based vision, multiple tool heads, reel and tray pick up, [Neil] has covered all the major points. He can’t do it alone though, so he’s looking for help. Check it out, and give him a hand (or a skull)!
pcbMill

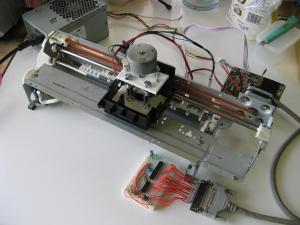
A low-cost pick and place machine will need printed circuit boards to work on. Not to worry, [shlonkin] has you covered with his PCB mill for under $10. Built from recycled printers, an Arduino, and host software written in processing, [shlonkin] has already posted impressive photos of boards his machine has milled. The main problem [shlonkin] has run into is longevity with plastic parts. In his most recent update, he’s looking for ideas. Can you help him?

Digital Watches

Anyone will tell you that digital watches are a pretty neat idea. With the era of smartwatches upon us, more than one hacker has delved into building their own timepiece. We’re happy to report that most of them even tell time.

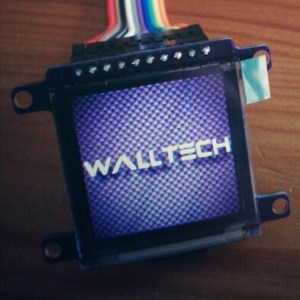
walltech[Walltech] has gone all out to create the ultimate watch. His OLED Smart Watch 6.0 is the culmination of years of work. The watch features a 1.5” OLED display, an SD card slot, and a vibrator motor. It has Bluetooth 4.0 to connect to the world, and an Atmel ATmega32u4 as its brain. A 500mAh battery will power the watch for 18-24 hours per charge.

[Walltech] plans to make it do everything from SMS and email notifications to music streaming. Don’t see a feature you want? Add it! Smart Watch 6.0 Is completely open source, so you can hop into the code and hack away!

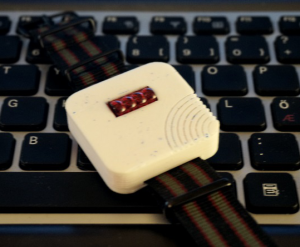
tilttouchtime2On the other side of the spectrum is [askoog89’s] Tilt Touch Time, which utilizes  those awesome bubble LED displays some of us remember from the 70’s. The retro look is only 3D printed skin deep though, as [askoog89] is using an ATtiny2313 processor. Atmel’s Qtouch is providing the capacitive touch sensing, while a tilt sensor helps Tilt Touch Time live up to its name. [Askoog89] has submitted his watch to The Hackaday Prize, so he’s trying to figure out a way to use the touch sensor to sync time with a PC. If that doesn’t work out, we bet those bubble LEDs would make great light sensors for some monitor-blink-sync action.

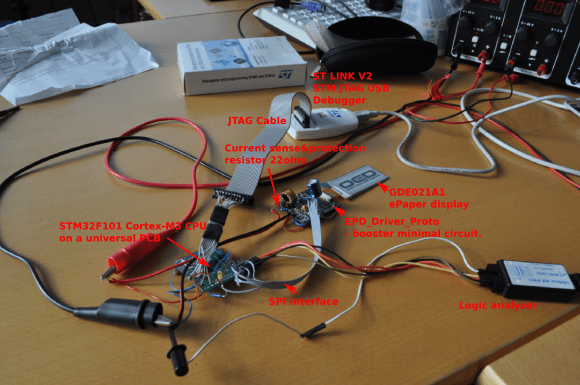
Fallout fans have seen plenty of PIP boys here on Hackaday, but have you seen [jara’s] PIP Watch? This Personal Information Panel is going big on size but low on power with a 3 inch e-ink display. [Jara] is using an STM32F101 ARM Cortex-M3 CPU, so he’s got plenty of processing power at his disposal. He’s connecting to the world through a Bluetooth serial link. All he needs is a Geiger counter, and he’s good to go!

pipWatch

That’s it for this week’s Hacklet, stay tuned for next week when we bring you more of what’s happening at Hackaday.io!

Thumbnail that say The Hacklet

The Hacklet #3

The Hacklet Issue 3

The third issue of The Hacklet has been released. In this issue, we start off with a roundup on the Sci-Fi Contest which recently concluded. After seeing the many great hacks you came up with for that contest, we’re looking forward to seeing what you think of for The Hackaday Prize.

Next up, we take a look at two hacks that deal with switching mains, which is a feature that most home automation projects need. These high voltage switches can be dangerous to build, but one hack finds a safe and cheap way to do it. The next looks at building your own high voltage circuitry.

Finally, we talk about two laser hacks. The first is practical: a device for exposing resins and masks using a laser. The second is just a really big laser, built from hardware store parts. Who doesn’t like big lasers? We definitely like big lasers, and so does the FAA.

The Hacklet #2

2

A new edition of The Hacklet is now available It covers some of our favorite stuff going on in the Hackaday Projects community.

In this edition, we round up a few hacks involving cars. There’s Bluetooth Low Energy connectivity, vehicle telematics, and tools to hack into your car’s CAN bus. If you’ve ever wanted to clear that pesky check engine light without paying the dealer, or unlock your car with a smart watch, these are worth a look.

Next up are a bunch of LED hacks. This starts with a DIY theater light, then looks at a portable DJ booth, finishing off with our Evil Overlords’ own LED visualization platform.

Finally, we check out a new 3D printer design. This one uses polar coordinates instead of the Cartesian coordinate system that most printers use. This gives it the unique ability to print with multiple extruders at the same time.

Once again, let us know what you think of this edition in the comments. Our goal is to keep you entertained with some of the coolest hacks on the site.

The Hacklet #1

Hacklet Newsletter Issue 1

With the launch of hackaday.io, our project hosting site, we’ve seen quite a bit of interesting hacks flowing in. While we feature some of our favorite projects on the blog, we’ve decided it’s time to start a regular recap of what’s going on in the Hackaday Projects community. We call it The Hacklet, and the first issue is now available.

This installment starts off with information on our Sci-fi Contest and improvements to the Hackaday Projects site. We talk a bit about the various projects relating to the Mooltipass password manager being developed on Hackaday. The Mooltipass has its own project page, but there’s also separate projects for the low level firmware being developed. Next we look at a pair of NFC rings for unlocking Android devices, and finish off with advice on soldering tiny packages.

Check it out and let us know what you think. Our goal is to summarize some of the neat things going on in the community, and we’re always happy to get constructive feedback from the community itself. Or you can flame us… whichever you prefer.