Hacklet 69 – Morse Code Projects

With over 160 years of history under its belt, Morse code is by far the oldest digital signaling system known to man. Originally developed for telegraph systems, [Samuel Morse’s] code has been sent over wires, via radio, and even with flashes of light. Hackers, makers and engineers have been working with Morse code throughout history. For many years, simple code keys and practice oscillators were the “hello world” of hobby electronics. In fact, a company which started out selling a Morse key has gone on to become one of the largest electronic component distributors in the world. The company still bears the name of that project: Digi-Key. This week’s Hacklet is all about some of the best Morse code projects on Hackaday.io!

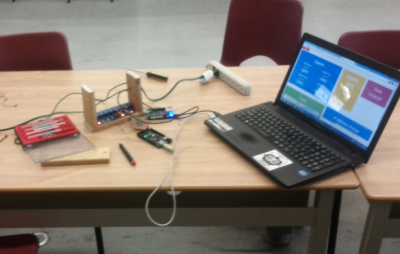
key1We start with [voxnulla] and Morse key HID + ugly hack. [voxnulla] found an old key at his favorite thrift store. It was dusty, greasy, and for some reason had been painted hospital green. Once the paint and grime were removed, and the original wooden plate restored, the key actually looked pretty good. [Voxnulla] then decided to turn it into a USB Human Interface Device (HID), emulating the keyboard of his computer. An Arduino converts Morse code characters tapped at the key into keystrokes over USB. As [voxnulla] knows, when butterflies aren’t available, real programmers drive vim with a Morse key!

code2Next up is [Voja Antonic] with Daddy, I don’t have the key. If you didn’t read [Voja’s] article about Hacking the Digital and Social System, check it out! Many apartments have an intercom system where you have to “buzz” someone in, activating a solenoid lock in the door. [Voja] inserted a Microchip PIC12 series microcontroller between the speaker and the unlock button. All a user has to do is tap out the right Morse code password on the call button in the lobby. If the code is accepted, the PIC unlocks the door, and you’re in!

 

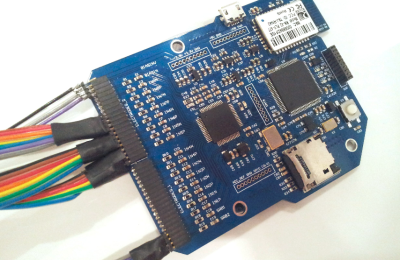
morseterminal[kodera2t] took things into the digital age with Stand-alone Tiny Morse code encoder/decoder. This project grew out of his general purpose Portable tiny IoT device project. [kodera2t] rolled his own Arduino-compatible board for this project. The tiny ATmega1284 powered computer allows him to encode and decode Morse code. A smartphone-sized keyboard and a lilliputian OLED display serve as the user interface, while rotary encoder allows for variable code speed. You can even “tap” Morse out on one of the tactile buttons!
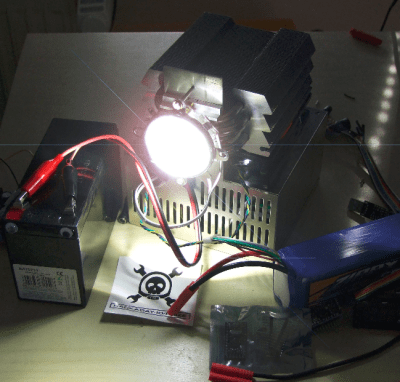
 

morselightFinally, we have [Yannick (Gigawipf)] with Portable (morsing) 100W led flashlight. 100 watt LEDs have gotten quite cheap these days, and they’re perfect when you absolutely, positively have to blind everyone around you. These LEDs can also be switched on and off quickly, which makes them perfect for Morse code. In years past, mechanical shutters had to be used to perform the same feat. [Yannick] used a 5000mAh 5S Zippy Li-Po to supply electrons to this hungry beast, while a 600 Watt constant current boost converter keeps that power under control. An Arduino running Morse code converter software controls the boost convert and LED.  [Yannick] uses his computer to send a message over the Arduino’s serial link, and the light does the rest, flashing out the message for all to see.

If you want more Morse goodness, check out our brand new Morse code project list! My Morse is a bit rusty, so if I wasn’t able to copy your transmission and missed your project, don’t hesitate to drop me a message on Hackaday.io. That’s it for this week’s Hacklet. As always, see you next week. Same hack time, same hack channel, bringing you the best of Hackaday.io!

Hacklet 68 – Rocket Projects

There’s just something amazing about counting down and watching a rocket lift off the pad, soaring high into the sky. The excitement is multiplied when the rocket is one you built yourself. Amateur rocketry has been inspiring hackers and engineers for centuries. In the USA, modern amateur rocketry gained popularity after Sputnik-1, continuing on through the space race. Much of this history captured in the book Rocket Boys by Homer Hickam, which is well worth a read. This week’s Hacklet is dedicated to some of the best rocketry projects on Hackaday.io!

rocket1We start with [Sagar] and Guided Rocket. [Sagar] is building a rocket with a self stabilization system. Many projects use articulated fins for this, and [Sagar] plans to add fins in the future, but he’s starting with an articulated rocket motor. The motor sits inside a gimbal, which allows it to tilt about 10 degrees in any direction. An Arduino is the brain of the system. The Arduino gathers data from a MPU6050 IMU sensor, then determines how to steer the rocket motor. Steering is accomplished with a couple of micro servos connected to the gimbal.


rocket2Next up is [Howie], with Homemade rocket engine. [Howie] is cooking some seriously hot stuff on his stove. Rocket candy to be precise, similar to the fuel [Homer Hickam] wrote about in Rocket Boys. This solid fuel is so named because one of the main ingredients is sugar. The other main ingredient is stump remover, or potassium nitrate. Everything is mixed and heated together on a skillet for about 30 minutes, then pushed into rocket engine tubes. It goes without saying that you shouldn’t try this one at home unless you’re really sure of what you’re doing!


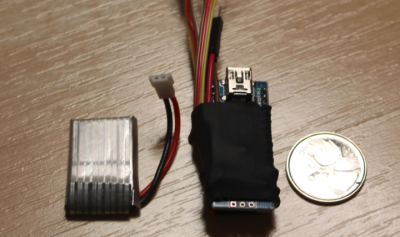
rocket3Everyone wants to know how high their rocket went. [Vcazan] created AltiRocket to record acceleration and altitude data. AltiRocket also transmits the data to the ground via a radio link. An Arduino Nano keeps things light. A BMP108 barometric sensor captures pressure data, which is easily converted into altitude. Launch forces are captured by a 3 Axis accelerometer. A tiny LiPo battery provides power. The entire system is only 23 grams! [Vcazan] has already flown AltiRocket, collecting data from several flights earlier this summer.


rocket4Finally we have [J. M. Hopkins] who is working on a huge project to do just about everything! High Power Experimental Rocket Platform includes designing and building everything from the rocket fuel, to the rocket itself, to a GPS guided parachute recovery system. [J. M. Hopkins] has already accomplished two of his goals, making his own fuel and testing nozzle designs. The electronics package to be included on the rocket is impressive, including a GPS, IMU, barometric, and temperature sensors. Data will be sent back to the ground by a 70cm transceiver. The ground station will use a high gain human-guided yagi tracking antenna with a low noise amplifier to pick up the signal.

If you want more rocketry goodness, check out our brand new rocket project list! Rocket projects move fast, if I missed yours as it streaked by, don’t hesitate to drop me a message on Hackaday.io. That’s it for this week’s Hacklet, As always, see you next week. Same hack time, same hack channel, bringing you the best of Hackaday.io!

Hacklet 57 – CNC Hacks

Everyone’s first microcontroller project is making an LED blink. It’s become the de-facto “Hello World” of hardware hacking.  There’s something about seeing wires you connected and the code you wrote come together to make something happen in the real world. More than just pixels on a screen, the LED is tangible. It’s only a short jump from blinking LEDs to making things move. Making things move is like a those gateway drug – it leads to bigger things like robots, electric cars, and CNC machines. Computer Numerical Control (CNC) is the art of using a computer to control movement. The term is usually applied to machine tools, which cut, engrave, or perform other operations on wood, plastic, metal and other materials. In short, tools to make more things. It’s no surprise that hackers love CNCs. This week’s Hacklet is all about some of the best CNC projects on Hackaday.io!

charliexWe start with [Charliex] and Grizzly G0704 CNC Conversion. [Charliex] wanted a stout machine capable of milling metal. He started with a Grizzly  G0704, which is small compared to a standard knee mill, but still plenty capable of milling steel. [Charliex] added a Flashcut CNC conversion kit to his mill. While they call them “conversion kits” there is still quite a bit of DIY ingenuity required to get a system like this going. [Charliex] found his spindle runout was way out of spec, even for a Chinese mill. New bearings and a belt conversion kit made things much smoother and quieter as well. The modded G0704 is now spending its days cutting parts in [Charliex’s] garage.


makesmithNext up is [brashtim] with Makesmith CNC. Makesmith was [brashtim’s] entry in the 2014 Hackaday prize. While it didn’t win the prize, Makesmith did go on to have a very successful Kickstarter, with all the machines shipping in December of 2014. The machine itself is unorthodox. It uses closed loop control like large CNC machines, rather than open loop stepper motors often found in desktop units. The drive motors are hobby type servos.  We’re not talking standard servos either – [brashtim] picked microservos. By using servos, common hardware store parts, and laser cut acrylic, [brashtim] kept costs down. The machine performs quite well though, easily milling through wood, plastic, foam, and printed circuit boards.


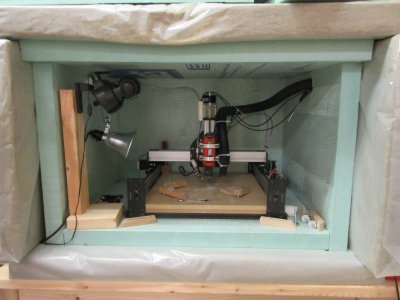
reactronNext we have [Kenji Larsen] with Reactron material processor: Wireless CNC mill. [Kenji] started with a  Shapeoko 2, and gave it the Reactron treatment. The stock controller was replaced with a Protoneer shield, which is connected to the Reactron network via a HopeRF radio module. The knockoff rotary tool included with the kit was replaced with a DeWalt DW660 for heavy-duty jobs, or a quieter Black and Decker RTX-6. A tool mounted endoscope keeps an eye on the work. [Kenji] mounted the entire mill in a custom enclosure of foam and Roxul insulation. The enclosure deadens the sound, but it also keeps heat in. [Kenji] plans to add a heat exchanger to keep things cool while maintaining relative quiet in his shop.

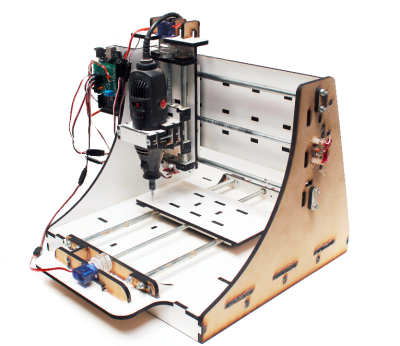
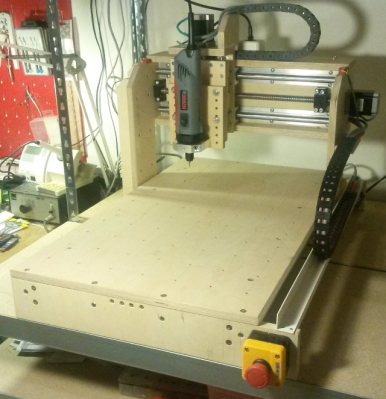
cnc2Finally we have a [hebel23] with DIY Multiplex Plywood CNC Router. [hebel23] wanted to build a big machine within a budget – specifically a working area of  400 x 600 x 100 mm and a budget of 800 Euro. As the name implies, [hebel23] used birch plywood as the frame of his machine. He chose high quality plywood rather than the cheap stuff found in the big box stores. This gives the machine a stable frame. The moving components of the machine are also nice – ball screws, linear bearings, and good stepper controllers. The stepper motors themselves are NEMA-23 units, which should give the CNC plenty of power to cut through wood, plastic, and even light cuts on metal. [hebel23] spent a lot of time on the little details of his CNC, like adding an emergency stop switch, and a wire-chain to keep his gantry control wires from ending up tangled up in the work piece. The end result is a CNC which would look great in anyone’s workshop.

If you want more CNC goodness, check out our brand new CNC project list! Did I miss your project? Don’t be shy, just drop me a message on Hackaday.io. That’s it for this week’s Hacklet, As always, see you next week. Same hack time, same hack channel, bringing you the best of Hackaday.io!

Hacklet 56 – Brain Hacks

The brain is the most powerful – and least understood computer known to man. For these very reasons, working with the mind has long been an attraction for hackers, makers, and engineers. Everything from EEG to magnetic stimulus to actual implants have found their way into projects. This week’s Hacklet is about some of the best brain hacks on Hackaday.io!

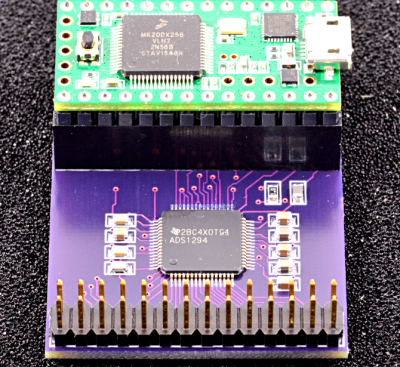
teensy-bio[Paul Stoffregen], father of the Teensy, is hard at work on Biopotential Signal Library, his entry in the 2015 Hackaday Prize. [Paul] isn’t just hacking his own mind, he’s creating a library and reference design using the Teensy 3.1. This library will allow anyone to read electroencephalogram (EEG) signals without having to worry about line noise filtering, signal processing, and all the other details that make recording EEG signals hard. [Paul] is making this happen by having the Teensy’s cortex M4 processor perform interrupt driven acquisition and filtering in the background. This leaves the user’s Arduino sketch free to actually work with the data, rather than acquiring it. The initial hardware design will collect data from TI ADS129x chips, which are 24 bit ADCs with 4 or 8 simultaneous channels. [Paul] plans to add more chips to the library in the future.


bioxNext up is [Jae Choi] with Lucid Dream Communication Link. [Jae] hopes to create a link between the dream world and the real world. To do this, they are utilizing BioEXG, a device [Jae] designed to collect several types of biological signals. Data enters the system through several active probes. These probes use common pogo pins to make contact with the wearer’s skin. [Jae] says the active probes were able to read EEG signals even through their thick hair! Communication between dreams and the real world will be accomplished with eye movements. We haven’t heard from [Jae] in awhile – so we hope they aren’t caught in limbo!

bioloop[Qquuiinn] is working from a different angle to build bioloop, their entry in the 2015 Hackaday Prize. Rather than using EEG signals, [Qquuiinn] is going with Galvanic Skin Response (GSR). GSR is easy to measure compared to EEG signals. [Qquuiinn] is using an Arduino Pro Mini to perform all their signal acquisition and processing. This biofeedback signal has been used for decades by devices like polygraph “lie detector” machines. GSR values change as the sweat glands become active. It provides a window into a person’s psychological or physiological stress levels. [Qquuiinn] hopes bioloop will be useful both to individuals and to mental health professionals.

biomonitorFinally we have [Marcin Byczuk] with Biomonitor. Biomonitor can read both EEG and electrocardiogram (EKG) signals. Unlike the other projects on today’s Hacklet, Biomonitor is wireless. It uses a Bluetooth radio to transmit data to a nearby PC or smartphone. The main processor in Biomonitor is an 8 bit ATmega8L. Since the 8L isn’t up to a lot of signal processing, [Marcin] does much of his filtering the old fashioned way – in hardware. Carefully designed op-amp based active filters provide more than enough performance when measuring these types of signals. Biomonitor has already found it’s way into academia, being used in both the PalCom project, and brain-computer interface research.

If you want more brain hacking goodness, check out our brain hacking project list! Did I miss your project? Don’t be shy, just drop me a message on Hackaday.io. That’s it for this week’s Hacklet, As always, see you next week. Same hack time, same hack channel, bringing you the best of Hackaday.io!
Hacklet 55 – Home Automation Projects

Home automation – the idea of a smart home that monitors and controls the inside environment, takes commands from occupants, and generally makes living easier. Hackers, makers, and engineers have been building their own vision of the smart home for decades. Thanks to cell phones and the revolution of the “internet of things”, home automation is now in the public eye. The hackers haven’t stopped though. They’re still building dreams, one circuit and one line of code at a time. This week’s Hacklet is dedicated to some of the best home automation projects on Hackaday.io!

jarvisWe start at the top – [IamTeknik’s] Project Jarvis has been in the top five skulled and viewed projects on Hackaday.io for as long as we’ve been keeping records. Just like the fictional Tony Stark design which inspired its name, Jarvis is based on artificial intelligence. [IamTeknik] has created a system using the BeagleBone Black running his own custom software. He’s also creating Jarvis from the ground up – even the relay modules have been designed and built by [IamTeknik]. So far Jarvis has a great 3D printed door lock unit, and a really nice wall mounted tablet. We’re watching to see what modules [IamTeknik] adds next!


hcs[Morrisonpiano] is no home automation noob. He’s been running his own system for two decades. HCS_IV Home Automation System is a project to update his HCS_C home automation system. For the uninitiated, the original HCS was created by [Steve Ciarcia] of Byte and Circuit Cellar fame. There have been several generations of the hardware and software since then, with plenty hackers adding their own custom features. [Morrisonpiano] is updating his system with an NXP Arm Cortex M4 CPU, three big Altera Cyclone FPGAs, and plenty of flash storage. Why use a FPGA on a home automation system? I/O of course! HCS uses a ton of I/O. There are 16 RS485 ports and 10 RS232 serial ports. Going with an FPGA makes things flexible as well. Want to add CAN bus? Just drop in some CAN HDL code and you’re golden!


[Sswitchteven] is giving the smart home more senses with Squirco Smart Home System – Sensor Network. Rather than just have a temperature sensor at the thermostat, or a motion detector in the front foyer, [Steven] wants a network of unobtrusive sensors to blanket the home. He’s doing this by replacing the common light switch with a smart module that has sensors for temperature, humidity, and human presence. [Steven] has spent quite a bit of time researching and experimenting microwave tomography as a means to detect humans. Going with microwaves means no obvious PIR windows.


bbb-haFinally, we have [Ansaf Ahmad] with BeagleBone Black Home Automation. The idea for this project came from a calculus class on optimization. [Ansaf] is putting mathematical theorems to use in the real world by monitoring usage patterns and current demands of a device. With that data, he can optimize the usage to make things greener. So far, [Ansaf] has been experimenting with a lamp. The system has a web front end which uses PHP. The GPIO pins on the board are controlled using Python and Flask. As an early project, BeagleBone Home Automation is doing great – it’s already earned [Ansaf] high grades in his computer engineering class!

If you want more smart home goodness, check out our updated home automation projects list! Did I miss your project? Don’t be shy, just drop me a message on Hackaday.io. That’s it for this week’s Hacklet, As always, see you next week. Same hack time, same hack channel, bringing you the best of Hackaday.io!
Hacklet 54 – Virtual Reality Projects

Virtual Reality is finally coming of age. Hackers, Makers and Engineers have dreamed of creating immersive interfaces for years. From the first flight simulators to today’s cellphone powered head mounted displays, VR has always been an exciting field. Many of the advances today are being created by hackers who were inspired by systems like Virtuality from the early 1990’s. Now 25 years on, we’re seeing amazing advances – not only in commercial systems, but in open source VR projects. This week’s Hacklet is all about the best VR projects on Hackaday.io!

vr1We start with [j0nno] and D.I.Y Virtual Reality. [J0nno] has become interested in VR, and decided to build his own head mounted display. His goal is to create a setup with full head tracking and an open source software stack. He’s hoping to do this within a budget of just $200 AUD. [J0nno] started with the Ritech3d-V2 VR Goggles, which are a plastic implementation of Google’s project cardboard. For display he’s using a 5.6 inch 1280 x 800 TFT LCD. Tracking is optical, using IR LEDs and a PS3 Eye camera. [J0nno’s] background is in software, so he’s doing great setting up OpenVR and Perception. The hardware side is a bit new to him. This isn’t stopping [J0nno] though! In true hacker spirit, he’s learning all about resistors and driving LEDs as he works on D.I.Y Virtual Reality.

vr2Next up is [Josh Lindsay] with Digitabulum: The last motion-capture glove. Digitabulum is a motion capture glove designed to be able to emulate most other motion capture systems. It is also designed to be relatively low-cost. At $400 per hand, it is less expensive than most other offerings, though we’d still love to see something even cheaper. [Josh] is going with inertial sensors, and a lot of them. Specifically he’s using no less than 17 LSM9DS1 Inertial Measurement Unit (IMU) sensors from ST Microelectronics. IMU sensors like this combine multiple rate gyros, accelerometers, and magnetometers into a single unit. Essentially every segment of every finger has its own sensor suite. As you might imagine, that is quite a bit of data to crunch. An Altera Max II CPLD and an ST Arm processor help boil down the data to something which a VR engine can process. [Josh] has been working on this project for over a year now, and he’s making great progress. The prototype glove looks terrific!

vr3[Thomas] brings augmented reality to the table with Oculus Rift featured Crane control. What started as a hobby experiment became [Thomas’] major project at university. He’s connected an Oculus Rift to a toy crane. A stereo camera on the crane sends a video image to the operator. The camera is mounted on a pan/tilt mechanism driven by the Rift’s head tracking unit. Simple joystick controls allow [Thomas] to move the boom and lower the line. On-screen displays show the current status of the crane. The use of the Rift makes this an immersive demonstration. One could easily see how moving this system into the real world would make crane operations safer for crane operators.

vr4Finally we have [Arcadia Labs] with DIY Augmented Reality Device. This project, which is the [Arcadia Labs] entry in the 2015 Hackaday Prize, uses two 320 x 240 screens to create an augmented reality head mounted display. While the resolution can’t match that of the Oculus Rift or HTC Vive, [Arcadia Labs] is ok with that. They’re going for a lower cost open source alternative for augmented reality. Tracking is achieved with an IMU, while a PS3 Eye camera provides the video. A Raspberry Pi controls the show. [Arcadia Labs] was able to get 50 frames per second on the displays just using the Pi’s SPI interface, however the USB PS3 Eye camera limits things to around 10 FPS. This project is under heavy development right now, so follow along with us to see where [Arcadia Labs] ends up!

If you want VR goodness, check out our new virtual reality projects list! Did I miss your project? Don’t be shy, just drop me a message on Hackaday.io. If you’re on the left coast of the USA, check out SOCAL Virtual Reality Conference and Expo. Hackaday is a sponsor. The event happens on July 12 at the University of California Irvine.

That’s it for this week’s Hacklet, As always, see you next week. Same hack time, same hack channel, bringing you the best of Hackaday.io!
Hacklet 53 – Quick Tool Hacks

They say necessity is the mother of invention. Have you ever been right in the middle of a project, when you realize that you could hack up a simple tool which would make your current task easier? Maybe it’s a coil winder, or a device to hold .100 headers straight in their holes. Faster than you can say “Arabian Nights”, you’re working on a project within a project. It might not be pretty, but it gets the job done. This week’s Hacklet is all about quick tool hacks – little projects that help out around the shop or hackerspace.

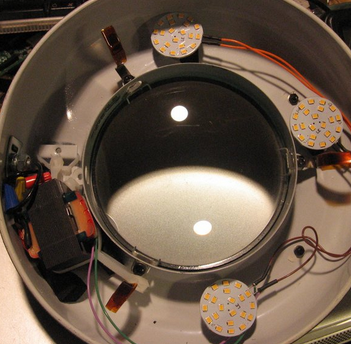
lampieWe start with [theonetruestickman] and Magnificent Magnifier LED Coversion. [theonetruestickman] picked up an articulated magnifier lamp at Goodwill for $4. These lamps are a staple of benches everywhere. The only problem was the switch and fluorescent tube were both failing. [theonetruestickman] didn’t feel bad for the lamp though. He pulled out the tube, ballast, and starter, replacing them with LEDs. He used 12 V 3 watt LED modules to replace the tube. Three modules provided plenty of light. An old wall wart donated its transformer to the effort. Since these LED modules are happy running on AC, no bridge rectifier was necessary. The modernized lamp is now happily serving on [theonetruestickman’s] workbench.

toolNext up is [Kwisatz] with Pick Up tool hack. [Kwisatz] is a person of few words. This whole project consists of just two words. Specifically, “syringe” and “spring”. Thankfully [Kwisatz] has provided several pictures to show us exactly what they’ve created. If you’ve ever used one of those cheap pickup tools from China, you know [Kwisatz’s] pain. The tiny piece of surgical tube inside the tool creates a feeble vacuum. These tools only hold parts for a few seconds before the vacuum decays enough to drop the part. [Kwisatz] kept the tip of the tool, but replaced the body with a syringe. A spring is used to create just the right amount of vacuum to hold parts on while they are being placed.

fume[Dylan Bleier] made his shop air a bit safer to breathe with a simple fume extractor for $20. Solder and flux create some nasty smoke when heated. Generally that smoke wafts directly into the face of the hacker peeking at the 0402 resistor they are trying to solder. A bit of smoke once in a while might not be so bad, but over the years, the effects add up. [Dylan] used two 120V AC bathroom fans, some metal ducting, plywood, and a bit of time to make this fume extractor. [Dylan] is the first to say it’s not UL, CE, or ROHS compliant, but it does get the job done. He even added a screen to keep bugs from flying in from the outdoor exhaust port.

helix[ftregan] needed to wind a helical coil for an antenna, so he built Helix Winder. Helices are essentially springs, so that should be easy, right? Turns out that making a nice uniform helix is not the easiest thing in the world. The helix winder is a jig which makes winding these special coils much easier. Holes are drilled at a specific angle in a wooden block. The wire is fed through that block and rolled onto an aluminum tube. Rotating the block on the tube forces the wire into the helix shape. The only downside is that each winder is only good for once dimension of helix.

I’ve noticed that some of these quick hacks don’t get as much love as they deserve over on hackaday.io. So if you notice a cool hack like this, drop a comment and give the project a skull. If you want to see more of these hacks, check out our new quick tool hacks list! See a project I might have missed? Don’t be shy, just drop me a message on Hackaday.io. That’s it for this week’s Hacklet, As always, see you next week. Same hack time, same hack channel, bringing you the best of Hackaday.io!