Fail Of The Week: Reset Issues With 595 And HD44780

fotw-reset-issues-595-character-lcd

We really like to see hardware hackers stepping out of the safe and polished boundaries of available Arduino libraries. One example of this is a project which [Matteo] thought worked: using a shift register to drive a character LCD. This can be a desirable way to do things, because it takes the GPIO usage down from six to just three connections. If you don’t remember seeing that one earlier this month take another look. The gist of it is that [Matteo] hacked one function in the LiquidCrystal library to make it happen.

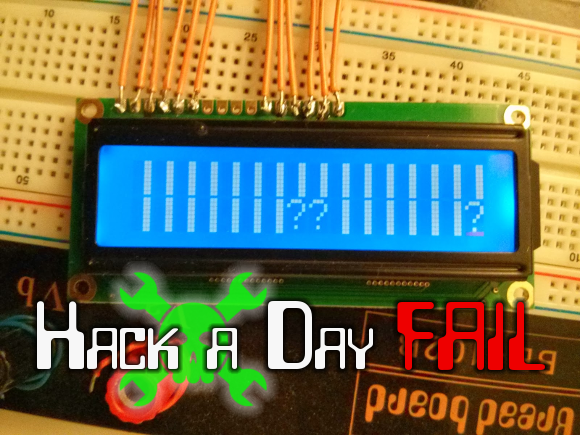
What makes this a truly great fail is that the problem was not immediately apparent, and is difficult to reliably reproduce. The LCD is unstable depending on how the Arduino board is reset. When connecting the Arduino to a computer the screen doesn’t work until you press the reset button. But press the reset button repeatedly and you get a non-functional screen plus the gibberish seen above.

There’s not much to go on here, but we think it’ll be a lot of fun to state your theory on the malfunction and suggesting for testing/fixing the issue. This could be a lot of things, the controller on the display getting mixed-up, the 595 missing an edge (or something along those lines). Do you fix this with hardware (ie: capacitor to avoid voltage dip), a software issue (need a longer delay after startup), or a combination of the two?


2013-09-05-Hackaday-Fail-tips-tileFail of the Week is a Hackaday column which runs every Wednesday. Help keep the fun rolling by writing about your past failures and sending us a link to the story — or sending in links to fail write ups you find in your Internet travels.

Controlling Alphanumeric LCDs With Three Wires

shift

The HD44780 LCD controller is the defacto way of adding a small text display to your next project. If you need a way to display a few variables, a few lines of text, or adding a small user interface to a project, odds are you’ll be using one of these parallel LCDs. These displays require at least six control lines, and if you’re using a small microcontroller or are down to your last pins, you might want to think about controlling an LCD with a shift register.

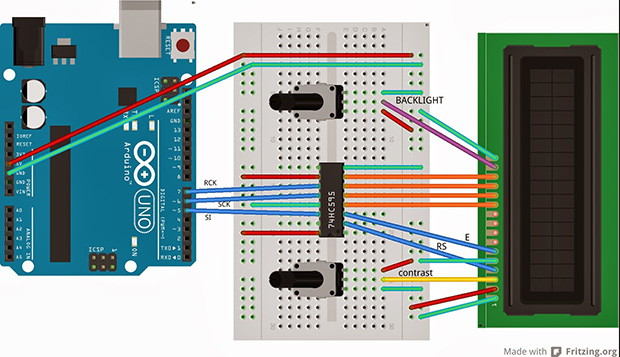
[Matteo] used the ubiquitous ‘595 shift register configured as a serial to parallel converter to drive his LCD. Driving the LCD this way requires only three pins on the Arduino, [Matteo]’s microcontroller of choice.

For the software, [Matteo] modified the stock Arduino LiquidCrystal library and put it up on his Git. Most of the functions are left untouched, but for this build the LCD can only be used in its four bit mode. That’s not a problem for 99% of the time, but if you need custom characters on your LCD you can always connect another shift register.

If you just can’t spare three pins for a display, you could squeeze this down to just two, or add a second microcontroller for a one-wire-like interface.

Controlling Alphanumeric LCDs With Two Wires

LCD

The Hitachi HD44780 LCD controller is the most common interface to all those alphanumeric LCDs out there, and there are a million and one tutorials for connecting these displays to any microcontroller imaginable. This still doesn’t mean hooking up these displays is necessarily simple, though: you still need at least four wires for the data, at least two for control signals, and power and ground lines for connecting the LCD the traditional way.

Here’s a neat trick for connecting HD44780 displays that only needs two wires. In this setup there’s only a ground and power+data wire. The interesting part of this build is using the power pin to transmit serial data with an RS-232-like format. The only difference is keeping the data line at +5 V when idle; a reasonable-sized cap keeps the display and controller alive when the master microcontroller is transmitting.

This technique does require a bit of logic on the receiving end, which a small 8-pin PIC can handle with ease. Communication between a microcontroller and this “smart” LCD is done at 2400 bps, which even the wimpiest micro can handle. All the software to make this setup work are available here, and we expect an Atmel-based version to hit the Hackaday tip line shortly.

Adding A Display To A USB Digital Scale

arduino_scale

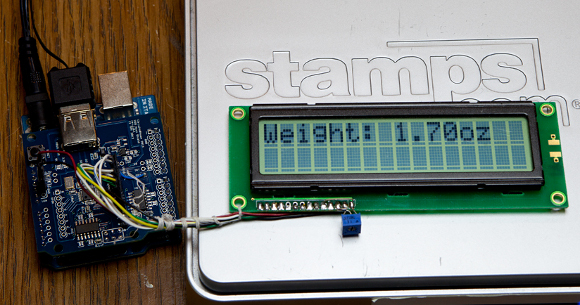
[Oleg] found himself in possession of a Stamps.com Model 510 5lb digital scale.  It’s a great scale, but only works as a USB HID device. In other words, it’s a digital scale without a digital display. He decided he wanted it to be more standalone, so he added a Toshiba HD44780 (compatible) display. An Arduino UNO and USB Host shield were used to make it happen. His sketch simply polls the scale and outputs the weight on the display.

In this case, he used the USB Host Shield from Circuits at Home, but a brief look shows they use the same MAX3421 controller chip as Sparkfun and other versions of the board. You might also be able to pull off the same functionality with an AVR running V-USB, though admittedly it wouldn’t be so easy.

We haven’t found a great way to add USB host mode to projects other than shields like the one [Oleg] used. If you know of a better way, share your ideas in the comments.

Of course, if this isn’t hardcore enough for you, forget using a consumer scale – make your own from scratch!

A Video Game With Custom LCD Characters

LCD

[Nakul] wanted to build a video game, and with a few projects worth of Arduino experience decided he could finally attain his goal. He used a character LCD display to make his game, and instead of a text-based adventure, he went with a graphical side scroller.

The display for this space-based side scroller isn’t a graphical display like a CRT or a graphic LCD. Instead, [Nakul] is using the ubiquitous Hitachi HD44780 character LCD display. Normally these are used to display text, but they all have the ability to display custom 5 by 8 pixel characters. The code puts these custom characters – a spaceship, missile, and barrier – into the display’s memory and uses them as the sprites for the video game.

You can grab [Nakul]’s code over on his git or check out the action videos below.

Continue reading “A Video Game With Custom LCD Characters”

LED Array Uses Ridiculous Amount Of 14-segment Displays

What do you do if you see a bunch of 14-segment LED displays for sale for a penny a piece? [Fritzler], when faced with that conundrum did what any of us would do – he bought 64 14-segment displays and built a huge 16×4 alphanumeric display (German, here’s the translation).

[Fritzler] found a cache of old East German 14-segment displays for €0.01 at electrobi.de (don’t bother, they’re out of stock), and the only thing he could think of was building a gigantic display. He used ULN2803 Darlington drivers for each LED module, but there was still the issue of controlling the entire display.

For that, [Fritzler] decided to make his 16×4 use the same protocol as the Hitachi HD44780 LCD controller. This meant [Fritzler] could wire up his gigantic, power-hungry display to a microcontroller as if it were a simple LCD display.

An amazing amount of work went in to the creation of this display, as evidenced by a pair of pictures showing what [Fritzler] had to solder.

Thanks [freax] for sending this one in.

Using An HD44780 Character LCD With The Raspberry Pi

[Tech2077] is one of the lucky ones who already got his hands on a Raspberry Pi. He’s been looking into different interface options with the GPIO header and just posted a guide to using an HD44780 character display with the RPi. We like this approach because instead of doing some hard-core LCD work he’s using prototyping equipment you probably already have on hand.

Getting a character LCD running should be really simple. The gotcha is the logic level gap between the devices. If you’ve been working with Arduino, your add-ons are probably meant for a 5V power rail  and logic levels. The RPi outputs 3.3V logic. You could use a level converter (you’d need at least 7 pins to be converted in this case) or you can be a bit more clever. [Tech2077] grabbed an I2C port expander that uses just 2 of the RPi lines to address even lines of the display (four data bits plus three control bits). This is a bit of a hack, as the 3.3V logic is 0.2V below the recommended minimum for a digital 1 on the port expander. But it seems to work just fine! If it didn’t, a couple of NPN transistors would do the trick as well.

Addressing the new peripheral is just a matter of loading the i2c module and writing some Python.