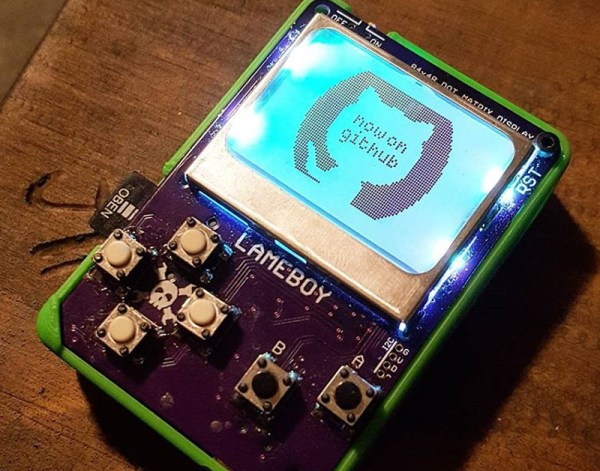
We’ve had our eye on [davedarko’s] LAMEBOY project for a while now, a handheld setup in roughly the same form factor as the classic Nintendo Game Boy. It’s remarkable how approachable portable electronic design has become, and that’s really what makes this interesting. The design is beautiful, and the closer you look, the more respect you have for what [dave] is doing.
 Right now his proof of concept has a 3D printed enclosure whose face is the printed circuit board. We love how the lower left corner of the PCB slips under a pocket in the case, which makes it possible to use just one screw to secure the two together in the upper right.
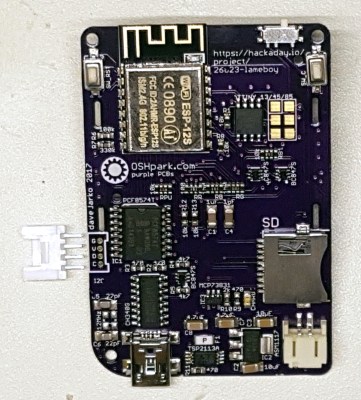
The LAMEBOY is built around an ESP8266 module. Anyone who has used one knows this chip contains a fair amount of horsepower, but very little I/O. [Dave] has a lot going on with an LCD screen, six user buttons, a USB to I/O chip, and an SD card slot. He took two approaches to solve this dilemma. First he grabbed a PCF8574 port expander, and second he’s offloaded the color control of the screen backlights to an ATtiny85 (running a BlinkM clone).
Below you can see some early game tests on the perfboard prototype. We haven’t seen game play on the most recent prototype (there is a screen color test video in his latest project log) but it sounds as though [dave] plans to make use of the Gamebuino framework. This should mean that there will be no shortage of cool ROMs to load.
Continue reading “LAMEBOY Is Handheld Gaming On The ESP8266”


