When Engineering, Fine Art, And ASMR Collide

The success that [Julian Baumgartner] has found on YouTube is a perfect example of all that’s weird and wonderful about the platform. His videos, which show in utterly engrossing detail the painstaking work that goes into restoring and conserving pieces of fine art, have been boosted in popularity by YouTube’s Autonomous Sensory Meridian Response (ASMR) subculture thanks to his soft spoken narration. But his latest video came as something of a surprise to lovers of oil paintings and “tingles” alike, as it revealed that he’s also more than capable of scratch building his own equipment.

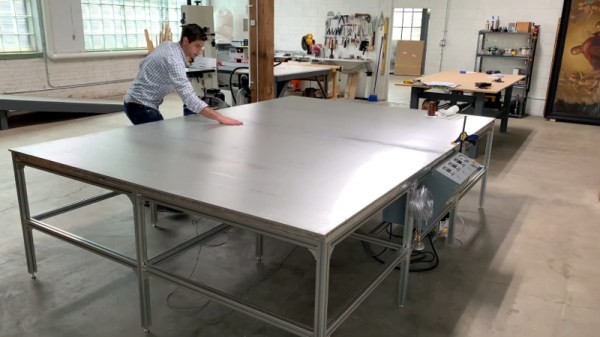
Anyone who’s been following his incredible restorations will be familiar with his heated suction table, which is used to treat various maladies a canvas may be suffering from. For example, by holding it at a sufficiently high temperature for days on end, moisture can be driven out as the piece is simultaneously smoothed and flattened by the force of the vacuum. But as [Julian] explains in the video after the break, the heated suction table he’s been using up to this point had been built years ago by his late father and was starting to show its age. After a recent failure had left him temporarily without this important tool, he decided to design and build his own fault-tolerant replacement.
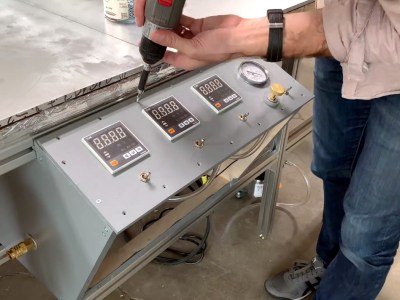
The table itself is built with a material well known to the readers of Hackaday: aluminum extrusion. As [Julian] constructs the twelve legged behemoth, he extols the many virtues of working with 4040 extrusion compared to something like wood. He then moves on to plotting out and creating the control panel for the table with the sort of zeal and attention to detail that you’d expect from a literal artist. With the skeleton of the panel complete, he then begins wiring everything up.

Underneath the table’s 10 foot long surface of 6061 aluminum are 6 silicone heat pads, each rated for 1,500 watts. These are arranged into three separate “zones” for redundancy, each powered by a Crydom CKRD2420 solid state relay connected to a Autonics TC4M-14R temperature controller. Each zone also gets its own thermocouple, which [Julian] carefully bonds to the aluminum bed with thermally conductive epoxy. Finally, a Gast 0523-V4-G588NDX vacuum pump is modified so it can be activated with the flick of a switch on the control panel.

What we like most about this project is that it’s more than just a piece of equipment that [Julian] will use in his videos. He’s also released the wiring diagram and Bill of Materials for the table on his website, which combined with the comprehensive build video, means this table can be replicated by other conservators. Whether it’s restoring the fine details on Matchbox cars or recreating woodworking tools from the 18th century, we’re always excited to see people put their heart into something they’re truly passionate about.

Continue reading “When Engineering, Fine Art, And ASMR Collide”

Reducing Drill Bit Wear The Cryogenic Way

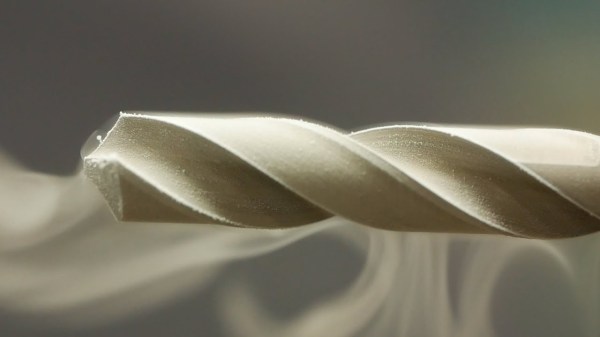
There are a lot of ways that metals can be formed into various shapes. Forging, casting, and cutting are some methods of getting the metal in the correct shape. An oft-overlooked aspect of smithing (at least by non-smiths) is the effect of temperature on the final characteristics of the metal, such as strength, brittleness, and even color. A smith may dunk a freshly forged sword into a bucket of oil or water to make the metal harder, or a craftsman with a drill bit might treat it with an extremely cold temperature to keep it from wearing out as quickly.

Welcome to the world of cryogenic treatment. Unlike quenching, where a hot metal is quickly cooled to create a hard crystal structure in the metal, cryogenic treatment is done by cooling the metal off slowly, and then raising it back up to room temperature slowly as well. The two processes are related in that they both achieve a certain amount of crystal structure formation, but the extreme cold helps create even more of the structure than simply tempering and quenching it does. The crystal structure wears out much less quickly than untreated steel, therefore the bits last much longer.

[Applied Science] goes deep into the theory behind these temperature treatments on the steel, and the results speak for themselves. With the liquid nitrogen treatments the bits were easily able to drill double the number of holes on average. The experiment was single-blind too, so the subjectivity of the experimenter was limited. There’s plenty to learn about heat-treated metals as well, even if you don’t have a liquid nitrogen generator at home.

Thanks to [baldpower] for the tip!

Continue reading “Reducing Drill Bit Wear The Cryogenic Way”

Metal Magic: Heat Bluing Steel Clock Hands

Metalwork of any kind is fascinating stuff to watch. When the metalwork in question is in service of the clockmaker’s art, the ballgame changes completely. Tiny screws and precision gears are created with benchtop lathes and milling machines, and techniques for treating metals border on alchemy – like heat-bluing of steel clock hands for a custom-built clock.

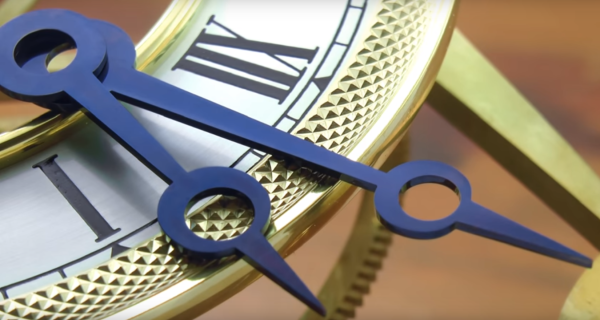
If you have even a passing interest in metalwork and haven’t followed [Clickspring]’s YouTube channel, you don’t know what you’re missing. [Chris] has been documenting a museum-quality open-body clock build, and the amount of metalworking skill on display is amazing. In his latest video, he covers how he heat-blues steel to achieve a wonderful contrast to the brass and steel workings. The process is simple in principle but difficult in practice – as steel is heated, a thin layer of oxides forms on the surface, enough to differentially refract the light and cause a color change. The higher the heat, the thicker the layer, and the bluer the color. [Chris] uses a custom-built tray filled with brass shavings to even out the heat of a propane torch, but even then it took several tries to get the color just right. As a bonus, [Chris] gives us a primer on heat-treating the steel hands – the boric acid and methylated spirits bath, propane torch flame job and oil bath quenching all seems like something out of a wizard’s workshop.

We’ve covered [Chris]’ build before, and we encourage everyone to tune in and watch what it means to be a craftsman. We only hope that when he finally finishes this clock he starts another project right away.

Continue reading “Metal Magic: Heat Bluing Steel Clock Hands”

[Ben Krasnow] Discusses The Heat Treatment Of Steel

steel

For home metallurgy, there are two sources of information for the heat treatment and tempering of steel. The first source is academic publications that include theoretical information, while the second includes the home-spun wisdom of blacksmiths who learn through trial and error. [Ben Krasnow] put up a great video that tries to bridge that gap with some great background information with empirical observations to back up his claims.

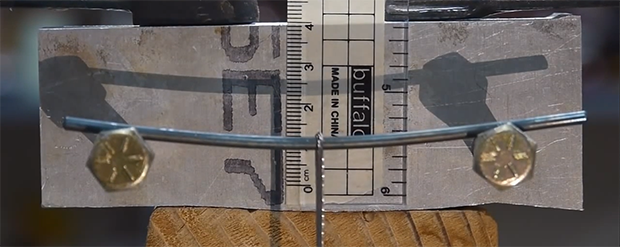
For investigating the hardness of steel, a few definitions are in order. The first is stiffness, or the ability of a material to ‘spring back’ after being flexed. The second is strength, specifically yield strength, which is the amount of strain a material can withstand before being permanently deformed.

[Ben] did all these experiments with a 1/8″ W1 steel drill rod. As it came from McMaster, this rod could handle a bit of force before becoming permanently bent, and in terms of stiffness was much better than a piece of coat hanger wire [Ben] had lying around. After taking a piece of this drill rod, heating it up to a cherry red and quenching it in water, [Ben] successfully heat treated this steel to a full hardness. After putting it on his testing jig, this full hardness steel didn’t deform at all, it simply broke.

Full hardness steel is basically useless as a structural material, so [Ben] tried his hand at tempering pieces of his drill rod. By putting a few pieces in a kiln at the requisite temperature, [Ben] was able to temper his drill rods to be stronger than the stock material, but not as terribly brittle as a full hard rod.

Continue reading “[Ben Krasnow] Discusses The Heat Treatment Of Steel”