This Lightning Detector Is Remarkably Sensitive

Lightning strikes are quite high energy events, and release plenty of radio frequency energy when they go off in the atmosphere. This makes them easy to detect, and the magnitude of the energy release means it can be done at impressive range. [Jay] decided to build a device of his very own, and was impressed at its detection performance.

The device is a simple but effective design. An antenna is used to capture RF signals, and these are then amplified through a single transistor stage. This is connected to a basic transistor flasher circuit, which is biased to only flash when tipped over the edge by an incoming signal. After building the circuit, [Jay] noticed that the device wasn’t just picking up signals from lightning, but also those from many other smaller discharges. The device was able to detect a shock from wearing socks on a wood floor, as well as discharges from a Van de Graff generator and even just from getting out of a chair!

Lightning detectors have been around for a long time now; we’ve seen others grace these pages before. Video after the break.

Continue reading “This Lightning Detector Is Remarkably Sensitive”

When Engineering, Fine Art, And ASMR Collide

The success that [Julian Baumgartner] has found on YouTube is a perfect example of all that’s weird and wonderful about the platform. His videos, which show in utterly engrossing detail the painstaking work that goes into restoring and conserving pieces of fine art, have been boosted in popularity by YouTube’s Autonomous Sensory Meridian Response (ASMR) subculture thanks to his soft spoken narration. But his latest video came as something of a surprise to lovers of oil paintings and “tingles” alike, as it revealed that he’s also more than capable of scratch building his own equipment.

Anyone who’s been following his incredible restorations will be familiar with his heated suction table, which is used to treat various maladies a canvas may be suffering from. For example, by holding it at a sufficiently high temperature for days on end, moisture can be driven out as the piece is simultaneously smoothed and flattened by the force of the vacuum. But as [Julian] explains in the video after the break, the heated suction table he’s been using up to this point had been built years ago by his late father and was starting to show its age. After a recent failure had left him temporarily without this important tool, he decided to design and build his own fault-tolerant replacement.

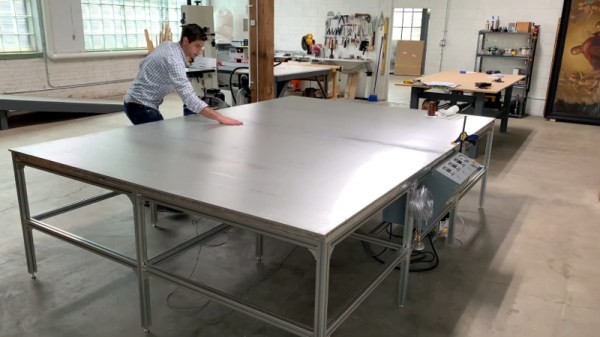
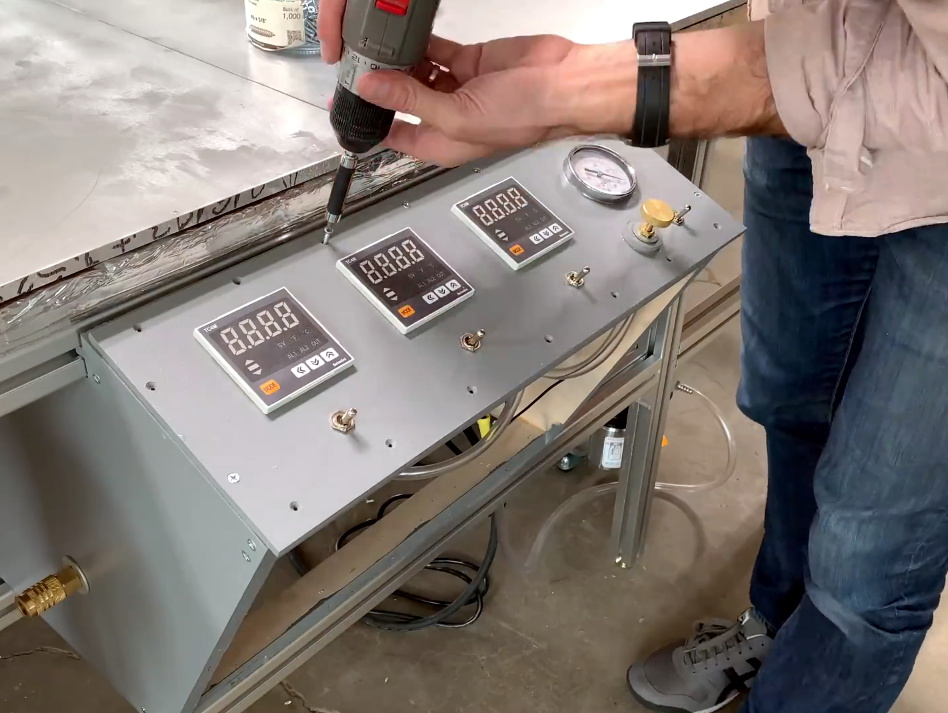
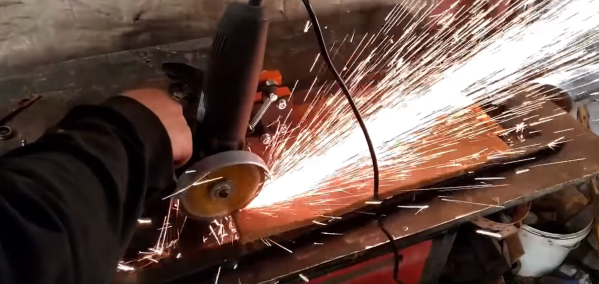
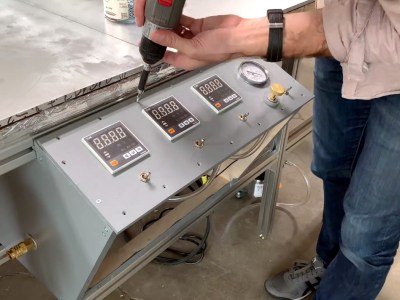
The table itself is built with a material well known to the readers of Hackaday: aluminum extrusion. As [Julian] constructs the twelve legged behemoth, he extols the many virtues of working with 4040 extrusion compared to something like wood. He then moves on to plotting out and creating the control panel for the table with the sort of zeal and attention to detail that you’d expect from a literal artist. With the skeleton of the panel complete, he then begins wiring everything up.

Underneath the table’s 10 foot long surface of 6061 aluminum are 6 silicone heat pads, each rated for 1,500 watts. These are arranged into three separate “zones” for redundancy, each powered by a Crydom CKRD2420 solid state relay connected to a Autonics TC4M-14R temperature controller. Each zone also gets its own thermocouple, which [Julian] carefully bonds to the aluminum bed with thermally conductive epoxy. Finally, a Gast 0523-V4-G588NDX vacuum pump is modified so it can be activated with the flick of a switch on the control panel.

What we like most about this project is that it’s more than just a piece of equipment that [Julian] will use in his videos. He’s also released the wiring diagram and Bill of Materials for the table on his website, which combined with the comprehensive build video, means this table can be replicated by other conservators. Whether it’s restoring the fine details on Matchbox cars or recreating woodworking tools from the 18th century, we’re always excited to see people put their heart into something they’re truly passionate about.

Continue reading “When Engineering, Fine Art, And ASMR Collide”

Amazing Open Source Quadruped Capable Of Dynamic Motion

The more we read about [Josh Pieper]’s quadruped, the mjbots quad A0, the more blown away we are by his year of progress on the design. Each part of the robot deserves its own article: from the heavily modified brushless motors (with custom planetary gears) to the custom motor driver designed just for this project.

[Josh], realized early on that the off-the-shelf components like an ODrive just weren’t going to cut it for his application. So he designed his own board, took it through four revisions, and even did thermal and cycle testing on it. He ended up with the compact moteus board. It can pump out 400 Watts of peak power while its 3Mbit control protocol leaves plenty of bandwidth for real time dynamic control.

The motors and gearboxes are also impressive. It took thorough experimenting and taking inspiration from other projects  before he arrived at a 8108 quad copter motor modified and upgraded so heavily its own mother wouldn’t recognize it. This is all packed into a leg unit with three degrees of freedom that puts even the fanciest servo based quadruped to shame.

Finally it’s all packed into a neat four-legged robot frame with batteries and a Pi. You can get a video summary of the robot here or after the break, and we recommend reading his blog for some more images and details.

Continue reading “Amazing Open Source Quadruped Capable Of Dynamic Motion”

Saying Farewell To Another B-17 And Its Crew

The harsh reality of keeping historical airplanes airworthy and flying is that from time to time one will crash. Thus it was that on October 2nd a Boeing B-17 Flying Fortress crash-landed after technical troubles. Incidentally, this is the very same airplane which we covered only a number of days ago. Painted to look like another B-17 of WWII (Nine-o-Nine, variant B-17G-30-BO), this late-model B-17G-85-DL aircraft wasn’t finished in time to join World War II, but instead spent its 74 years being a flying museum to these amazing airplanes.

Details about the cause of the crash are still scarce, but from radio communication between the crew and tower, it’s understood the B-17 was having having issues with the number 4 engine, which was seen sputtering and smoking by a witness. The airplane’s pilots tried to perform an emergency landing at Bradley International Airport, Connecticut, where it had taken off from only moments ago. Unfortunately the aircraft ran off the runway and struck a building, after which it burst into flames. The NTSB has indicated that they have dispatched a team to investigate the crash, and say that a preliminary report is likely two weeks away.

Of the thirteen people on board, seven died, with the remaining six surviving with injuries. One person on the ground was injured as well. The vintage bomber (civilian registration number N93012) has been all but completely destroyed in the fire, with only a section of the wing and tail remaining recognizable.

We feel terrible about such loss of life and hope the injured make a speedy recovery. The loss of yet another B-17 is also tough to swallow, as this leaves just ten airworthy B-17s. How long until we say farewell to this part of our history, with the final flight of a B-17, or its kin?

(Thanks to Pez for this update)

No Need To Watch Your Tea, This Robot Does It For You

For anyone who’s ever had to make their own tea, steeping it for the right amount of time can be a pain. That’s precisely the problem that the automatic tea brewing robot solves with its painless approach to brewing tea, built by Slovenian electrical engineering student [Kristjan Berce].

You can use the robot by setting a timer on the knob, at which point the robot raises it arm for the tea bag then dips in the water every 30 seconds until the time has passed. At the end of the timer, the bag is raised clear of the cup to end the brewing. It’s a remarkably simple design that almost evokes chindogu (the Japanese art of useless inventions) if not for the fact that the robot actually serves a useful purpose.

The components for 3D printing the robot are available online, consisting of a case, a container for the Arduino-powered electronics, the lever for holding the tea, and the gear that raises the lever up and down. The device also uses an integrated Li-Ion battery with an accessible charging port and integrated BMS. A 35BYJ46 stepper motor and ULN2003 driver are used to move the 3D printed mechanism. The device uses a potentiometer for setting the steeping time between 1 and 9 minutes, and there’s even a buzzer for indicating once the tea is done brewing.

The Gerber and Arduino code files are open-source for any hackers looking to make their own tea brewers; just take care they operate with “deadly punctuality”.

Continue reading “No Need To Watch Your Tea, This Robot Does It For You”

DSP Spreadsheet: FIR Filtering

There’s an old saying: Tell me and I forget, teach me and I may remember, involve me and I learn. I’m guilty of this in a big way — I was never much on classroom learning. But if I build something or write some code, I’m more likely to understand how it works and why.

Circuit simulation and software workbooks like Matlab and Jupyter are great for being able to build things without a lot of overhead. But these all have some learning curve and often use clever tricks, abstractions, or library calls to obscure what’s really happening. Sometimes it is easier to build something in a spreadsheet. In fact, I often do little circuit design spreadsheets or even digital design because it forces me to create a mathematical model which, in turn, helps me understand what’s really going on.

In this article I’m going to use Google Sheets — although you could do the same tricks in just about any spreadsheet — to generate some data and apply a finite impulse response (FIR) filter to it. Of course, if you had a spreadsheet of data from an instrument, this same technique would work, too.

Continue reading “DSP Spreadsheet: FIR Filtering”

Solve Your Precision Woes With A Sliding Angle Grinder

Angle grinders are among the most useful tools for anyone who’s ever had to cut metal. They’re ergonomic, compact, and get the job done. Unfortunately, one of the tradeoffs you usually make when using them is precision.

But thankfully, there’s a DIY solution. YouTuber [workshop from scratch] demonstrated the build process for a sliding angle grinder in a recent video, welding steel beams into a flat frame and attaching fitted beams on top to slide across the rows. Where necessary, spacers are used to ensure that the slider is perfectly fitted to the beam. The contraption holding the angle grinder – a welded piece of steel bolted to the sliding mechanism – has a grip for the user to seamlessly slide the tool across the table.

The operation is like a more versatile and robust chop saw, not to mention the customized angle references you can make to cut virtually anything you like. The build video shows the entire process, from drill pressing and turning holes to welding pieces of the frame together to artfully spray painting the surface a classy black, with familiarity enough to make the project look like a piece of cake.

As the name implies, [workshop from scratch] is all about building your own shop tools, and we’ve previously taken a look at their impressive hydraulic vise and mobile crane builds. These tools, largely hacked together from scraps, prove that setting up your own shop doesn’t necessarily mean you need to break the bank.

Continue reading “Solve Your Precision Woes With A Sliding Angle Grinder”