POV Airsoft Turret On A RC Plane

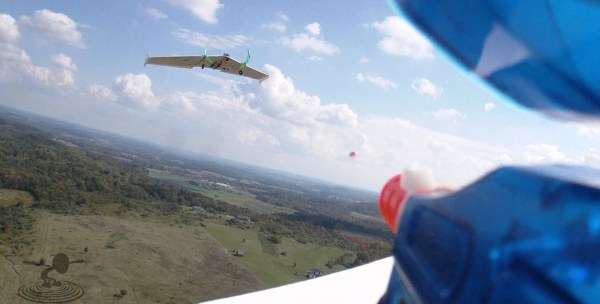
To be honest, we’re surprised this hasn’t been tried before — then again, maybe it has! But what we do know is that the folks over at Flite Test have rigged up an electric Airsoft gun to a large RC airplane, aptly called The Kracken.

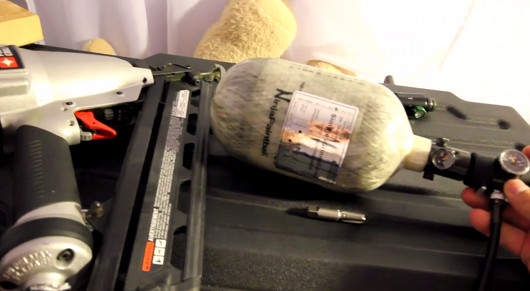
The planes are a scaled up version of their own FT Versa Wing, which feature two props, giving them the ability of differential thrust. Not only were they able to strap a semi-automatic Airsoft pistol on top, they also have two GoPros filming the action and giving the gunner a POV for shooting down the enemy plane! Don’t worry though, the enemy plane features its own weapon — A permanent marker! This hardly seems fair though, as the closer the marker gets, the easier shooting down the plane will be!

Don’t take our word for it though, check out the awesome video for yourself, after the break.

Continue reading “POV Airsoft Turret On A RC Plane”

Going Mobile With Your Air Tools

airtank

If you’ve ever worked with air tools outside of a shop setting, you know that lugging the air hose around can get more and more annoying the further away you are from the compressor. [headsplosive] posted a video (embedded after the break) showing how to go mobile with your air tools.

Air tanks made for paintball are high-pressure in a tiny space, and make a very convenient energy source. In this case, [headsplosive] used a 68 cubic inch, carbon fiber wrapped tank rated at 4500psi. The normal regulator only steps that pressure down to 800psi, so he added a second regulator to hit the 120-140psi that air tools need. He then attached a ‘remote line’, or a coiled high-pressure hose, and added a standard air tool coupler at the end.

The yield is pretty impressive. With a half-charge of the tank, he managed to drive 100 two-inch nails. [headsplosive] has a scuba tank handy, and uses that to recharge the paintball tank. He estimates a scuba tank will last you about 2000 shots from a nailer, and only costs about $7.50 to recharge. Not bad at all. We can’t help but wonder how long you’d get out of an air-powered cutoff wheel, or even a hammer drill. While the parts aren’t terribly cheap unless you buy them used, it will still pay for itself in convenience if you have the need.

Continue reading “Going Mobile With Your Air Tools”

Monitor GitHub Activity With An RGB LED Matrix

tim-display

Ever wonder who is forking your code? [Jack] did, so he built a real time GitHub activity display for his company’s repositories. The display is based a Wyolum The Intelligent Matrix (TiM) board. The TiM is an 8 x 16 matrix of the ubiquitous WS2811/Smart Pixel/NeoPixel RGB LEDs with built-in controller. We’re seeing more and more of these serial LEDs as they drop in price. Solder jumpers allow the TiM to be used as 8 parallel rows of LEDs (for higher refresh rates), or connected into one long serial chain.

[Jack] wasn’t worried about speed, so he configured his board into a single serial string of LEDs. An Arduino drives the entire matrix with a single pin. Rather than reinvent the wheel, [Jack] used Adafruit’s NeoMatrix library to drive his display. Since the TiM uses the same LEDs as the Adafruit NeoPixel Matrix, the library will work. Chalk up another victory for open source hardware and software!

An Electric Imp retrieves Github data via WiFi and passes it on to the Arduino. This is a good use of a microcontroller such as the AVR on the Arduino. [Jack’s] display has a scrolling username. Every step in the scroll animation requires all the pixel data be clocked out to the TiM board. The Arduino can handle this while the IMP takes care of higher level duties.

Continue reading “Monitor GitHub Activity With An RGB LED Matrix”

[Ben Krasnow] Discusses The Heat Treatment Of Steel

steel

For home metallurgy, there are two sources of information for the heat treatment and tempering of steel. The first source is academic publications that include theoretical information, while the second includes the home-spun wisdom of blacksmiths who learn through trial and error. [Ben Krasnow] put up a great video that tries to bridge that gap with some great background information with empirical observations to back up his claims.

For investigating the hardness of steel, a few definitions are in order. The first is stiffness, or the ability of a material to ‘spring back’ after being flexed. The second is strength, specifically yield strength, which is the amount of strain a material can withstand before being permanently deformed.

[Ben] did all these experiments with a 1/8″ W1 steel drill rod. As it came from McMaster, this rod could handle a bit of force before becoming permanently bent, and in terms of stiffness was much better than a piece of coat hanger wire [Ben] had lying around. After taking a piece of this drill rod, heating it up to a cherry red and quenching it in water, [Ben] successfully heat treated this steel to a full hardness. After putting it on his testing jig, this full hardness steel didn’t deform at all, it simply broke.

Full hardness steel is basically useless as a structural material, so [Ben] tried his hand at tempering pieces of his drill rod. By putting a few pieces in a kiln at the requisite temperature, [Ben] was able to temper his drill rods to be stronger than the stock material, but not as terribly brittle as a full hard rod.

Continue reading “[Ben Krasnow] Discusses The Heat Treatment Of Steel”

3D Printering: Pastestruders

printering

While bits of plastic are the usual material for 3D printers, there are hundreds of other materials that are equally well suited for 3D printing. One of the most famous is chocolate, a material so popular and easy to manipulate inside an extruder there are even Kickstarters for 3D printed chocolate bars.

teapotThere are many more materials deserving of being 3D printed, though: wax for lost wax castings, other foodstuffs for improbably shaped edibles, and ceramics so I can finally print a life-sized, functional version of the Utah Teapot.

Unfortunately, for all the progress of plastic extrusion, little has been done about extruding pastes, foods, and clay with a 3D printer. The RepRap paste extrusion working group is fairly close to being dead, so let this volume of 3D Printering explore what has been done in the world of paste printing.

Continue reading “3D Printering: Pastestruders”

Tour Of Chicago Hackerspace: Pumping Station One

lady_ada_ps1

As you may know I was on vacation in Chicago last week. I got a chance to jump on the blue line train from Chicago’s downtown loop for a short trip out to the Addison stop where I caught a quick bus ride over to one of Chicago’s hackerspaces: Pumping Station One. I was given a tour by some camera-shy members that were there when I popped in. The space had a large welding area with lots of equipment, metal lathes, metal brake and woodworking equipment. You name the shop tool, I think it was there. I even think I spotted a functioning scanning electron microscope! WOW!

The lower workspace was quite extensive. Yes, there’s a second-floor having sewing machines, vinyl cutters, 3-D printers and an entire room dedicated to electronics and robotics. Also, they are in the process of expanding to make the space even larger. If you’re in Chicago I recommend you check them out, it’s an amazing space and an easy commute from downtown.

I hope my iPhone video is good enough to show off their splendid space.
Follow along after the break to learn more and get a glimpse inside Pumping Station One.

Continue reading “Tour Of Chicago Hackerspace: Pumping Station One”

Teach An Old LCD New Tricks

pic-lcd

[Art] has done some amazing work with character LCDs. He started with a classic character LCD. These LCDs are typically controlled by Hitachi HD447XXX compatible controllers. Hitachi’s controllers allow several custom characters to be defined. We’ve used those characters in the past for applications like spinners and bar graphs. [Art] took things to a whole new level. He created a double buffered LCD graphics library which allows these old LCDs to perform tricks usually reserved for graphical LCDs. Even more impressive is the fact the whole thing runs on a Microchip PIC16F628A programmed mostly in PICBASIC.

According to [Art’s] thread on the PICBASIC forum, he is using the custom character memory as a framebuffer. The LCD is set to display all 8 custom characters. Each frame is then in the PIC’s RAM. The completed frames are then pushed to the custom character memory of the Hitachi LCD controller. The result is a very smooth update rate on the LCD. [Art] wrapped the whole example up in a video reminiscent of the C64 demoscene.

Continue reading “Teach An Old LCD New Tricks”