Teardown: Impassa SCW9057G-433 Alarm System

This series of monthly teardowns was started in early 2018 as an experiment, and since you fine folks keep reading them, I keep making them. But in truth, finding a new and interesting gadget every month can sometimes be a chore. Which is why I’m always so thankful when a reader actually sends something in that they’d like to see taken apart, as it absolves me from having to make the decision myself. Of course it also means I can’t be blamed if you don’t like it, so keep that in mind as well.

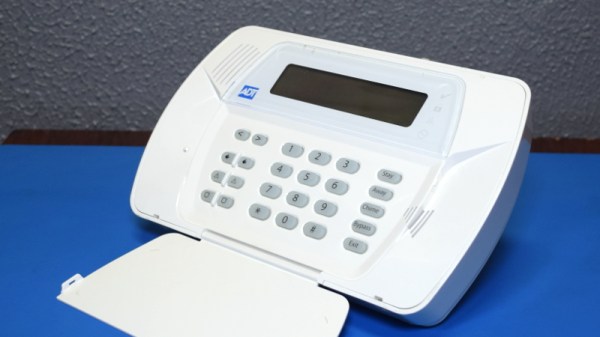
Coming our way from the tropical paradise of Eastern Pennsylvania, this month’s subject is an ADT branded Impassa SCW9057G-433 alarm system that was apparently pulled off the wall when our kind patron was moving house. As you might have guessed from the model number, this unit uses 433 MHz to communicate with various sensors and devices throughout the home, and also includes a 3G cellular connection that allows it to contact the alarm monitoring service even if the phone line has been cut.
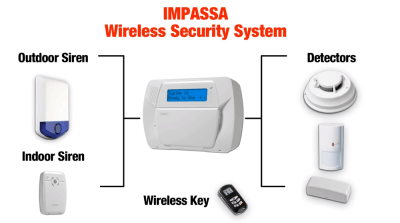
Diagram of Impassa home security setup
The alarm can connect to a wide array of 433 MHz devices.

From how many of these are on eBay, and the research I’ve done on some home alarm system forums, it appears that you can actually pick one of these up on the second-hand market and spin your own whole-house alarm system without going through a monitoring company like ADT. The extensive documentation from Impassa covers how to wire and configure the device, and as long as the system isn’t locked when you get it, it seems like wiping the configuration and starting from scratch isn’t a problem.

If it’s possible to put together your own homebrew alarm system with one of these units at the core, then it seems the least we can do is take it apart and see what kind of potentially modifiable goodies are waiting under that shiny plastic exterior.

Continue reading “Teardown: Impassa SCW9057G-433 Alarm System”

DIY ESP32 Alarm System Leverages 433 MHz Sensors

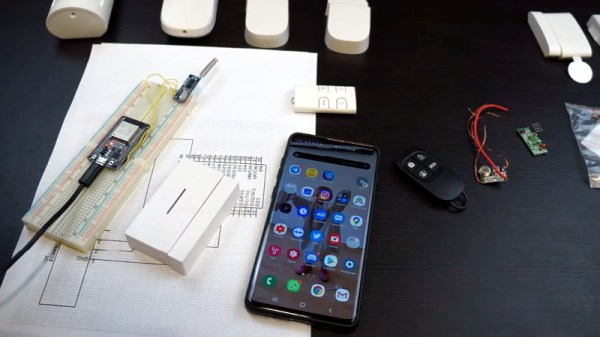
There’s a huge market for 433 MHz alarm system hardware out there, from PIR motion detectors to door and window sensors. If you want to put them to work, all you need is a receiver, a network-enabled microcontroller, and some code. In his latest video, [Aaron Christophel] shows how easy it can be.

In essence, you connect a common 433 MHz receiver module to an ESP32 or ESP8266 microcontroller, and have it wait until a specific device squawks out. From there, the code on the ESP can fire off using whatever API works for your purposes. In this case [Aaron] is using the Telegram API to send out messages that will pop up with a notification on his phone when a door or window is opened. But you could just as easily use something like MQTT, or if you want to go old-school, have it toggle a relay hooked up to a loud siren.

Even if you aren’t looking to make your own makeshift alarm system, the code and video after the break are a great example to follow if you want to get started with 433 MHz hardware. Specifically, [Aaron] walks the viewer through the process of scanning for new 433 MHz devices and adding their unique IDs to the list the code will listen out for. If you ever wondered how quickly you could get up and running with this stuff, now you’ve got your answer.

In the past we’ve seen the Raspberry Pi fill in as an RF to WiFi gateway for these type of sensors, as well as projects that pulled them all together into a complete home automation system on the cheap.

Continue reading “DIY ESP32 Alarm System Leverages 433 MHz Sensors”

Stupid Security In A Security System

alarm

[Yaehob]’s parents have a security system in their house, and when they wanted to make a few changes to their alarm rules – not arming the bathroom at night – an installer would come out, plug a box into the main panel, press a few buttons, and charge 150 €. Horrified at the aspect of spending that much money to flip a few bits, [yaehob] set out to get around the homeowner lockout on the alarm system, and found security where he wasn’t expecting.

Opening the main panel for the alarm system, [yaehob] was greeted with a screeching noise. This was the obvious in retrospect tamper-evident seal on the alarm box, easily silenced by entering a code on the keypad. The alarm, however, would not arm anymore, making the task of getting ‘installer-level’ access on the alarm system a top priority.

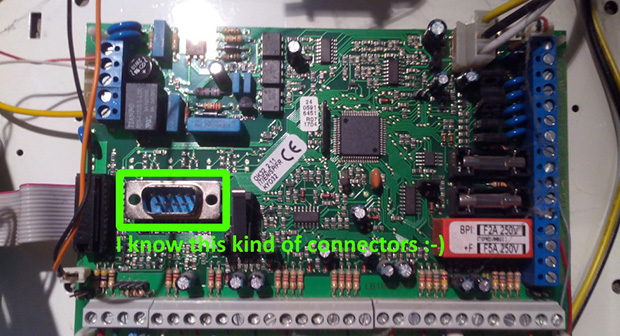
After finding a DE-9 serial port on the main board, [yaehob] went to the manufacturer’s website thinking he could download some software. The website does have the software available, but only for authorized distributors, installers, and resellers. You can register as one, though, and no, there is no verification the person filling out a web form is actually a distributor, installer, or reseller.dist

Looking at the installer and accompanying documentation, [yaehob] could see everything, but could not modify anything. To do that would require the installer password, which, according to the documentation was between four and six characters. The system also responded quickly, so brute force was obviously the answer here.

After writing up a quick script to go through all the possible passwords, [yaehob] started plugging numbers into the controller board. Coming back a bit later, he noticed something familiar about what was returned when the system finally let him in. A quick peek at where his brute force app confirmed his suspicions; the installer’s code was his postal code.

From the installer’s point of view, this somewhat makes sense. Any tech driving out to punch a few numbers into a computer and charge $200 will always know the postal code of where he’s driving to. From a security standpoint, holy crap this is bad.

Now that [yaehob]’s parents are out from under the thumb of the alarm installer, he’s also tacked on a little bit of security of his own; the installer’s code won’t work anymore. It’s now changed to the house number.