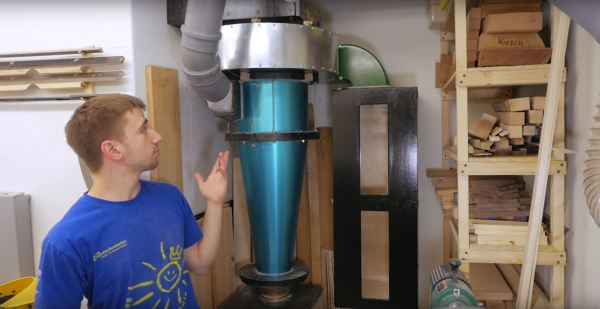
As [Marius Hornberger] was working in his woodshop, a thunderous bang suddenly rocked the space. A brief search revealed the blower for the dust collector had shifted several inches despite being stoutly fastened down. Turns out, the blower had blown itself up when one of the impeller fins came loose. Time to revise and build a bigger, better dust collector!
[Hornberger] is thorough in describing his process, the video series chronicles where he went astray in his original design and how he’s gone about improving on those elements. For instance, the original impeller had six fins which meant fewer points to bear the operating stresses as well as producing an occasionally uncomfortable drone. MDF wasn’t an ideal material choice here either, contributing to the failure of the part.
[Mark Rehorst] has been on the hunt for the perfect 3D printer cooling fan and his latest take is a really interesting design. He’s printed an impeller and housing, completing the fan using a hard drive motor to make it spin.
We should take a step back to see where this all began. Many 3D printers us a cooling fan right at the tip of the extruder because the faster you faster you cool the extruded filament, the fewer problems you’ll have with drooping and warping. Often this is done with a small brushless fan mounted right on the print head. But that adds mass to the moving head, contributing to problems like overshoot and oscillation, especially on larger format printers that have longer gantries. [Mark] just happens to have an enormous printer we covered back in January and that’s the machine this fan targets.
CPAP fan and duct tubing
Make sure you give [Mark’s] Mother of all print cooling fansarticle a look. His plan is to move the fan off of the print head and route a flexible tube instead. He tried a couple of fans, settling on one he pulled from a CPAP machine (yes the thing you wear at night to combat sleep apnea) found in the parts bin at Milwaukee Makerspace. It works great, moving quite a bit more air than necessary. The problem is these CPAP parts aren’t necessarily easy to source.
You know what is easy to source? Old hard drives. [Mark] mentions you likely have one sitting around and if not, your friends do. We have to agree with him. Assuming you already have a 3D printer (why else do you want to print this fan?), the only rare part in this mix is the ESC to make the motor spin. Turns out we just saw a BLDC driver build that would do the trick. But in [Mark’s] case he found a rather affordable driver that suits his needs which is used in the video demo below.
[Ben Krasnow’s] water vortex machine has been an exhibit in the lobby of the San Jose City Hall for quite some time now. Unfortuantely he recently had to perform some repair work on it due to the parts inside the water chamber rusting.
This is the same water vortex that we saw about a year ago. It uses a power drill to drive an impeller at the bottom of a water column to produce the vortex. That impeller was made from painted steel and after being submerged for eight months it began rusting, which discolored the water. [Ben’s] repair process, which you can watch after the break, replaces the shaft and the impeller. He reused a plastic PC cooling fan as the new impeller. The replacement shaft is stainless steel, as is all of the mounting hardware that will be in contact with water. But for us, the most interesting part of the repair is his explanation of the shaft gasket and bearings. Two thrust bearings and two radial bearings ensure that the shaft cannot move axially, which would cause a problem with the gasket. He had intended to swap out the oil seal for an all Teflon seal but the machined acrylic wasn’t conducive to the part swap. Instead, he replaced it with the same type of gasket, but bolstered the new one with some silicone to stave off corrosion.