Screenshot from the video showing comparisons between diffused light pictures at different brightnesses and diffusers applied

LED Diffusers Confusing? Organize A Practical Contest

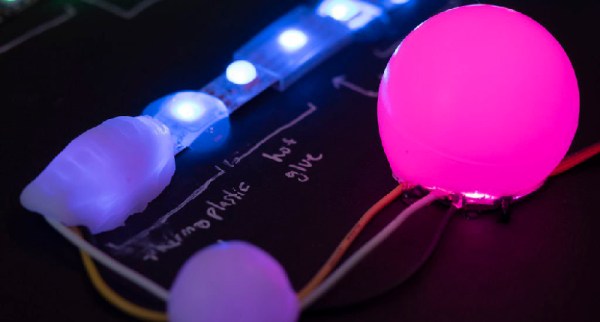
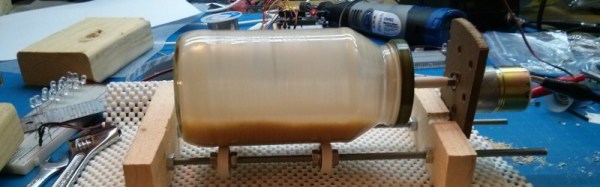
We all want a nice and shiny LED strip that doesn’t actually look like it consists of individual LEDs – a bar of uniform light is just that much more attractive. There’s all kinds of diffusion options available out there, but they can be confusing – sometimes you’d just like to know, which one is better? If there’s one thing that could easily settle this, it’s a practical test, and that’s what [The Hook Up] has devised for us to learn from.

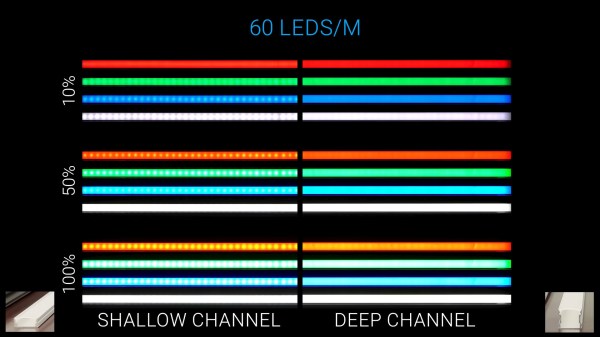
First off, he talks about LED strips available – between 30, 60 and 144 LED per meter variations, the latter is going to be easier to diffuse than the former. From there, there’s a few different kinds of diffuser covers and aluminum profiles you can get, and [The Hook Up] pairs them in combinations, filming them from a distance and giving us concise visuals of how each combination works at different duty cycles, as well as making brightness measurements every now and then to evaluate losses of different diffuser layers. He proposes a simple rule – when picking a diffuser, distance between the LEDs and the diffuser has to be larger than the between-LED distance, and experiments confirm that. In the end, one of the takeaways is that the differences between 60LED/m and 144LED/m strips are not significant enough that they can’t be compensated for with a decent diffuser.

Continue reading “LED Diffusers Confusing? Organize A Practical Contest”

3D Printed Diffusers Make More Natural Light

A strip of LEDs may be a simple and flexible way to add light to a project, but they don’t always look natural.  There is an easy way to make them look better, though: add a diffuser. That’s what [Nate Damen] did using a 3D printer. He created a diffuser using PETG giving a standard string of LEDs a softer and more natural look that makes them look more like older light sources such as fluorescent strips or EL wire, but with the flexible colors of LEDs. The PETG material he used has a naturally somewhat cloudy look, so it acts as a diffuser without needing any extra treatment.

Continue reading “3D Printed Diffusers Make More Natural Light”

Friday Hack Chat: LED Diffusion

A decade ago, the first Arduino projects featuring addressable RGB LEDs came on the scene, and the world hasn’t been the same since. Now we have full wall video displays with WS2812s and APA102s, wearable blinky, and entire suits of armor made of LEDs. The future is bright, and in RGB.

For this week’s Hack Chat, we’re going to be talking all about how to maintain the blinky without eye-searing brightness. It’s the LED Diffusion Hack Chat, full of tips and tricks on how to get the glowey without it being imprinted on your retina.

Our guest for this week’s Hack Chat is the incredible Becky Stern. Becky is one of the most prolific makers around and has a long history of fabricating some really, really cool stuff. She’s published hundreds of tutorials on everything from microcontrollers to computerized knitting machines, and has been featured by dozens of media outlets including the BBC, CNN, The Late Show with Colbert, VICE, and Forbes. Right now, she’s working at Autodesk with Instructables.

During this Hack Chat, we’re going to be talking all about diffusing LEDs, with topics including:

  • Taking some sandpaper to LEDs
  • Light pipes
  • 3D printed LED enclosures
  • Looking into a bright blue LED with your remaining eye

You are, of course, encouraged to add your own questions to the discussion. You can do that by leaving a comment on the Hack Chat Event Page and we’ll put that in the queue for the Hack Chat discussion.join-hack-chat

Our Hack Chats are live community events on the Hackaday.io Hack Chat group messaging. This week is just like any other, and we’ll be gathering ’round our video terminals at noon, Pacific, on Friday, August 17th. Need a countdown timer? Here ‘ya go.

Click that speech bubble to the right, and you’ll be taken directly to the Hack Chat group on Hackaday.io.

You don’t have to wait until Friday; join whenever you want and you can see what the community is talking about.

Curved Wood LED Lamp Needs No Fancy Tools

Those of us who aren’t familiar with woodworking might not expect that this curved wood and acrylic LED lamp by [Marija] isn’t the product of fancy carving, just some thoughtful design and assembly work. The base is a few inches of concrete in a plastic bowl, then sanded and given a clear coat. The wood is four layers of beech hardwood cut on an inverted jigsaw with the middle two layers having an extra recess for two LED strips. After the rough-cut layers were glued together, the imperfections were rasped and sanded out. Since the layers of wood give a consistent width to the recess for the LEDs, it was easy to cut a long strip of acrylic that would match. Saw cutting acrylic can be dicey because it can crack or melt, but a table saw with a crosscut blade did the trick. Forming the acrylic to match the curves of the wood was a matter of gentle heating and easing the softened acrylic into place bit by bit.

Giving the clear acrylic a frosted finish was done with a few coats of satin finish clear coat from a spray can, which is a technique we haven’t really seen before. Handy, because it provides a smooth and unbroken coating along the entire length of the acrylic. This worked well and is a clever idea, but [Marija] could still see the LEDs and wires inside the lamp, so she covered them with some white tape. A video of the entire process is embedded below.

Continue reading “Curved Wood LED Lamp Needs No Fancy Tools”

Home Made Tumbler Diffuses Clear LEDs

What happens when you have a large stash of clear LED’s but you want or need diffused models for a project? You could go buy some more, but [Tyler] says no! Go grab some scrap from the shop, and make yourself a sand tumbler to diffuse the LED’s you already have.

The tumbler mechanism is similar to a rock tumbler, but is crafted out of bits of wood, some rods, a spaghetti sauce jar, and a DC motor which is available out of the types of machines we already tear apart. Once constructed, fine dry sand and the LED’s are loaded in the jar and is set to tumble for several hours.

Once done its easy to fish out the now diffused LED’s, which have a more even glow over their clear counterparts which shoot most of the light directly out of the end. Although it takes time, its a lot easier than trying to manually diffuse LED’s by hand, and if you need more than just a few its a massive labor saver.

Join us after the break for a quick video showing the results of different attempts during the learning process.

Continue reading “Home Made Tumbler Diffuses Clear LEDs”