Kinematic Mount For 3D Printer Bed Shows Practical Design

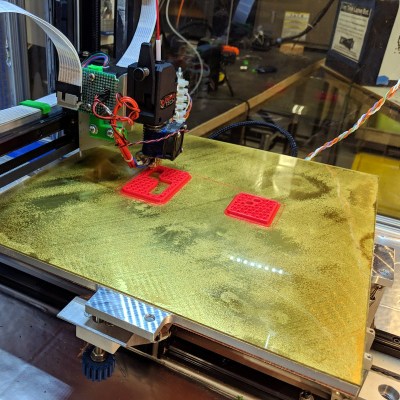
Aluminum bed with new kinematic mount and base on printer Son of Megamax, at the Milwaukee Makerspace

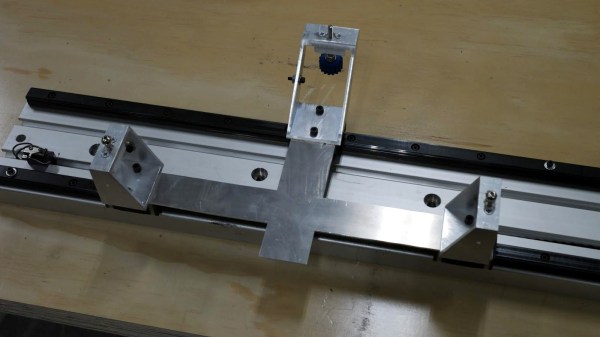
[Mark Rehorst] has been busy designing and building 3D printers, and Son of Megamax — one of his earlier builds — needed a bed heater replacement. He took the opportunity to add a Kelvin-type kinematic mount as well. The kinematic mount and base efficiently constrain the bed in a controlled way while allowing for thermal expansion, providing a stable platform that also allows for removal and repeatable re-positioning.

After a short discussion regarding the heater replacement, [Mark] explains the design and manufacture of his kinematic mount. Of particular note are the practical considerations of the design; [Mark] aimed to use square aluminum tubing as much as possible, with machining requirements that were easily done with the equipment he had available. Time is a resource after all, and design decisions that help one get something working quickly have a value all their own.

If you’re still a bit foggy on kinematic mounts and how they work, you’re not alone. Check out our coverage of this 3D-printed kinematic camera mount which should make the concept a bit clearer.

Play Chess Like Harry Potter

If you are a Harry Potter fan, you might remember that one of the movies showed an Isle of Lewis chess set whose pieces moved in response to a player’s voice commands. This feat has been oft replicated by hackers and [amoyag00] has a version that brings together a Raspberry Pi, Arduino, Android, and the Stockfish chess engine in case you want to play by yourself. You can see a video of the game, below.

Interestingly, the system uses Marlin — the 3D printing software — to handle motion using the Arduino. We suppose moving chess pieces over a path isn’t much different than moving a print head. It is certainly a novel use of GCode.

Continue reading “Play Chess Like Harry Potter”

Power Supply Design For Clean Jazz Amps

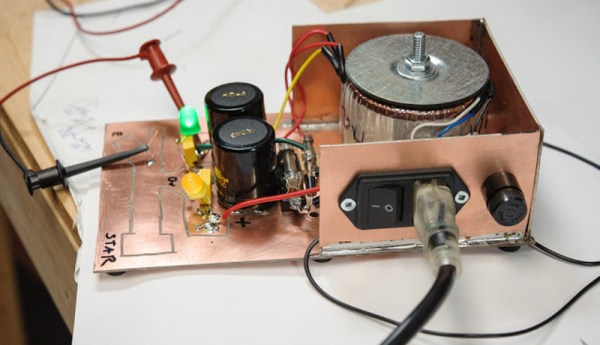
Power supply design is a broad field, requiring entirely different tools and techniques depending on what you’re working with. Creating a low-cost and compact mobile phone charger is a completely different ball game to designing the power supply for a medium-sized laser cutter, for example. [Vasily Ivanenko] has been designing a power supply for a clean jazz guitar amplifier, and has helpfully documented the process.

For a guitar amplifier which prides itself on clean tones, it’s highly important to avoid all sources of noise, to let the natural sound of the guitar come through as clearly as possible. [Vasily] notes that this requires careful component selection, as well as consideration of the placement of key parts and the construction of the power supply. Strategies to minimise inductive and capacitive coupling are discussed, as well as grounding schemes to minimise undesirable hum or buzz during amplifier operation.

The article is the first of a three part series, in which [Vasily] will then cover the full design of the guitar amp, including a focus on the design of the power amplifier stage. We’ve seen some of [Vasily]’s work before, like this discussion of how to build high quality audio amplifiers for ham radio use. 

3D Printed Diffusers Make More Natural Light

A strip of LEDs may be a simple and flexible way to add light to a project, but they don’t always look natural.  There is an easy way to make them look better, though: add a diffuser. That’s what [Nate Damen] did using a 3D printer. He created a diffuser using PETG giving a standard string of LEDs a softer and more natural look that makes them look more like older light sources such as fluorescent strips or EL wire, but with the flexible colors of LEDs. The PETG material he used has a naturally somewhat cloudy look, so it acts as a diffuser without needing any extra treatment.

Continue reading “3D Printed Diffusers Make More Natural Light”

Test PCBs On A Bed Of Nails

While it might be tempting to start soldering a circuit together once the design looks good on paper, experience tells us that it’s still good to test it out on a breadboard first to make sure everything works properly. That might be where the process ends for one-off projects, but for large production runs you’re going to need to test all the PCBs after they’re built, too. While you would use a breadboard for prototyping, the platform you’re going to need for quality control is called a “bed of nails“.

This project comes to us by way of [Thom] who has been doing a large production run of circuits meant to drive nixie tubes. After the each board is completed, they are laid on top of a number of pins arranged to mate to various points on the PCB. Without needing to use alligator clamps or anything else labor-intensive to test, this simple jig with all the test points built-in means that each board can be laid on the bed and tested to ensure it works properly. The test bed looks like a bed of nails as well, hence the name.

There are other ways of testing PCBs after production, too, but if your board doesn’t involve any type of processing they might be hard to implement. Nixie tubes are mostly in the “analog” realm so this test setup works well for [Thom]’s needs.

A Trove Of Cosplay Prop Making Tutorials And Blueprints

[CutTransformGlue] recently posted a build video for “Making Rey’s Star Wars Blaster“, embedded after the break. The construction uses layered MDF sheets to build up the blaster, and it’s a treat to see it taking shape, ending with an amazing paint job. It’s a good way to learn about the techniques used to bring such props to life and help you hone your skills. But digging deeper led us down an awesome rabbit hole.

[CutTransformGlue] got plans for Rey’s Blaster from the Punished Props Academy – a prop and costume making team from Seattle committed to “transforming passionate fans into confident, skillful makers”. These folks have built a wide variety of projects ranging from guns, weapons, costumes, props and more, and are obviously extremely skilled at what they do. But they aren’t keeping those skills to themselves and in a series of posts and videos they are sharing with us such varied skills as Foamsmithing (gotta love that coinage), Molding, Casting, Painting, 3D printing, Vacuum Forming and electronics. If you’d like more information about supplies, check out the Tools and Materials section. And if all of this has given you the itch to build a Skyrim Wuuthrad or a Halo4 Sniper Rifle, head over to the amazing Free Blueprints section for a treasure chest full of downloads.

Like we said earlier, if building such stuff is your thing, it’s a rabbit hole from which you’ll find it extremely difficult to extract yourself. Have fun.

Continue reading “A Trove Of Cosplay Prop Making Tutorials And Blueprints”

Simple Hand Tools Turn Brass And Steel Into An Amazing Astrolabe

There’s something enchanting about ancient tools and instruments. The idea that our forebears were able to fashion precision mechanisms with nothing but the simplest hand tools is fascinating. And watching someone recreate the feat, such as by building an astrolabe by hand, can be very appealing too.

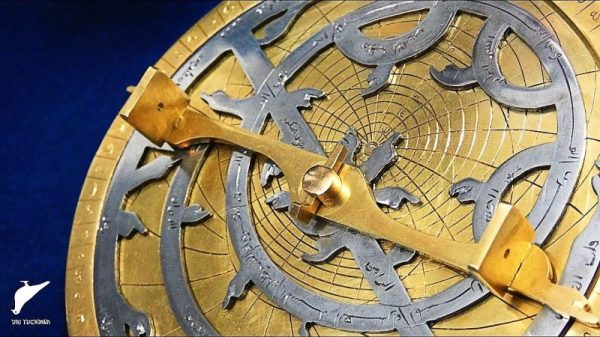
The astrolabe is an ancient astronomical tool of incredible versatility, allowing the user to do everything from calculating when the sun will rise to predicting the positions of dozens of stars in the night sky. That it accomplishes all this with only a few moving parts makes it all the more fascinating. [Uri Tuchman] began the astrolabe build shown in the video below with only a few hand tools. He quickly had his fill of the manual fretsaw work, though, and whipped up a simple scroll saw powered by an old sewing machine foot treadle to speed up his work. The real treat though is the hand engraving, a skill that [Uri] has clearly mastered. We couldn’t help musing that a CNC router could do the same thing so much more quickly, but watching [Uri] do it was so much more satisfying. Everything about the build really makes a statement, from the contrasting brass and steel parts to the choice of complex Arabic script for the markings. [Uri] has another video that goes over astrolabe basics and his design process that’s well worth watching too.

While it’s nowhere near as complicated an instrument, this astrolabe puts us in the mood to watch the entire Clickspring clock build again. And [Chris] is working on his own ancient instrument build at the moment, recreating the Antikythera mechanism. We can’t wait to binge-watch that one too.

Continue reading “Simple Hand Tools Turn Brass And Steel Into An Amazing Astrolabe”