Hacking Together A Color Changing Water Wall

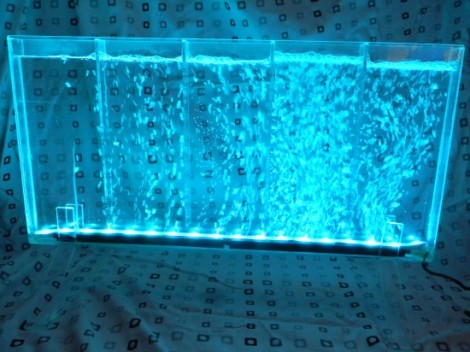
[BadWolf’s] girlfriend wanted him to build her a lamp for Christmas and he didn’t disappoint. What he came up with is a water-filled color changing lamp with bubbles for added interest. See for yourself in the clip after the jump.

The color changing properties are easily taken care of by some waterproof RGB LED strips. [BadWolf] went the Arduino route for this project but any microcontroller will be able to fill the role of color cycling. The enclosure is all hand-made from acrylic sheets. He grabbed some chemical welding liquid from the hardware store and applied it to the acrylic with a syringe. That’s easy enough when attaching the edges to one side of the enclosure. But it gets much tougher when it’s time to seal up the other side. He recorded a video of this which shows the syringe taped to a rod so he can get it down in there, pushing the plunger with a second extension device.

Bubbles are supplied by a small aquarium pump. We’re wondering if this will need frequent cleaning or if you can get some pool chemicals to keeps it nice and clear (or just a teaspoon of bleach)? Continue reading “Hacking Together A Color Changing Water Wall”

Let There Be Light Inside Your Epilog Laser Cutter

[Bradley Gawthrop’s] biggest gripe about his laser cutter is the lack of Mac support. We don’t think we’d have any gripes if we owned one of these (yeah, that’s a lie…) but we can understand his second biggest issue which is the inability to see the work piece once it’s inside the machine. He figured out a very easy way to light the area as the cutter gets to work.

It occured to him that the optical head is always directly above the part of the work piece he was interested in seeing. He had been using a flashlight to shed some light, but what if he just added lighting to that head? The circuit is certainly nothing hard; some LEDs, resistors and a power source will do the trick. But routing the power is where things get more difficult. You need flexible wiring strung just right so as not to restrict motion on the X/Y axes. Most of his time was spent routing some 14 gauge stranded speaker wire for this task. He added his own 5V DC supply to power the adhesive LED strip which enjoys a resting place on the bottom rail of the head unit. Boom, problem solved.

Video Display From RGB Strips Makes It Seem So Easy

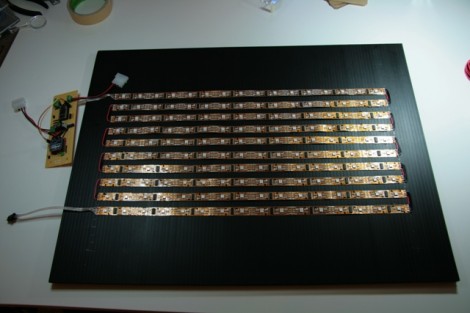
[Fabien] wrote in to share a link to this RGB video display which he made. He’s got some pretty cool routines that make it more functional than you would think, but first we want to comment on the construction. He used an RGB strip, which makes this look like an incredibly simple build. The strip has a data and power bus running the length of it. You can it into smaller segments, then just solder jumper wires to reconnect the buses. That’s exactly what he did here, making it what must be the fastest method of putting together a display of this size (16×10 pixels).

It’s driven by a Netduino which easily addresses the LPD8806 drivers responsible for the LEDs. It gets input from a computer via Xbee, making it easy to include data from the net, or to push visualizations. The video after the break shows a [Van Gogh] self-portrait. Since 160 pixel resolution wouldn’t do it justice, the visualization software shows a zoomed in portion of the painting which is constantly panning to let you see the entire work. It’s a fabulous effect.

Continue reading “Video Display From RGB Strips Makes It Seem So Easy”

LED Strip And UC Add Some Flash To Your Tail Lights

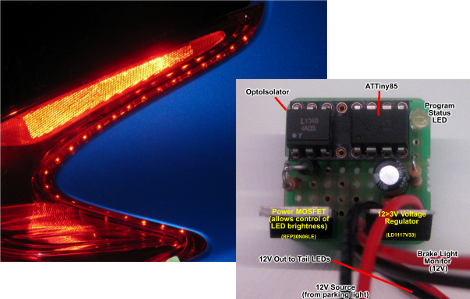
[Dave] spiced up his new 2012 Nissan Juke with a little tail-light amendment. You can see that outlining the rim of the light enclosure is a series of dots. This is an LED strip that he added to augment the brake lights. It’s glued in place, and features side emitting LEDs so that the light will be focused behind the car.

To control the strip he’s using an ATtiny85 microcontroller. It’s the chip on the right, and an optoisolator next to it protects it from the 12V vehicle power which drives the strip (via a MOSFET), and acts as a trigger when the brake pedal is pressed. He wrote a few effects into the firmware. When the lights are turned on, the strip fades up to 75% over about eight seconds. When the brake pedal is pressed they go to 100%. Check out the video after the break (it seems a little weird to us, as the video runs 18 seconds but the audio keeps going… YMMV).

We’ve seen a couple of tail light concepts that flash the brake lights when you stomp on the pedal. Unfortunately the Juke (and all other cars as far as we know) don’t have functionality built-in to sense when you’ve really given the brake a sudden jolt. It makes us wonder if this info could be gleaned from the CANbus? Continue reading “LED Strip And UC Add Some Flash To Your Tail Lights”

Hone Your Skills By Building Control Modules

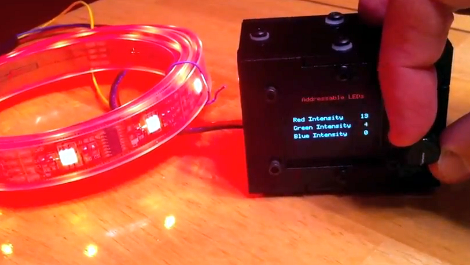
If you ask us, there’s no substitute for learning by doing. But often the hardest part of acquiring new skills is coming up with the idea for a project that utilizes them. [Mike Rankin] wanted to develop a project using laser cut acrylic, and settled on building a control box for an RGB LED strip. He got some practice modeling objects in SolidWorks and seeing the process through to the final build. But it also let him explore an area of microcontroller programming in which he had little experience.

The LED strip he’s using depends on the HL1606. This is an SPI addressable chip that we see popping up in a lot of projects these days. It’s pretty simple to send red, green, and blue values through the data bus, and it allowed [Mike] to try his hand at programming menus and sub-menus. The controller takes input from a clickable rotary encoder. The settings are displayed on an OLED screen, with all the hardware nestled comfortably in his custom-cut enclosure.

Don’t miss the demo video embedded after the break.

Continue reading “Hone Your Skills By Building Control Modules”