Make Multi-Material Resin Prints With A Syringe (And A Bit Of Patience)

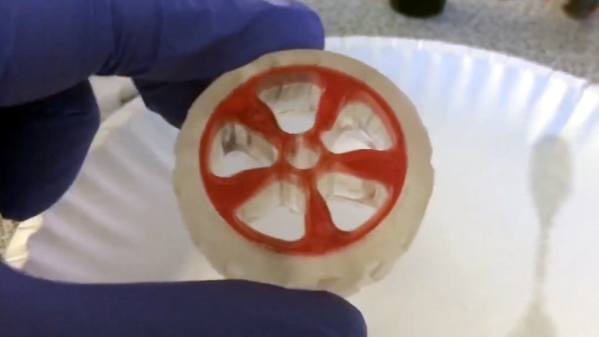
Resin printing is a fantastic way to create parts, but multi-material printing isn’t really a possibility with resin. That is, unless you use [Cameron Coward]’s method for creating multi-material resin prints.

[Cameron]’s idea relies on the fact that handling and curing UV resin can easily be done outside of the printer itself. First, one prints what we’ll call the primary object. This object has empty spaces representing the secondary object. Once the primary object is printed and finished, these voids are carefully filled with a different resin, then cured with UV light. The end result is a single multi-material object that is, effectively, made from two different resins.

Continue reading “Make Multi-Material Resin Prints With A Syringe (And A Bit Of Patience)”

Prusa XL Goes Big, But That’s Only Half The Story

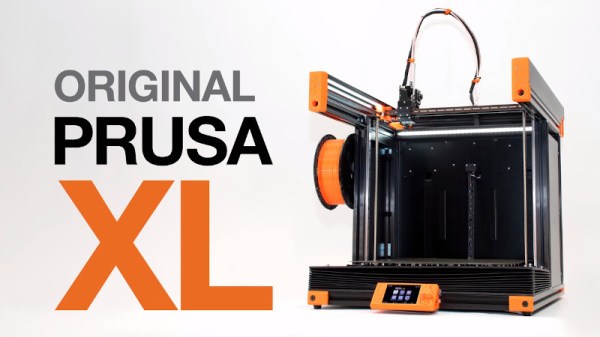
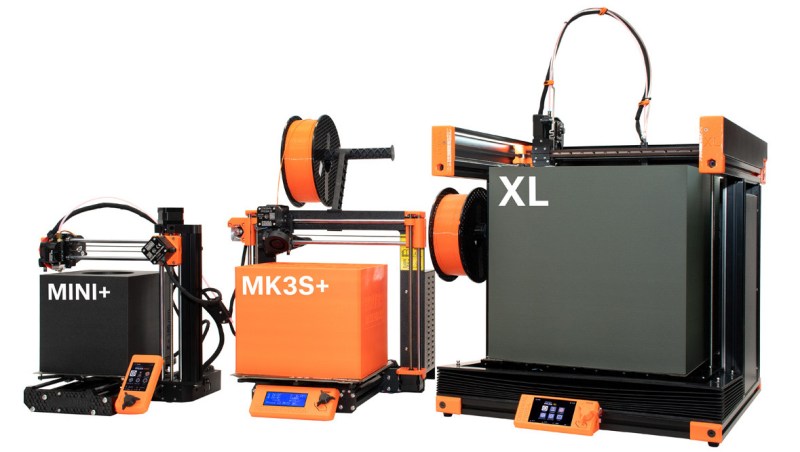
For a few years now it’s been an open secret that Prusa Research was working on a larger printer named, imaginatively enough, the Prusa XL. Positioned at the opposite end of their product spectrum from the wildly popular Prusa Mini, this upper-tier machine would be for serious hobbyists or small companies that need to print single-part objects that were too large for their flagship i3 MK3S+ printer. Unfortunately, the global COVID-19 pandemic made it difficult for the Czech company to focus on bringing a new product to market, to the point that some had begun to wonder if we’d ever see this mythical machine.

But now, finally, the wait is over. Or perhaps, it’s just beginning. That’s because while Prusa Research has officially announced their new XL model and opened preorders for the $1,999+ USD printer, it’s not expected to ship until at least the second quarter of 2022. That’s already a pretty substantial lead time, but given Prusa’s track record when it comes to product launches, we wouldn’t be surprised if early adopters don’t start seeing their machines until this time next year.

So what do you get for your money? Well, not an over-sized Prusa i3, that’s for sure. While many had speculated the XL would simply be a larger version of the company’s popular open source printer with a few modern niceties like a 32-bit control board sprinkled in, the reality is something else entirely. While the high purchase price and ponderous dimensions of the new machine might make it a tough sell for many in the hacker and maker communities, there’s little question that the technical improvements and innovations built into the Prusa XL provide a glimpse of the future for the desktop 3D printer market as a whole.

Continue reading “Prusa XL Goes Big, But That’s Only Half The Story”

Enraged Rabbit Project Is A Filament Cocktail Special

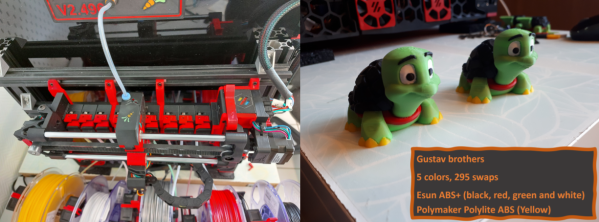
As long as 3D printers have been around, it seems as though many of us have dreamed about nozzle-sharing solutions for multicolor 3D prints. Just because Prusa’s MMU has had the spotlight for some time doesn’t mean that there’s no space to design something original. If you’re craving something new to feast your eyes upon, look no further than the EnragedRabbitProject by [EtteGit]. Built for Voron 3D printers, it’s a scalable filament changing solution designed from the ground up that expands to accommodate up to 9 filaments.

EnragedRabbitProject is broken into four main components. First comes the Enraged Rabbit Carrot Feeder (ERCF), the system that handles filament selection, retraction, and loading. Next, comes the Carrot Patch (ERCP), a spool holder/buffer combo that’s needed per spool. For those unfamiliar with filament changers, unspooling filament is easy, but rewinding it back onto the spool is hard. And since the nozzle will retract a significant length of filament when it switches between filaments, it’s important to manage all this extra loose filament to prevent tangles. A filament buffer is the solution; it’s a clever mechanical addition to the spool holder that will manage the extra filament that gets unwound during these filament changes. Beyond these two systems is the King’s Seat (ERKS) a Voron-2 setup that purges extra filament into beads instead of purge blocks, and finally, the filament sensor, which detects filament presence for filament changes.

It’s sometimes hard to appreciate the reliability of these sorts of CNC systems. On that note, keep in mind that the prints on the project’s landing page are the results of hundreds if not thousands of filament swaps — truly an astonishing feat. Beyond reliability is the project’s presentation. [EtteGit] has kindly posted STEP and STL files for all mechanical components, the Klipper configuration files, and a bill-of-materials that will scale according to the number of filaments you’re installing.

We’re thrilled to see folks continue to innovate on the concept of what it means to be a multi-color or multi-material 3D printer. For other takes on multi-filament setups, have a look at [Paul Paukstelis’] microscope-inspired head changer, and [MihaiDesigns’] removable tool head concept.

Continue reading “Enraged Rabbit Project Is A Filament Cocktail Special”

Dial In Your Multi-Headed 3D Printer With 2020 Machine Vision

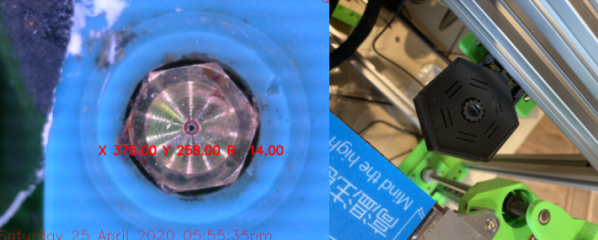
Most folks that have been poking around at multi-tool 3D printing know that lining up nozzles can be a gnarly, but necessary pain point. Existing methods either have us measure offsets with a vernier scale or with a series of pictures taken with an upwards-facing camera. And this step is not to be ignored! Any mismatch between nozzles, and your multicolor prints end up looking like Scotty really screwed up those sliders on that transporter beam console. Fear not, however! [Danal] took this problem as an opportunity to write something that’s completely automated and brought to you by some machine vision.

Dubbed TAMV, for Tool Align Machine Vision, [Danal] added a Raspberry Pi alongside his existing 3D printing motion controller in addition to an upwards facing camera. A few lines of code (and a few hours of compiling OpenCV) later, and he had himself a circle-detecting script that automatically cycles through each tool, detects the nozzle center, and calculates an offset for each tool that’s stored into the machine’s configuration file. If that’s not nifty enough, he’s made the entire setup open-source, and he included both an installation script for compiling OpenCV and a well-written set of step-by-step instructions.

In a world where most hobbyists approaches still solve this problem manually, this is leaps and bounds ahead of what we know, and it’s a great application of machine vision built on top of a stack of recognizable hardware and software. While this project was outfitted for a Jubilee running a Duet3 controller with a Raspberry Pi connected in “single-board computer” mode, the core features are readily adaptable to any other multi-tool machine with a similar control board stack. And for folks willing to poke under the hood, the project could even be extended to a standalone script that you can run on your PC locally to simply print the tool offsets separately.

Alongside TAMV, it’s refreshing that even a decade after 3D printers have been with us, we’re still finding ways to make these machines more capable. For more fresh hacks in this category, check out a new spin on using sharpie ink as a support material release agent.

Sadly, [Danal] has recently passed away in the last week, but we are grateful to capture a snapshot in the history of this person’s life.

Continue reading “Dial In Your Multi-Headed 3D Printer With 2020 Machine Vision”

Lithophanes Ditch The Monochrome With A Color Layer

3D printed lithophanes are great, if a bit monochromatic. [Thomas Brooks] (with help from [Jason Preuss]) changed all that with a tool for creating color lithophanes but there’s a catch: you’ll need a printer capable of creating multi-color prints to do it.

A video (embedded below) begins with an intro but walks through the entire process starting around the 1:26 mark. The lithophane is printed as a single piece and looks like most other 3D printed lithophanes from the front, but the back is different. The back (which is the bottom printed layer) is made of up multiple STL files, one for each color, and together creates something that acts as a color filter. When lit from behind, light passes through everything and results in an image that pops with color in ways that lithophanes normally do not.

The demo print was created with a printer equipped with a Palette 2, an aftermarket device that splices together filament from different spools to create multicolored prints, but we think a Prusa printer with an MMU (multi material upgrade) should also do the trick.

[Thomas] already has a lot of ideas on how to improve the process, but these early results are promising. Need a gift? Lithophanes plus LED strips make great lamps, and adding a cheap clock movement adds that little extra something.

Continue reading “Lithophanes Ditch The Monochrome With A Color Layer”