![]()
[Michael] just missed the deadline for the Trinket Contest but we still think his tablet is pretty cool. He says it predates the iPad and uses a custom aluminum case, a SoC he ripped from a Gecko Edubook, powered by eight NiMH batteries. Check out the front, the guts, and the sides.
Speaking of portable power sources, After doing a teardown of a 12V 6800 mAh Li-Po battery [Howard] strapped some prototyping equipment to either side of it and now he’s got a prototyping power supply that’s easy to take with him.
Blinky goodness doesn’t have to look hacked together (even if it is). This Raspberry Pi logo looks like a professional sign! It was cut from foam and plastic, primed and painted, then stuffed with addressable LED strips.
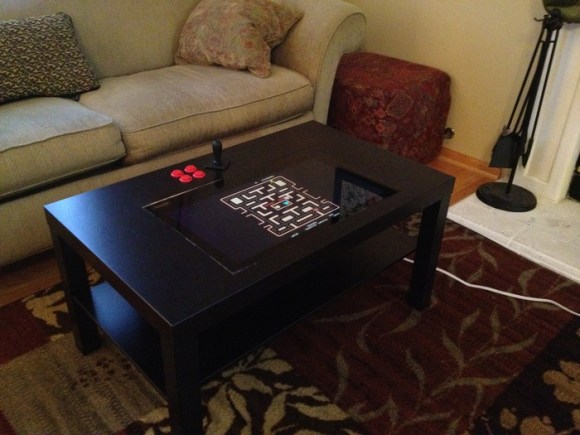
While we’re on the topic of refined RPi projects, check out this Raspberry Pi MAME cabinet. It’s a bit bigger than the Galaga cabinet we saw recently but still small enough to keep around the house without getting in the way.
If you’re a fan of automotive hacks you should check out this effort to build an Electronic Diesel Control.
We’ve been saving the gnarliest link for last. [Matthew] laments that his missed Halloween to show off this project. But we don’t think an almost-entirely wooden spider-like walker needs to be paired with a holiday. It’s very cool and somewhat operational, but still needs help working out all of the kinks. Our favorite moment in the video is when [Matthew] exclaims “It wants to live!”.