Pleasing Results From A CNC Mill Project

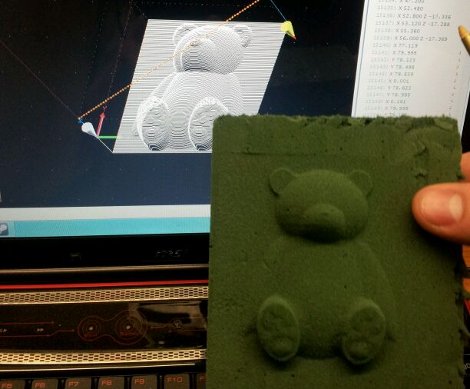
[Roy] is getting to the end of his second CNC mill project and finally seeing some results. Here you can see a bear he milled in some floural foam.

The project started out as an Arduino-based pen plotter. It move the pen along one axis, and the drawing surface along another, with the third axis allowing the pen to be lifted and repositioned. With that in his back pocket he went all out and began what he calls the Mark II. He used T-slot aluminum for the frame, which really helped when it came to aligning the linear rod supports for each axis. After a lot of drilling, and tapping he managed to bring each axis on line one at a time. A pre-fab CNC driver kit drives the stepper motors, making them groan as they do their work. hear it for yourself in the test video after the break were the machine is first tested as a pen plotter.

Continue reading “Pleasing Results From A CNC Mill Project”

CNC Conversions With [Bob]

[Bob Berg] emailed in to request that we take a look at his website. We did, and we liked what we saw! [Bob] has done a couple CNC mill conversions and documented the process quite thoroughly.

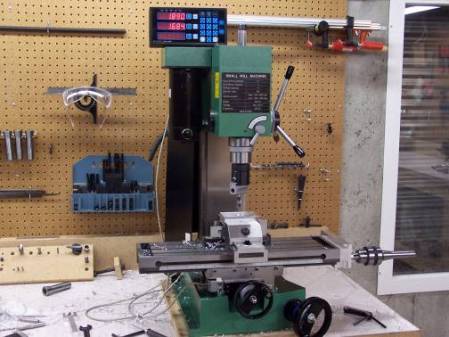
The first one listed on his site is a Sieg x-3, seen above. [Bob] explains that the first thing he did when he received it was tore it apart and  cleaned it meticulously. We’re not sure if [Bob] was being insanely neat, or if he bought a used dirty unit. Either way, you can’t argue that a nice clean machine is the way to start. After a short while using it the way it was, he added a digital read out for a little more accuracy. From there, he went for a fully motorized conversion.

Keep looking around his site. There is another full build (a lather master RF45) as well as some miscellaneous other projects that are quite interesting.

A Better Dust Skirt For Your CNC Mill

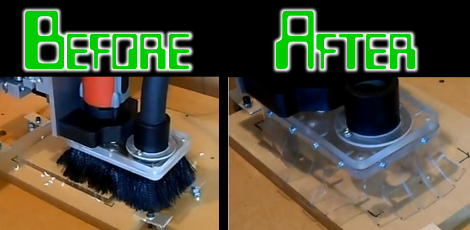
[Joshendy] wanted to get a better look at the cutting head on his CNC mill when it was running. The problem is that the rotating blades throw up a lot of junk which you don’t want flying around the shop so they’re usually surrounded with a shroud connected to a shopvac. He just milled is own transparent dust skirt to solve the problem.

The original dust skirt uses black bristle brushes to contain the waste from the cut. In addition to obscuring your view of the cutter this didn’t do a very good job of containing bits and pieces. The solution seen on the right uses clear, flexible PVC as the skirt. The video after the break details the build process. [Joshendy] cut out a replacement plate which is then fitted with magnets to connect to the cutter. The skirt is affixed to that plate with a series of screws, making it easy to replace if it ever wears out.

Continue reading “A Better Dust Skirt For Your CNC Mill”

Carabiner Helps You Hone Your Milling Skills

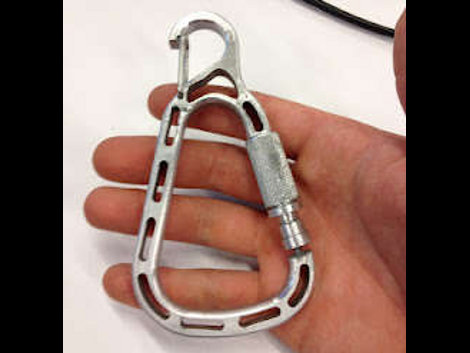
[Christian] is learning to use the metal milling tools at what we assume is his local Hackerspace. We love this about the communal spaces, they provide so many opportunities to delve into new fields. He embarked on a voyage that included visits to most of the machinery in the shop as he build his own carabiner with a magnetic gate. He’s not going to be hanging off the side of a mountain from it. But his keys or a water bottle will find a happy home thanks to the device.

It all started with some sketches to establish the shape of the overall design. From there he spent some time modelling the frame of the carabiner in CAD. He’s lucky enough to have access to a water jet which took the SolidWorks files and cut out the aluminum frame for him. That left a part with very sharp edges, so he used a wood router with a carbide bit to round them over.

The next part is adding the gate. He used an end-mill to add a mounting area on the frame. The locking ring for the gate was textured using a knurling tool, and the rest is milled with a simple cutting tool. This gate uses a magnet to center itself, with the knurled ring as the only mechanical latching mechanism. [Christian] does a good job of demonstrating the completed carabiner in the clip after the break.

Continue reading “Carabiner Helps You Hone Your Milling Skills”

Converting A Mill To CNC

For most of the past year, [Joel] has been working on converting a manual mill to a CNC mill with the addition of a computer, brackets and stepper motors. He’s put an amazing amount of effort into his project, and the result is awesome and much less expensive than buying and shipping an old Bridgeport mill.

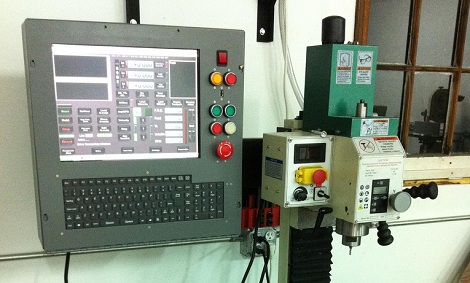
The project started with this mill from Grizzly. It’s a step above the small ‘hobby mills,’ but still very affordable at $1200 shipped to [Joel]’s driveway. The work began by fabricating an enclosure for the PC and motor drivers out of an electrical panel box. The controller box includes a touch screen, keyboard and computer running Mach3 CNC software. The computer connects to a breakout board with a trio of motor drivers providing power for the stepper motors on each axis.

After a few months (good things take time), [Joel] was ready to attach the stepper motors to the axes of the mill. He’s just put up a few videos of milling copper-clad board for PCBs and surface machining ABS, viewable after the break. For a total investment that is less than finding, buying, and repairing an old industrial mill, we’ll call [Joel]’s project a success.

Continue reading “Converting A Mill To CNC”

Simple Machining Process Repairs Broken Control Knob

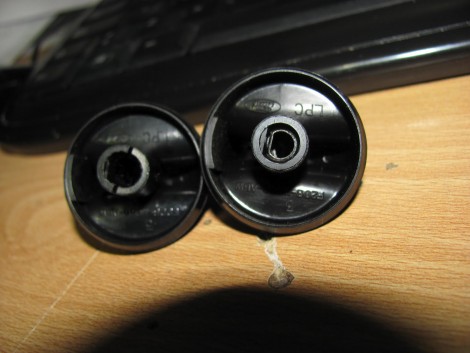
[Francisco] is helping his mother with a repair to the headlight knob on her Ford Ranger. Above you can see the broken knob on the left, and what it is supposed to look like on the right (taken from [Francisco’s] own vehicle for reference). We’ve encountered split shafts on plastic knobs before and decided it was not something that could be fixed. But he didn’t give up so easily. He mentions that you can purchase a replacement for a few bucks, but he has the means to repair the knob by machining a metal bushing.

The idea is that you mill a metal ring whose inner diameter matches what the outer diameter of the plastic shaft should be. By inserting the broken knob in the ring, the plastic is held tightly together as if it had never broken. In the video after the break [Francisco] uses a metal pencil body from his junk box and a mini-lathe to cut the bushing to length, and mill the inner diameter to his specifications.

He talks about the difficulty of getting replacement parts in Chile, where he lives. But we think this kind of thrift is a great example for all hackers. If you’ve got the tools why not use them? And if you don’t have them, here’s a great excuse to procure them!

Continue reading “Simple Machining Process Repairs Broken Control Knob”

NES Controller Uses Capacitive Touch Instead Of Buttons

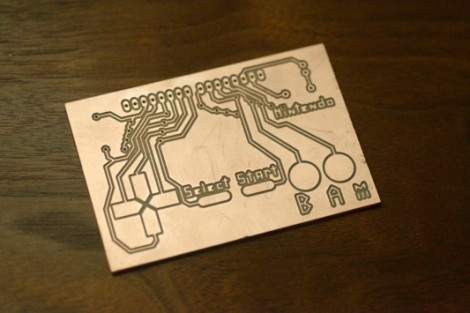
Here’s one way to really keep the component count low. [David] developed an NES controller that doesn’t use any buttons. The copper clad has been milled to provide a pad which registers a button push based on capacitance. The board has a SIL header at the top, making it easy to plug into the Arduino board that reads the inputs.

[David] had trouble getting the Arduino pin read functions to respond fast enough for he NES console’s expectations. He ended up using commands to access the ATmega’s peripherals directly in order to achieve the target timing. Speaking of, he did his own sniffing of the communication scheme using a logic analyzer. The results of that work, as well as the board files and code are available at the site linked above. And there’s a demo of the controller used to play Super Mario Bros. in the clip after the break.

This is actually a tangential project using a PCB mill which he’s developing through Kickstarter. This certainly shows that the mills works as designed.  Continue reading “NES Controller Uses Capacitive Touch Instead Of Buttons”